Drivedrive – Sony VPCF1 Series Hard Disk Drive (Replacement Instructions) User Manual
Page 2
VPCF1 Series Hard Disk Drive
Replacement Instructions
P/N 989201341
Rev. B
2/3
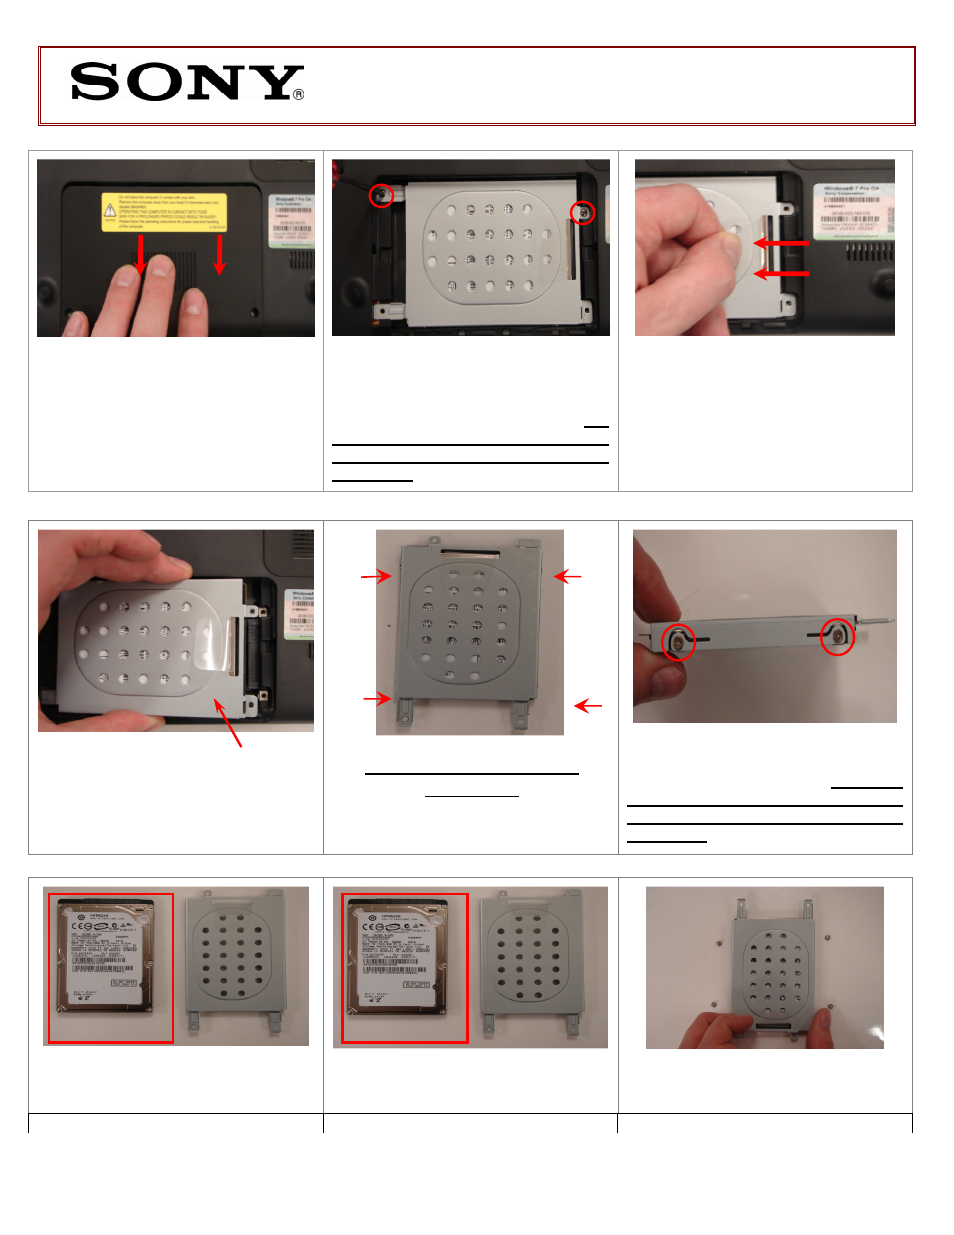
Step 4. Slide the Hard Drive Door away
from the unit, and lift to remove.
Step 5. Using the enclosed magnetic
screwdriver, remove the two (2) screws
securing the Hard Drive Assembly. Put
aside the Hard Drive Screws to re-
secure the Hard Drive later in the
procedure.
Step 6. Disconnect the Hard Drive by
pulling the clear plastic tab to the left.
Step 7. Carefully lift the Hard Drive
from the unit to remove.
Step 8. Identify the (4) side screws that
secure the bracket to the Hard Drive.
Step 9. Holding the edge of the Hard
Drive, remove each screw. Put aside
the Bracket Screws to secure the
Bracket to the Hard Dive later in the
procedure.
Step 12. Place the Hard Drive bracket
over the new Hard Drive.
Step 10. Set the old Hard Drive aside.
Step 11. Prepare the new Hard Drive
for assembly.
Hard Drive Disassembly
Steps 8-13
Lift To Remove
Old
Hard
Drive
DriveDrive
New Hard Drive