Sony VGN-BZ560 User Manual
Page 2
VGN-BZ Series Optical Disk Drive
Replacement Instructions
FOR TECHNICAL SUPPORT IN THE US CALL TOLL FREE 1-866-651-7669 FROM 9:00 AM TO 11:00 PM EST
P/N
994659200
Rev. A
2/2
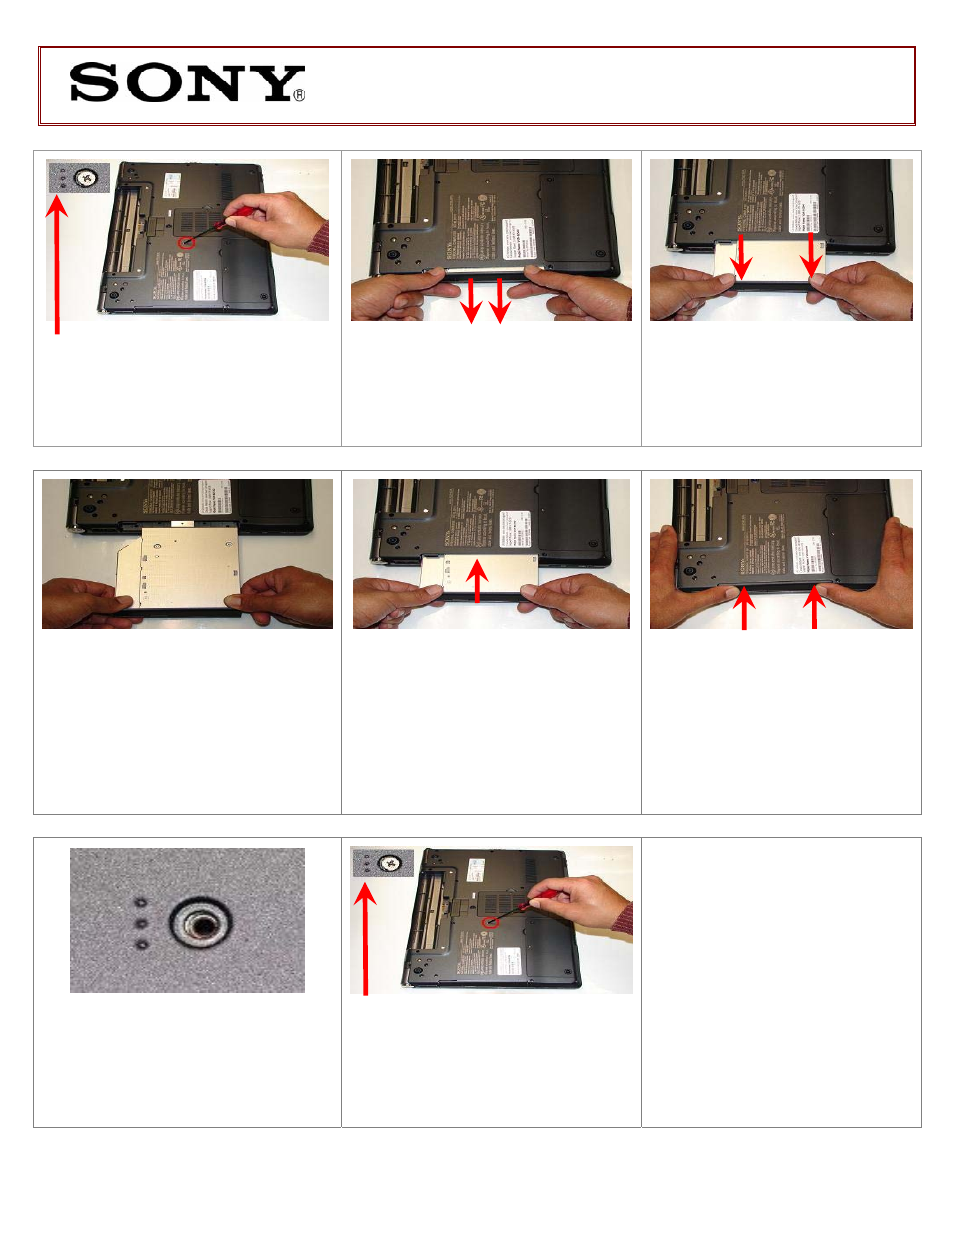
(Look for the screw hole with 3 dots)
Step 4. Using the enclosed magnetic
screwdriver, remove the one (1)
screw securing the optical drive.
Step 5. To initiate the removal of the
optical drive, slightly pull the optical
drive door as shown in the picture.
Step 6. With even force carefully
remove the optical drive by pulling
it away from the unit.
(ODD Reinstallation) Steps 7-11
Step 7. Install New Optical Drive.
Hold the new optical drive by the
edges and align it with the bay
opening.
Step 8. Carefully slide the optical
drive into the bay and back into
place.
Step 9. To ensure proper
assembly and connection, with
even force push the ODD back
into place.
(Optical drive should be sitting
flush with the edge of the
computer)
Step 10.
IMPORTANT! Make sure
the screw hole is aligned before
re-installing screw.
Step 11. Re-install the previously
removed screw.
Step 12. Re-install the battery
pack.
Return the old ODD Bay to Sony
following the included shipping
instructions.
- VGN-BZ579N04 VGN-BZ561 VGN-BZ579N03 VGN-BZ560P28 VGN-BZ570 VGN-BZ569P36 VGN-BZ560P22 VGN-BZ570N01 VGN-BZ569P47 VGN-BZ570NAB VGN-BZ569P VGN-BZ562N VGN-BZ569P44 VGN-BZ569P43 VGN-BZ569P46 VGN-BZ560P VGN-BZ570N VGN-BZ569P38 VGN-BZ569P40 VGN-BZ560P20 VGN-BZ560P30 VGN-BZ560P34 VGN-BZ569P26 VGN-BZ540N VGN-BZ570N02 VGN-BZ579N05 VGN-BZ562P VGN-BZ579TBB VGN-BZ563P VGN-BZ569P45