Aussie 8462 User Manual
Page 7
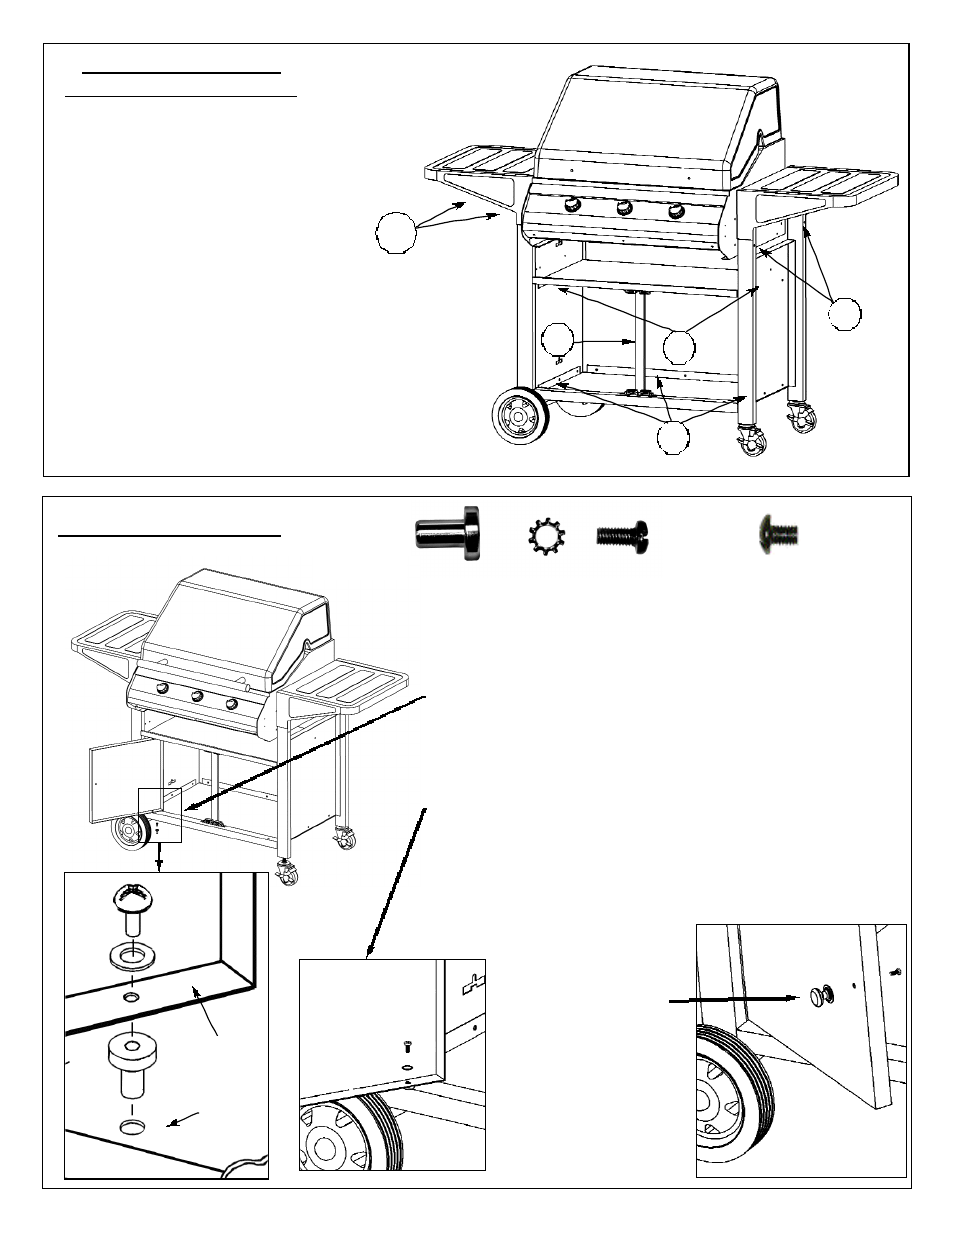
M5X10
Screw
Item#29
STEP 6 - INSTALL DOOR
1. Bottom Panel (Item#33) 9 Bolts & Nuts
2. Top Panel (Item#36) 7 Bolts & Nuts
3. Center Post (Item#31) 4 Bolts & Nuts
4. Body (Item#8) 8 Bolts & WingNuts
4
2
3
1
4
Note: Both doors are the same and can be
used in either the left or right position.
M4X6
Screw
Item#53
7
•Using a second person, turn full grill
assembly upright placing wheels and
legs/casters on the ground. Grill Body
should slide down and seat itself within
the slotted holes. If not, slightly loosen
the Body Bolts and push Body down
at the corners.
STEP 5 - BODY/ CART
ASSEMBLY (CONTINUED)
Tighten all Body Bolts and Wing
Nuts in the following sequence:
Bottom
Panel
•Align Door Knob(30)
with mounting hole in
Door. Insert M4X6
screw through Door
into Knob and tighten.
Repeat for other
Knob.
•Repeat with Right Door.
•While holding Pin in place move door into position
aligning screw hole in Door with screw hole in Pin.
Install M5X10 screw through Door and into Pin.
•Install left Door(27) by inserting Pin(28) through the
hole in left side of the Bottom Panel. Place Door into
position and install M5X10 screw through Door and
into Pin.
Door
Door Pin
Item#28
Item Qty.