American DJ Trance Wheel User Manual
Page 4
Trance Wheel™
Fuse & Lamp Replacement
Caution:
Always replace with the exact same type lamp and fuse,
unless otherwise specified by an authorized American DJ
®
technician.
Replace with anything other than the specified part can damage your
unit and will void your manufactures warranty.
Warning:
If after you have replaced the lamp or fuse and you
continue to blow either one, STOP using the unit. Contact customer
support for further instructions, you may have to return the unit for
servicing. Continuing to use the unit may cause serious damage.
Fuse Replacement:
Disconnect the unit’s main power supply. Insert
a standard flat head screw driver in to the fuse holder housing (located
on the rear of the unit). Turn the screwdriver in a counter-clockwise
direction to remove the fuse holder. Remove the old fuse and discard
it, replace the fuse with the same type. Insert the fuse holder back
into it’s housing and turn in clockwise direction to lock the holder in
place.
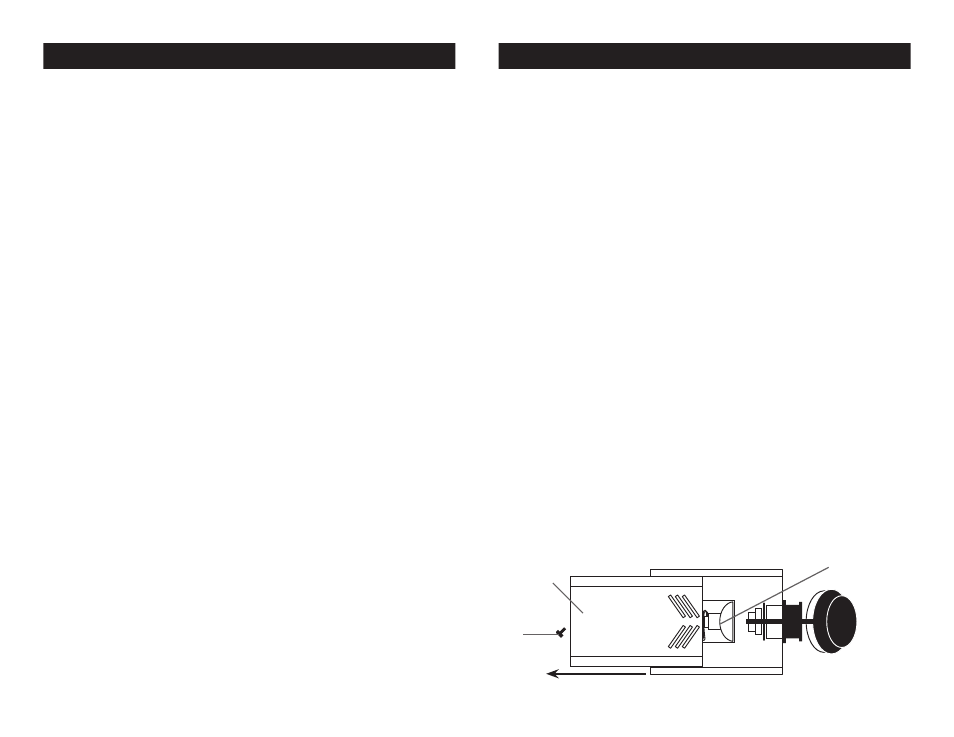
Lamp Replacement:
Caution! Never open the unit when in use.
Always disconnect the main power and allow the fixture ample time
to cool before attempting to replace the lamp. Lamp replacement has
been made simple by incorporating a split dome that is retained by
thumb screws. Again, please remember to always replace with the
exact same type lamp.
1. Be sure to follow the proper procedures when handling halogen
lamps. Never touch the new lamp with your bare fingers.
2. Unscrew the single thumb screw (7) located on the bottom of the
unit.
3. Once the thumb screw (7) has been remove, pull back the lamp
assembly cover plate (6) to expose the lamp (4).
4. Remove and replace the lamp with an exact match.
5. Reassemble in reverse order.
©
American DJ
®
- www.americandj.com - Trance Wheel™ Instruction Manual Page 8
Trance Wheel™
Operation
Power Supply:
Before plugging your unit in, be sure the source
voltage in your area matches the required voltage for your American
DJ
®
Trance Wheel™ before attempting operation.
General Operation:
Just plug this light in, and watch it go. This
fixture is designed to operate as a stand alone unit. It has been tested
and the lamp has been installed at the factory there is no assembly
necessary. The Trance Wheel™ is ready to be plugged in, out of the
box. There is no power switch, after plugging the unit the unit’s internal
beveled glass wheel will rotate continuously in a single direction, while
the outside color dish will rotate back and forth to the beat of music.
The unit will create multi-colored patterns that will simulate the rippling
effect of water. If there is no lamp output check the fuse and bulb. If
the fuse and bulb are good, please return the unit for servicing.
Operating Modes:
This unit comes with a 3-way multi-operating switch located on the
rear of the unit. The switch controls three (3) different operating
modes; Static, Sound Active, and Continuous Rotation.
Switch in the "I" position: Mode 1 - In this mode the internal oil wheel
and the external multi-mirror dish will spin continuously in clockwise
direction, regardless of the presence of sound.
Switch in the “0” position: Mode 2 - In this mode the internal oil wheel
will continuously rotate while the external multi-mirror dish will remain
static. In this mode the unit may be used as a projector.
Switch in the “II” position: Mode 3 - In the this mode the internal oil
wheel will continuously rotate in one direction while the outer multi-
mirror dish will react to sound. Please note that tapping on the unit, or
high pitched sounds may not trigger the unit, the unit is designed to
react to low frequencies (bass). Also note that the music sensitivity is
preset at the factory and may not be changed or adjusted.
Focusing:
The unit has a fully focusing lens. The lens is focused by manually
turning the lens in either a clockwise or counter-clockwise direction.
©
American DJ
®
- www.americandj.com - Trance Wheel™ Instruction Manual Page 7
6
7
4