Installing the switch in a rack mount – Allied Telesis AT-GS903SX User Manual
Page 20
Installation
10
Installing the Switch in a Rack Mount
Caution
Do not use power tools to perform this installation.
1.
Remove all cables and the power cord from the switch (if previously
attached).
Caution
Air vents must not be blocked and must have free access to the room
ambient air for cooling. ! 11
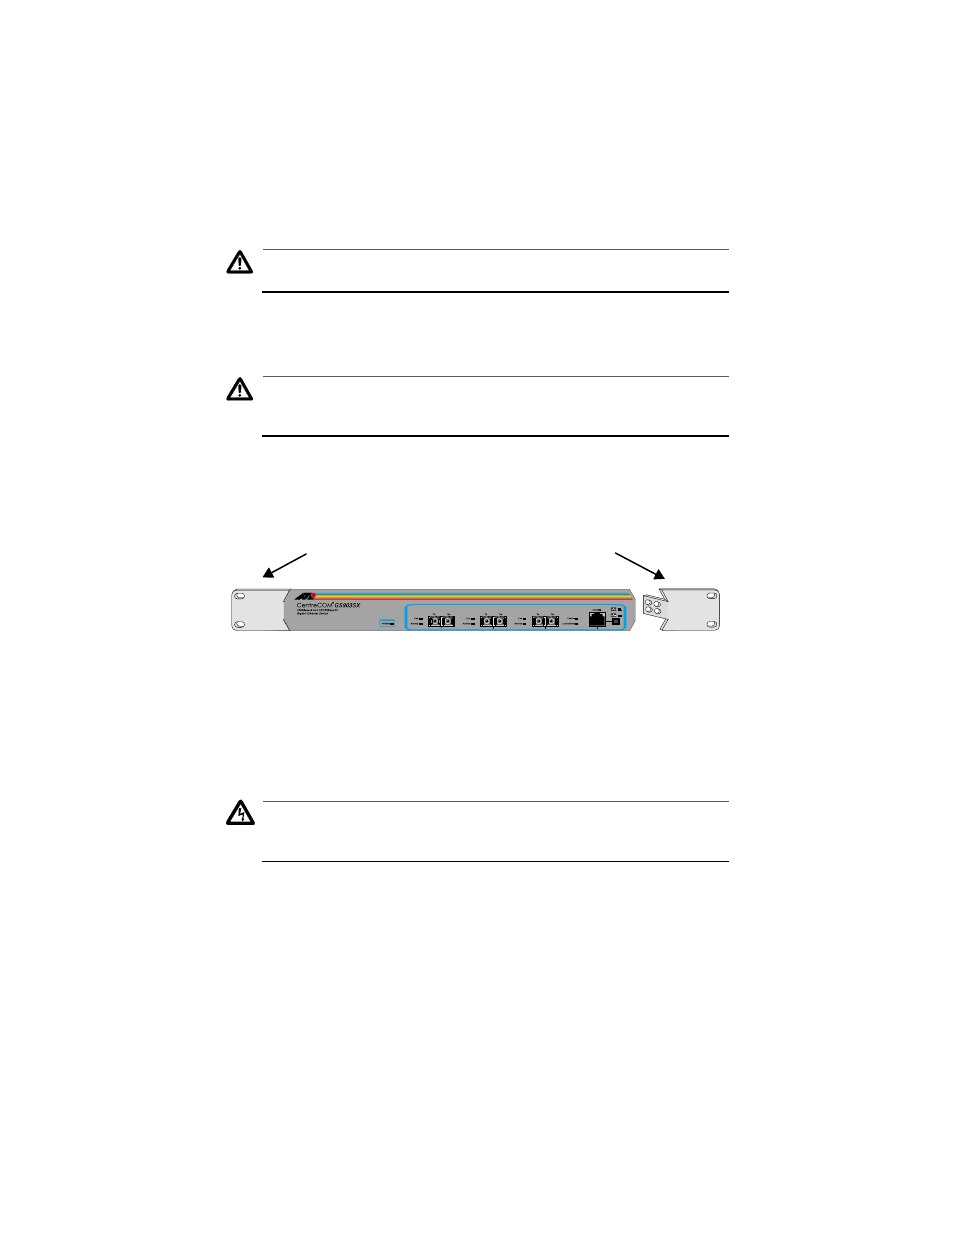
2.
Attach the rackmounting brackets to each side of the switch as shown
in Figure 4, using the eight flathead screws that came in the switch
package.
Figure 4 Attaching Rackmounting Brackets
3.
Mount the switch into the rack using four large pan-head screws and
nylon washers (provided).
4.
Ensure that there is unrestricted air flow around the switch.
Warning
The power cord is used as a disconnection device. To de-energize
equipment, disconnect the power cord. ! 8
5.
Apply power to the switch by plugging the power cord into the rear of
the unit and plugging the other end into a power outlet.
If the Power LED does not light green, refer to Chapter 3,
Troubleshooting, for further information.
Bracket
Bracket
- AT-GS908M (54 pages)
- AT-x230-10GP (80 pages)
- AT-GS950/10PS (386 pages)
- AT-GS950/48PS (64 pages)
- AT-GS950/16PS (386 pages)
- AT-GS950/48PS (386 pages)
- AT-9000 Series (1480 pages)
- AT-9000 Series (258 pages)
- IE200 Series (70 pages)
- AT-GS950/48 (410 pages)
- AT-GS950/8 (52 pages)
- AT-GS950/48 (378 pages)
- AT-GS950/48 (60 pages)
- SwitchBlade x8106 (322 pages)
- SwitchBlade x8112 (322 pages)
- SwitchBlade x8106 (240 pages)
- SwitchBlade x8112 (240 pages)
- AT-TQ Series (172 pages)
- AlliedWare Plus Operating System Version 5.4.4C (x310-26FT,x310-26FP,x310-50FT,x310-50FP) (2220 pages)
- FS970M Series (106 pages)
- 8100L Series (116 pages)
- 8100S Series (140 pages)
- x310 Series (120 pages)
- x310 Series (116 pages)
- AT-GS950/24 (404 pages)
- AT-GS950/24 (366 pages)
- AT-GS950/16 (44 pages)
- AT-GS950/16 (364 pages)
- AT-GS950/16 (404 pages)
- AT-GS950/8 (404 pages)
- AT-GS950/8 (364 pages)
- AT-GS950/8 (52 pages)
- AT-8100 Series (330 pages)
- AT-8100 Series (1962 pages)
- AT-FS970M Series (330 pages)
- AT-FS970M Series (1938 pages)
- SwitchBlade x3106 (288 pages)
- SwitchBlade x3112 (294 pages)
- SwitchBlade x3106 (260 pages)
- SwitchBlade x3112 (222 pages)
- AT-S95 CLI (AT-8000GS Series) (397 pages)
- AT-S94 CLI (AT-8000S Series) (402 pages)
- AT-IMC1000T/SFP (23 pages)
- AT-IMC1000TP/SFP (24 pages)
- AT-SBx3106WMB (44 pages)