3 turning the monitor on – Asus PW191 User Manual
Page 17
2 - 3
2 - 3
2 - 3
2 - 3
2 - 3
A S U S L C D M o n i t o r P W 1 9 1
A S U S L C D M o n i t o r P W 1 9 1
A S U S L C D M o n i t o r P W 1 9 1
A S U S L C D M o n i t o r P W 1 9 1
A S U S L C D M o n i t o r P W 1 9 1
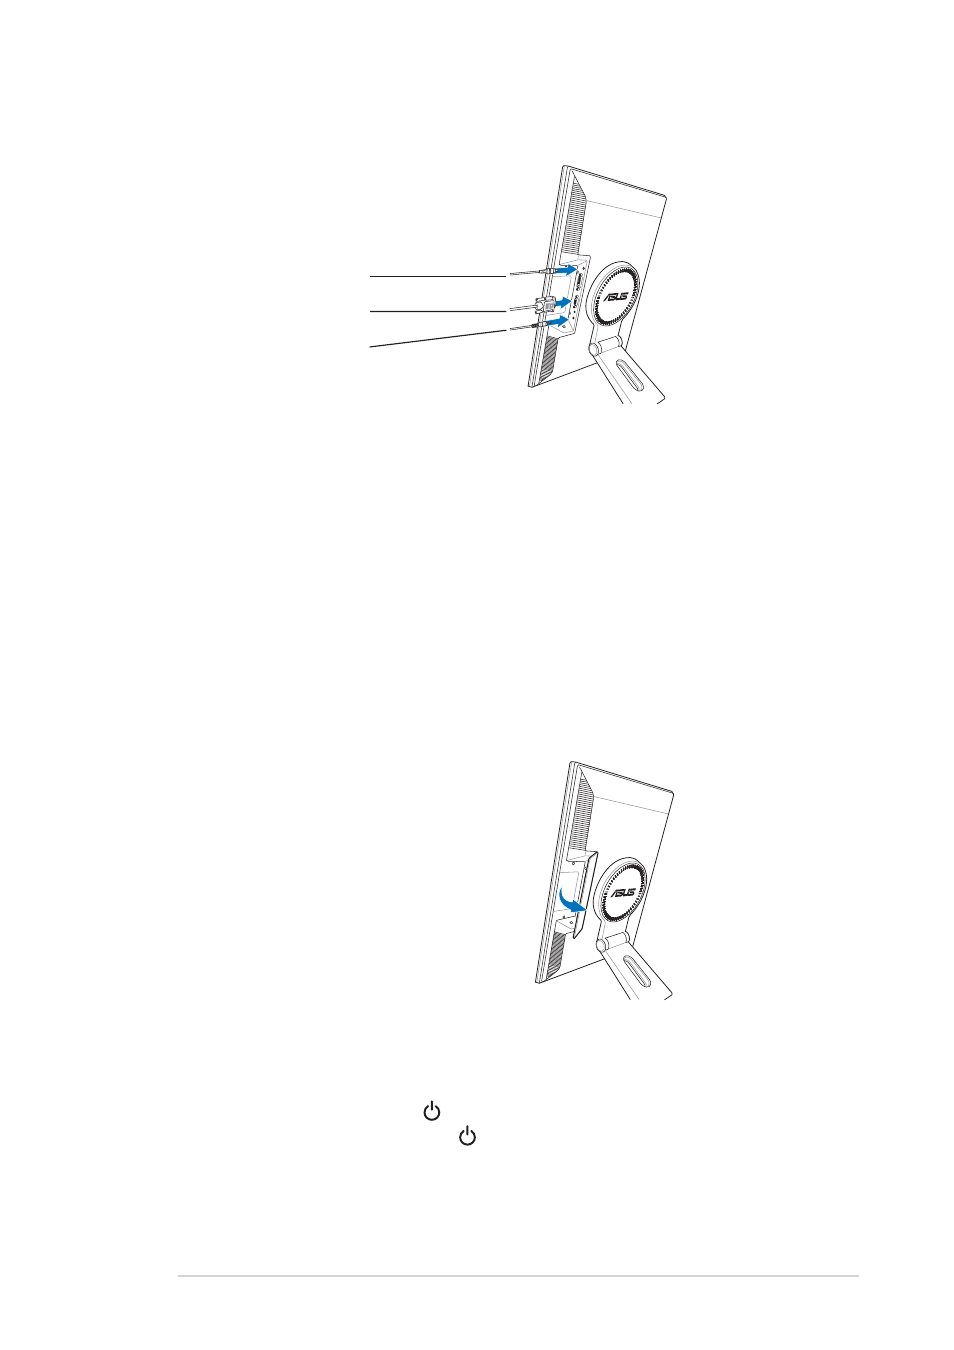
3.
Connect the cables as shown:
Power adapter
VGA cable
Audio cable
• To connect the audio cable:
To connect the audio cable:
To connect the audio cable:
To connect the audio cable:
To connect the audio cable: connect one end of the audio cable to
the monitor’s Audio-in port, and then connect the other end to the
computer multi-media (or audio) card’s audio output.
• To connect the power adapter:
To connect the power adapter:
To connect the power adapter:
To connect the power adapter:
To connect the power adapter: first, connect the adapter cord
securely to the monitor’s DC-in port. Then, connect the power plug to
the adapter port with the other end to a power outlet.
• To connect the VGA cable:
To connect the VGA cable:
To connect the VGA cable:
To connect the VGA cable:
To connect the VGA cable:
a.
Plug the VGA/DVI connector to the LCD monitor’s VGA/DVI port.
b. Connect the other end of the VGA/DVI cable to your computer’s
VGA/DVI port.
c.
Tighten the two screws to secure the VGA/DVI connector.
4.
Close the rear connector cover.
Align the cover to the three slots
near the ports and close the cover
carefully. A click indicates that the
cover has been closed successfully.
2.3
Turning the monitor on
Gently touch the power sensor . See page 1-4 for the location of the
power sensor. The power indicator lights up in blue to show that the
monitor is ON.