Wall installation instructions, Angle control holes – Samsung SPL4225DX-XAA User Manual
Page 8
15
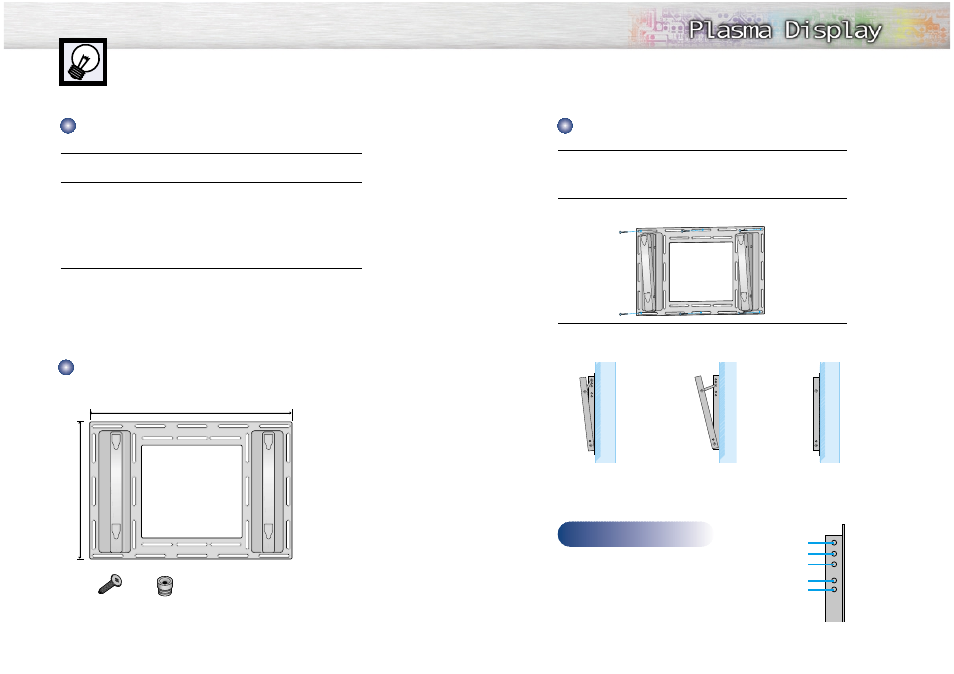
Wall Installation Instructions
14
1
See the drawing of the wall attachment panel shown in page 14 to check for
the stability of the wall where the PDP is to be installed. If the wall is not
enough strong to support the PDP, strengthen the wall before installation.
2
Fix the wall attachment panel on the wall using bolts as shown in the following
figure: Fixing bolts must protrude from the wall appox. 0.6 inches.
3
Using the wall attachment panel, you may adjust the angle of the display from
0 to 20 degrees. The angle can be set in 5 stages with 5 degrees of distance
each, using the angle control holes on the sides of the panel.
1
Do not install the PDP in any location other than vertical walls.
2
To protect the performance of the PDP and prevent problems, avoid the following
places:
• Do not install next to smoke and fire detectors.
• Do not install in an area subjected to vibration.
• Do not install in an area subjected to high voltage.
• Do not install near or around any heating apparatus.
3
Use only recommended parts and components.
Wall attachment panel
Insulation holder
bolt
Installation Notes
Parts
(
Wall attachment panel is sold separately. Check with your dealer
)
Installing the Display on the Wall Attachment Panel
When the angle
has been set to 5
degrees.
When the angle
has been set to
15 degrees.
When the panel
hasn't been tilted.
Angle control holes
5 degrees of tilt
10 degrees of tilt
15 degrees of tilt
20 degrees of tilt
No tilt
Continued...
34.61 inches
24.57 inches