3 hdm3d-c5sw-r – Avenview SW-HDM3D-C5-4X4 User Manual
Page 8
www.avenview.com
8
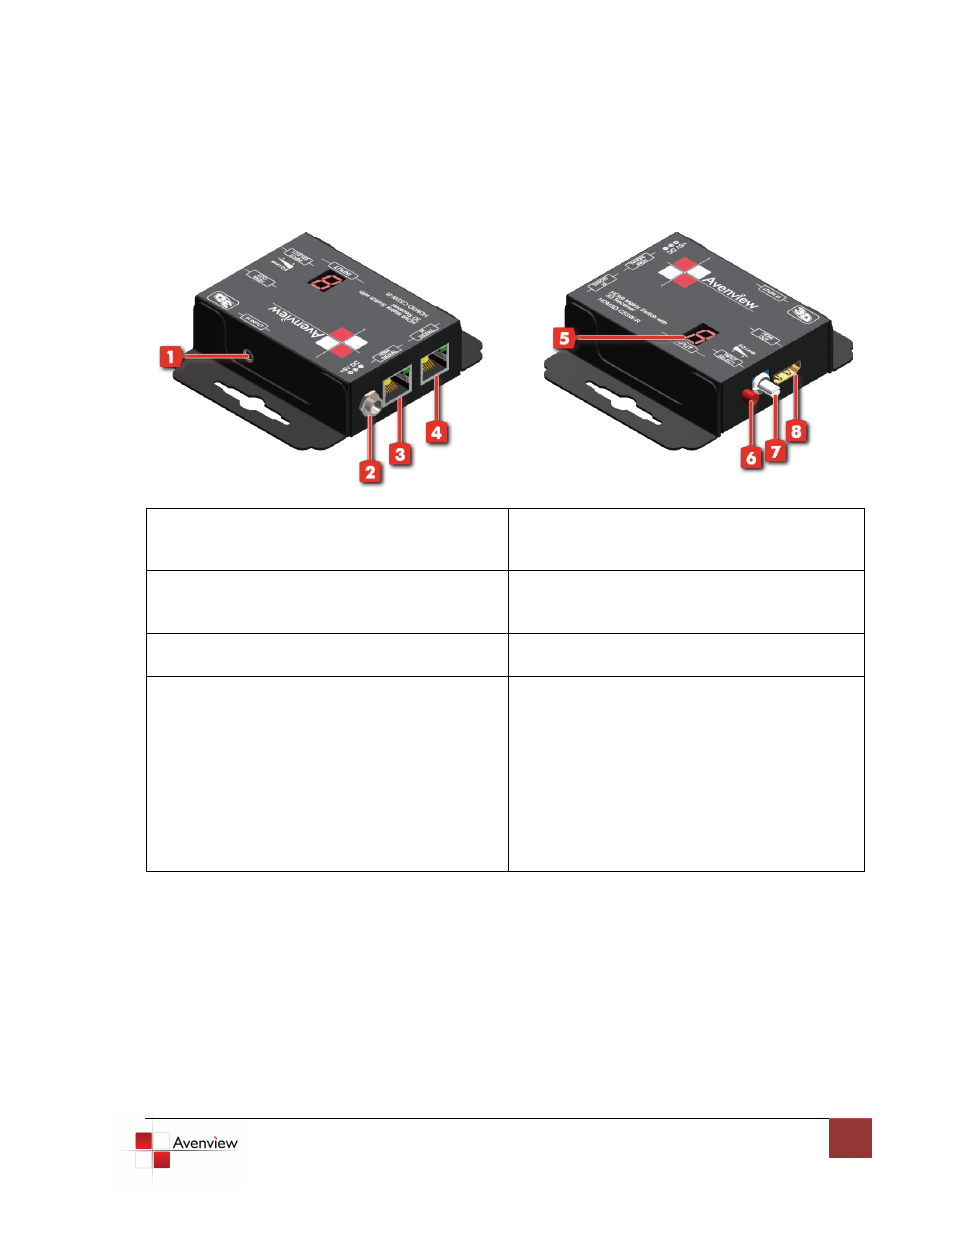
1.7.3 HDM3D-C5SW-R
1. IR INPUT: Plug in IR receiver.
2. +5V DC: Spare power jack for over 60m
transmission when the RX may need external
power to work.
3. HDMI SIGNAL: Plug in the CAT5 connected to the
respective A/V SIGNAL port on the
SW-HDM3D-C5-4X4
4. IR SIGNAL: Plug in the CAT5 connected from the
respective IR SIGNAL port on the
SW-HDM3D-C5-4X4
5. INPUT : Display the current showing HDMI source
channel
6. INPUT SELECT: Push button for switching input
source channel in sequential order
7. EQ Level: Adjust the 8-level equalization control
to the received HDMI signals. The HDMI signal
level varies from 0 (strongest) to 7 (weakest) for
respective transmission length from longest
possible range to short distance. Please adjust the
signal level from 7 to 0 and stop turning the
rotary switch whenever the audio/video is playing
normally. Inappropriate signal level setting may
cause overpowering issue that would shorten the
product life significantly!
8. HDMI OUT: Connect to HDTV with a HDMI cable