Delete ( ) button, E (effect) button, Printer ( ) button – Samsung Sensory Pleasure NV3 User Manual
Page 47
《46》
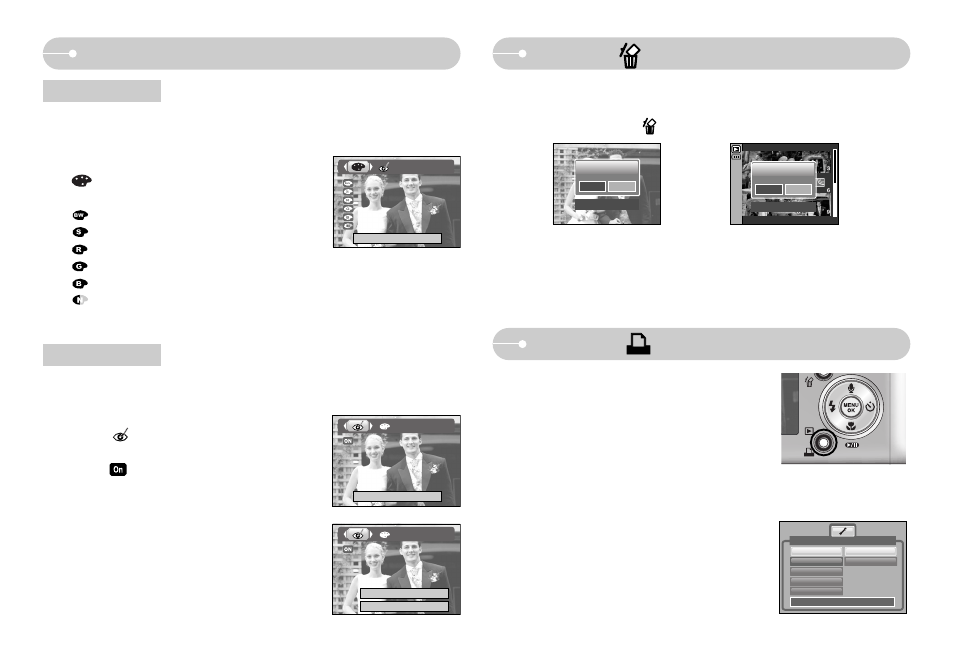
1. Select an image that you want to delete by pressing the LEFT/ RIGHT button
and press the DELETE( ) button.
Delete?
Confirm : OK
Yes
No
Delete?
Confirm : OK
Yes
No
Delete ( ) button
■ This deletes images stored on the memory card.
2. Select the submenu values by pressing the Left/ Right button and then press
the OK button.
If [Yes] is selected : deletes the selected images.
If [No] is selected : cancels "Delete Image".
E (Effect) button
■ By using the camera’s digital processor, it is possible to add special effects to
your images.
■ When a shot with "red eye" is played back, pressing this button can remove the
red eye from the subject.
1. Select a still image or movie clip and press the
button.
2. Select a desired sub menu and press the OK button.
: Captured images will be stored in black and white.
: Captured images will be stored in a sepia tone.
: Captured images will be stored in a red tone.
: Captured images will be stored in a green tone.
: Captured images will be stored in a blue tone.
: Save the image in negative mode.
Colour
Red eye reduction
1. Select a still image and press the E button.
2. Select menu by pressing the Left / Right
button.
3. Press the Down button and the red-eye will
be edited.
4. Press the OK button and the the changed image
will save as a new file name.
Exit : E
Exit : E
Red Eye Fix
Save : OK
Printer ( ) button
■ If the [USB] menu is set to the [Computer], you
cannot connect a Pictbridge compatible printer to the
camera through USB cable with [Connecting
Computer] message. By pressing the Printer button,
at this point, you can connect the easy printing mode
with [Connecting Printer] message.
*In some instances the camera may not connect to the printer, this will depend on
the make of the printer.
- After the connection, the Easy printing menu will
display on the LCD monitor. To display the
PictBridge menu, press the Menu button.
For more information about the PictBridge menu,
refer to page 54.
Back:
◀
Set:OK
IMAGES
Size
Layout
Type
Quality
One Pic
All Pics
Pictbridge