Waterloo F1972 User Manual
Page 4
4
Figure 4
Process:
• Place the cabinet in its upright position.
• Insert Shelf from top of unit.
• Place back of shelf in desired mounting location in the
back of unit, and rotate into place as shown.
• Attach using (2) 1/4-20 x 5/8" Carriage Bolts, (2)
11/32" Washers, and (2) 1/4-20 Serrated Flange Nuts
in square mounting holes as shown.
• Finger tighten.
Items Needed:
1/4-20 x 5/8" Carriage Bolt (Qty: 2)
11/32" Washer (Qty: 2)
1/4-20 Serrated Flange Nut (Qty: 2)
Shelf (Qty: 1)
Bottom
Washer
Carriage
Bolt
Nut
Button Head Screw
Nut
Carriage
Bolt
Washer
Nut
Flanges
toward bottom
Shelf
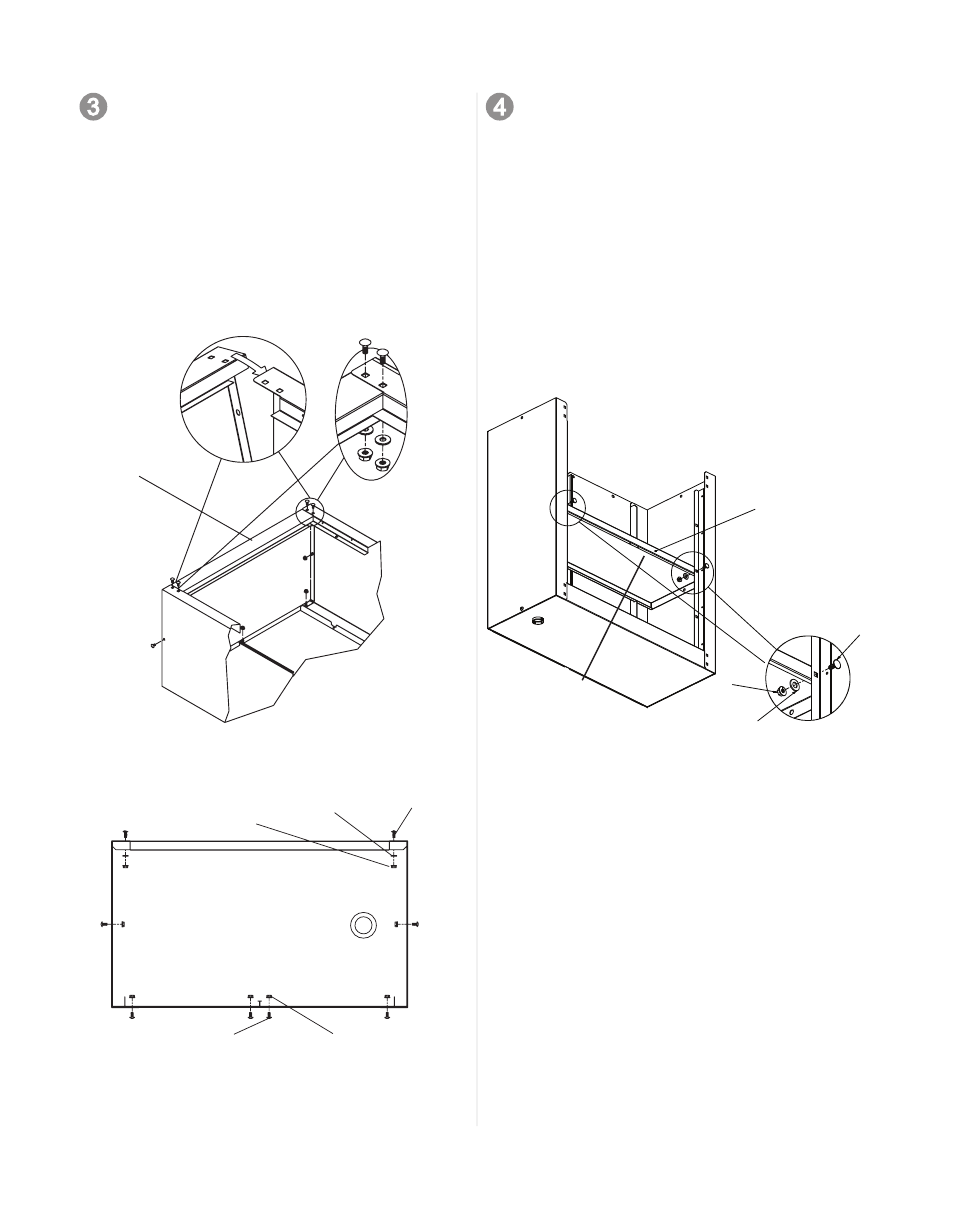
Process:
• Insert bottom into one end of assembly and attach
using (4) 1/4-20 x 5/8" Carriage Bolt , (6) 1/4-20 x 3/4"
Button Head Screws, (4) 11/32" Washer and (8) 1/4-20
Serrated Flange Nuts.
• Finger tighten.
Items Needed:
1/4-20 x 5/8" Carriage Bolt (Qty: 4)
1/4-20 x 3/4" Button Head Screw (Qty: 6)
11/32" Washer (Qty: 4)
1/4-20 Serrated Flange Nut (Qty: 10)
Top (Qty: 1)
Figure 3
Figure 3.1