Dake Model G-75 User Manual
Page 6
5/20/2010
Model G-75
6
5. Discard old belt. Install new belt in reverse order making sure the arrows printed on the
inside of the belt are going in the direction on rotation. If belt is reversed the seam of the belt
can be damaged causing premature belt failure.
Loop the belt around
the contact are drive wheel, try to keep it centered.
6. Once belt is in position, using the belt tension handle pull the handle up which moves the
motor back putting proper tension on the new belt. Make sure handle is engaged fully. Close
all doors and covers on the machine and readjust the spark catch box, and tool rest.
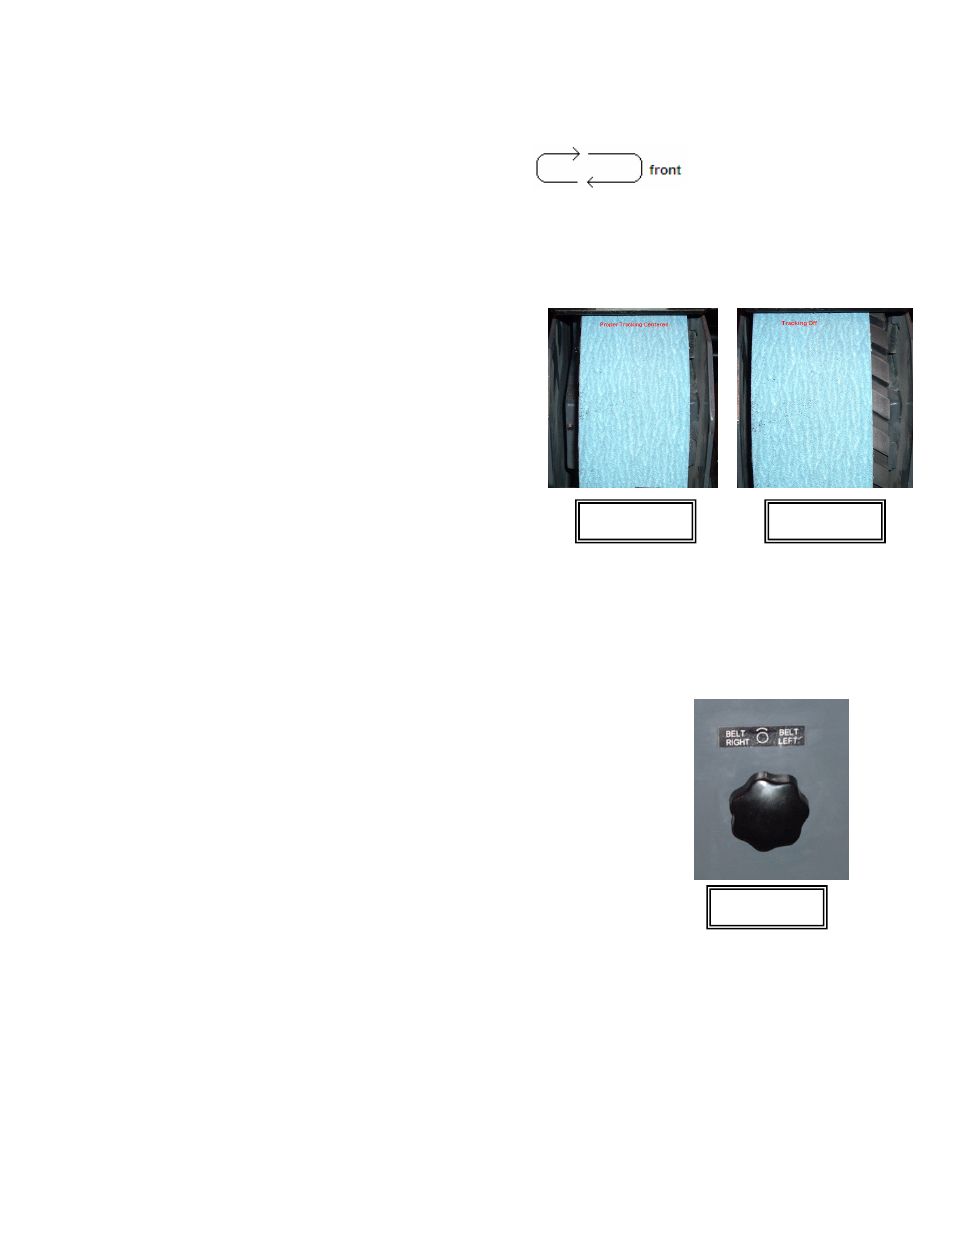
7. With all the doors closed except the top cover
and before power is restored to the machine visually
look at the placement of the belt on the contact
wheel. If the belt is close to being centered by hand
carefully push the belt in direction of rotation. This
will show you how much tracking is needed. If the
belt does not move too much left or right, close the
top cover and restore power. Quickly jog the
machine and watch where the belt is tracking. The
belt must track in the center of the contact wheel as
seen in figure 9. If the belt is tracking off as seen in
figure 10 adjustments must be made as described in
step 8.
8. Tracking of the must be done to prevent the belt from walking on the contact wheel and cutting
into the side of the machine or causing shredding of the belt. Start the machine and make your
tracking adjustment by turning the tracking knob on the motor side of the machine in very small
increments until the belt runs center on the contact wheel. The knob is labeled left and right as
to what direction the belt will move with each adjustment. (Figure 11)
NOTE: When a new belt is installed there should be a break-in
period so the belt will wear in evenly. For the first 5 minutes of
use lighter pressure should be used!
2. Safety:
2.1 Dress properly / Do’s and Do Not’s:
1.
Do wear approved safety glasses with side shields, or full-face shield is
recommended.
2.
Do wear non-slip foot ware. Do not over reach! Keep a safe footing.
3.
Do wear a dust mask if material being ground is dusty.
4.
Do wear hearing protection.
5.
Do keep guards in place and in good condition. Lock machine out if guards or
Figure 9
Figure 10
Figure 11