Blade selection – Dake Model Trademaster - Section I User Manual
Page 7
4/29/03
Model Trademaster
Section I -
7
Blade Selection
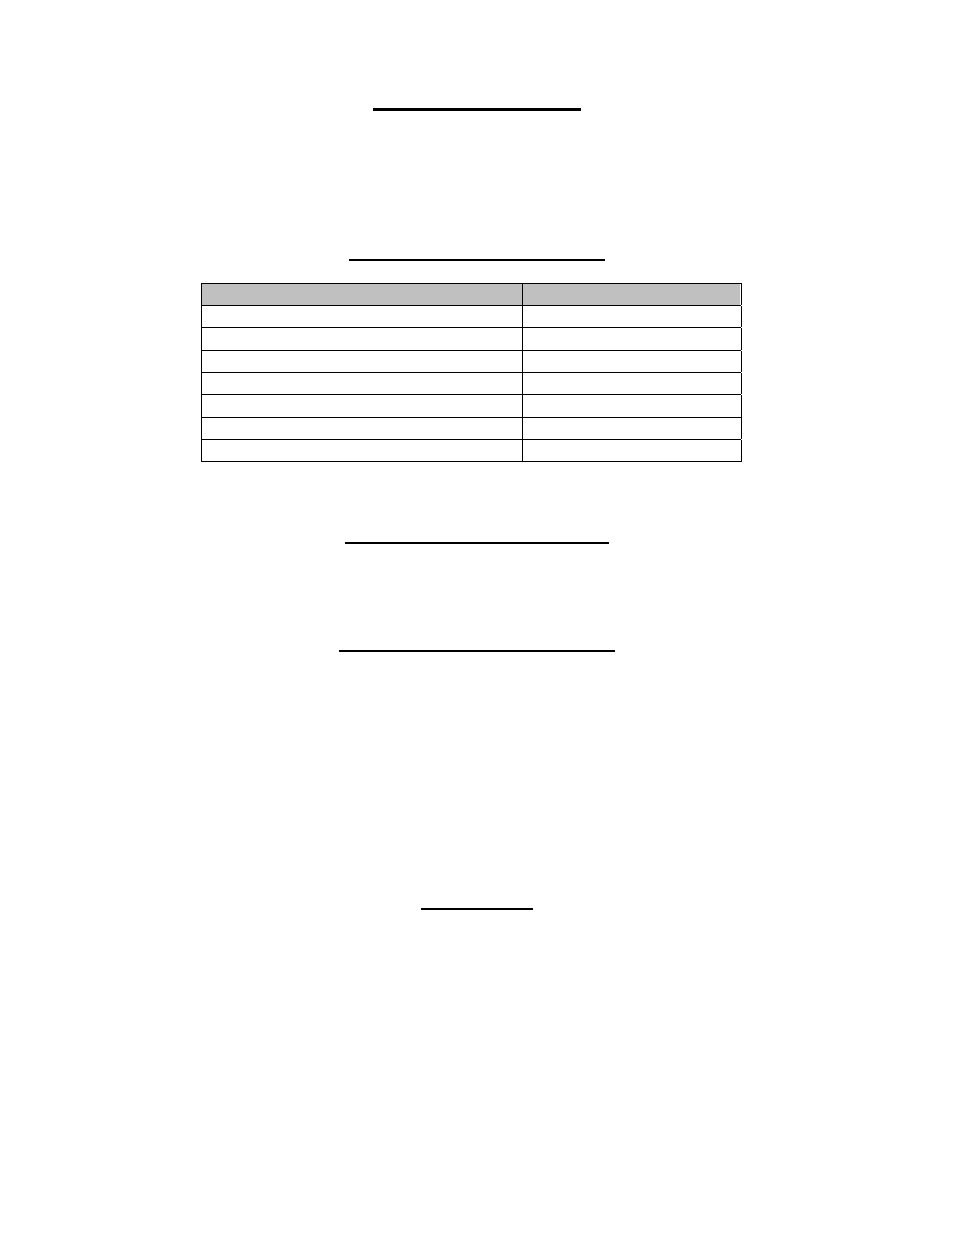
For Operator convenience, a blade selector chart is located inside the saw cover. It
provides recommended blade speeds, required teeth per inch, and minimum cutting
radius for various blade widths. The following chart can be used to select the blade
needed:
Standard Tooth Applications
Thickness of Material
Teeth per Inch
Up to 1/8”
18 Teeth
1/8” to 1/4"
14 Teeth
1/4" to 1/2"
10 Teeth
1/2" to 1”
8 Teeth
1” to 3”
6 –4 Teeth
3” to 6”
4-6 Teeth
6” and longer
3H
Note: 1) You must have at least 3 teeth into your work or blade damage will result.
2) For straight cuts, a 3/4" inch blade is best.
Blade Speed (feet per minute)
Refer to the blade selector chart inside the cover on your Trademaster for
the appropriate speed.
Blade Removal and Installation
To remove the blade, release the blade tension handle. (Item C on page
6). Remove the blade.
To install the blade, place the blade over the bottom wheel, then on the
top wheel. Teeth must point down toward the table. Tighten the blade
tension handle enough to hold the blade firmly in place, and the push the
blade into the guide inserts. Turn the machine on to allow the blade to
position itself and then finish tightening the blade. IMPORTANT: Blade
must be tight to insure straight cut.
Please Note:
The most common causes for your Trademaster not cutting straight are:
1) Blade tension is too low.
2) The blade is either dull or worn on one side.
3) The blade is upside down. The teeth must point down toward
the table.