Warning – Steffy Wood Products 5 Section Locker User Manual
Page 2
2
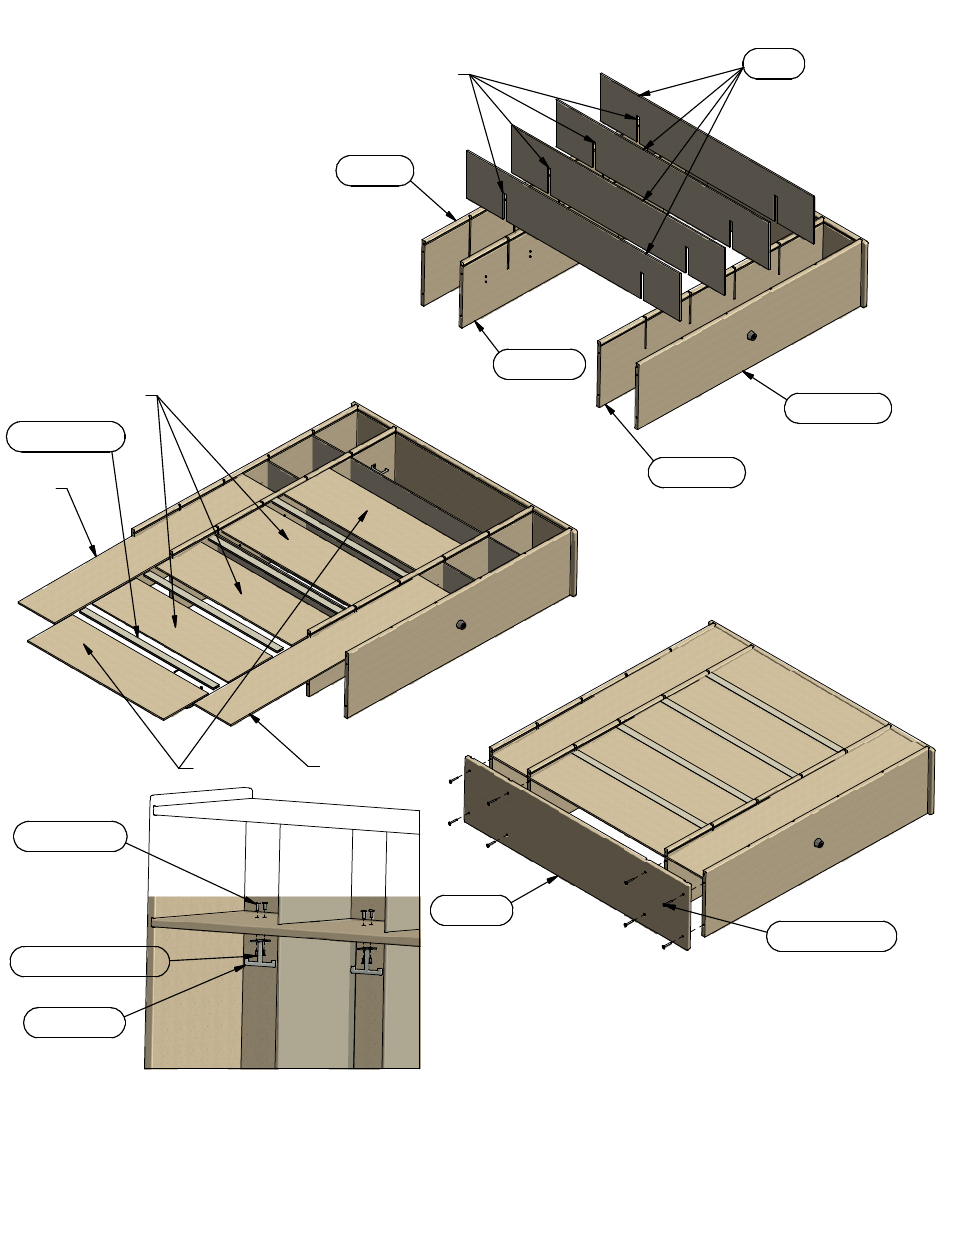
(refer to sketch at right)
Slide the dividers into the slots in the top,
shelves and bottom panels. Be sure the panels
are completely down into the slots.
3
(refer to sketch below)
Slide one outer (sider) back panel into the
slots in the shelves. Be sure the panel is
completely in the slot in the side panel. After
one panel is in place, slide a plastic divider
into the edge of the assembled back panel.
Slide a center back panel section (narrow)
into the slots in the shelves followed by a
plastic divider. Repeat this process until all
back panels are in place. Be sure the wide
back panels are at each end.
4
(refer to sketch below)
Attach the remaining side panel to the
top, shelves and bottom panel using the
connecting bolts and hex key.
5
(Refer to sketch above)
Stand the unit upright. Attach the ceiling hooks
to the bottom of the upper shelf using the posts
and flat head screws.
CHECK ALL BOLTS AND SCREWS PERIODICALLY
TO MAKE SURE THEY ARE TIGHT!
WARNING !!
Serious or fatal crushing injuries can occur from
furniture tip-over. To help prevent tip-over:
Place heaviest items on bottom of cabinet.
Never allow children to climb or hang on doors or shelves.
Use of tip-over restraints may only reduce, but not
eliminate, the risk of tip-over.
6
Furniture tipping restraint hardware is included in with the
hardware package for this unit. Follow the installation
instructions printed on the restraint hardware bag.
DIVIDER
BOTTOM PANEL
LOWER SHELF
UPPER SHELF
TOP PANEL
Slots in dividers
Upper
back
PLASTIC DIVIDER
Narrow backs
Lower back
Wide backs
SIDE PANEL
CONNECTING BOLT
CEILING HOOK
1/2" FLAT HEAD SCREW
1/2" LONG POST