Adding features to perspective – Triton Point Features User Manual
Page 6
Page 3
Adding Features to Perspective
Before adding feature files to Perspective it is important to first create a
Feature Group
to add the feature into. Feature Groups are used to organize features into user defined
groups. Each group is defined by a group name used to identify the group in the file tree,
with a symbol for displaying the location of the feature on the map view and also a user
selected color.
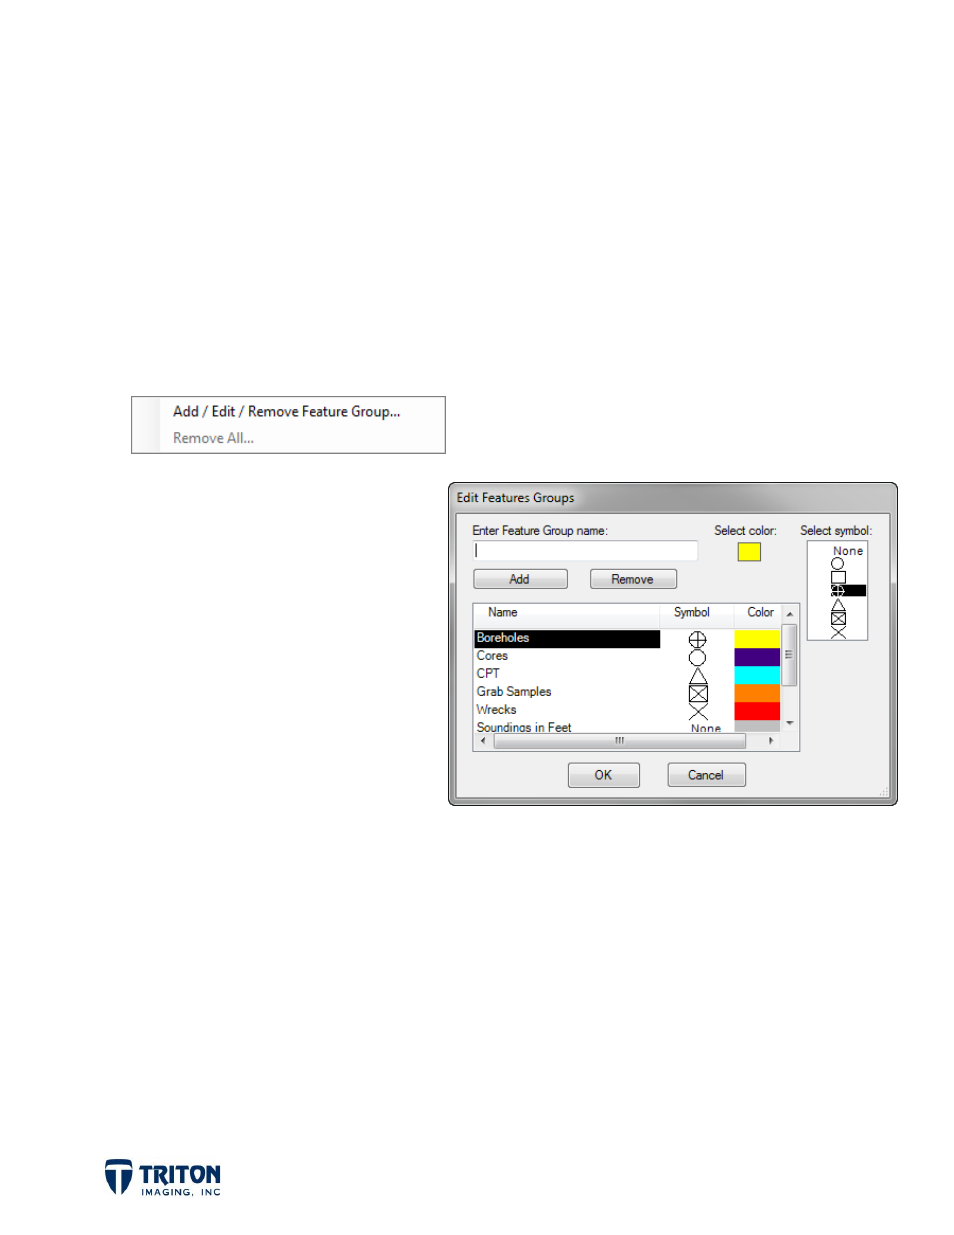
Feature groups are created by right-clicking on the root node of the Features file tree
and selecting
Add / Edit / Remove Feature Group
.
Selecting this option will open the
dialog shown right. Shown in this
dialog are the existing feature
groups and their associated symbol
and color.
To create a new feature group, enter
a name for the feature group, then
select a color and symbol to use.
Selecting the color will open a color
dialog to allow the user to select a
pre-defined or custom color.
A couple important notes regarding feature groups:
1. To display sounding data in the map view, select
None
for the symbol type. This will
put the labels (depths) centered on the feature location. Selecting a symbol will
offset the label up to the right of the symbol.
2. To add a new feature group when some already exist, you need to first deselect the
feature group highlighted in the list or its symbol will change when selecting the
symbol for the new feature group.
Once
Feature Groups
are created, then features can be added to them by right-clicking on
the group name in the file tree and selecting
Add
.