VariZoom VZZGRIG-DSLR User Manual
Zerogravityrig-dslr operating instructions
D
ZeroGravityRig-DSLR Operating Instructions
Welcome to our new top-of-the-line shoulder support
system for DSLR cameras. In addition to its totally
unique vertical balance offset, this system is designed
to be configurable to virtually any body type or camera
setup, so there are some adjustments and operational
parameters to discover before you begin using the
equipment. The Rig comes in a folded position, so you
should unfold it to approximately resemble the picture
at the right. Included are: shoulder rig, support pod,
belt, camera plate, accessory mount, removable
counterweight.
Please read the instructions to
ensure that you don’t damage the system or camera.
1A – The first and most important element to understand is the Tilt
Mechanism. Look at the safety lock (A), and notice how it slides
laterally when the red thumbscrew is loose. When the tilt arm is
perpendicular to the horizontal support member (w/ “VariZoom”
label), the safety lock will slide into the slot of the tilt arm. Once the
red thumbscrew is tightened, the safety lock prohibits the tilting
action of the ZG Rig. The safety lock allows you to set the ZG Rig
down without the system inadvertently tilting and flopping over, which could cause damage to
your camera. Always engage the safety lock before setting the ZG Rig down. Conversely,
while operating the ZG Rig, the safety lock should be disengaged so you can tilt freely.
1A2 – Always keep the tensioner knob (A2) tightened close to the max – only tiny adjustments
are needed. The tilt mechanism should never have any play/wobble, or damage may result.
WARNING: TENSIONER KNOB (A2) MUST BE TIGHT ENOUGH TO REMOVE ANY SIDE-
TO-SIDE WOBBLE/PLAY IN THE TILT MECHANISM, OR SEVERE DAMAGE MAY
RESULT!!!
2 - MOUNTING THE CAMERA - Make sure the safety lock is engaged
on the tilt mechanism. Attach the support belt to your waist, holster in
front. Mount your camera to the camera plate, tightening the screw
thoroughly. Slide the plate into the receiver and secure the plate
locking lever. Insert the brass tip of the support pod into the socket at
the end of the curved bar. Angle the pod roughly 30° downward and
raise the entire assembly over your shoulder, carefully inserting the
lower end of the support pod through the plastic D-ring and into the
holster. Unlock the support pod knobs to engage spring action.
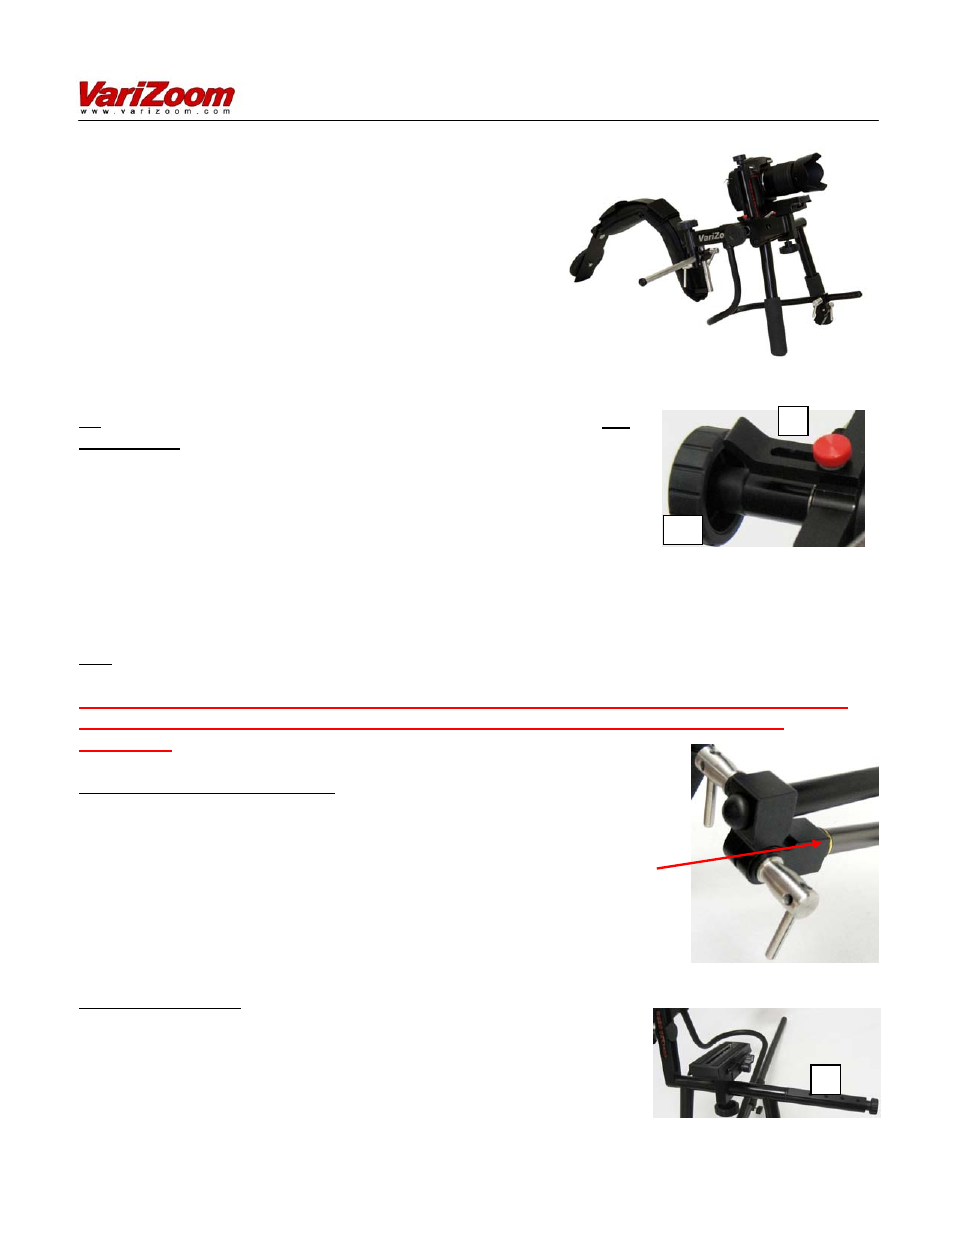
3 - ACCESSORIES – If you wish to use the accessory mount (D)
for attaching lights, monitors, mics, etc., go ahead and attach it and
mount the accessories before proceeding with adjustments or
balancing. This mount allows you to keep accessories off your
camera and aids in balancing the weight of the Rig. Four ¼”-20
holes are provided, and the mount rotates to allow fine positioning.
A
A2