Acer TravelMate 430 User Manual
Page 50
2 Customizing my computer
42
En
glish
Installing memory
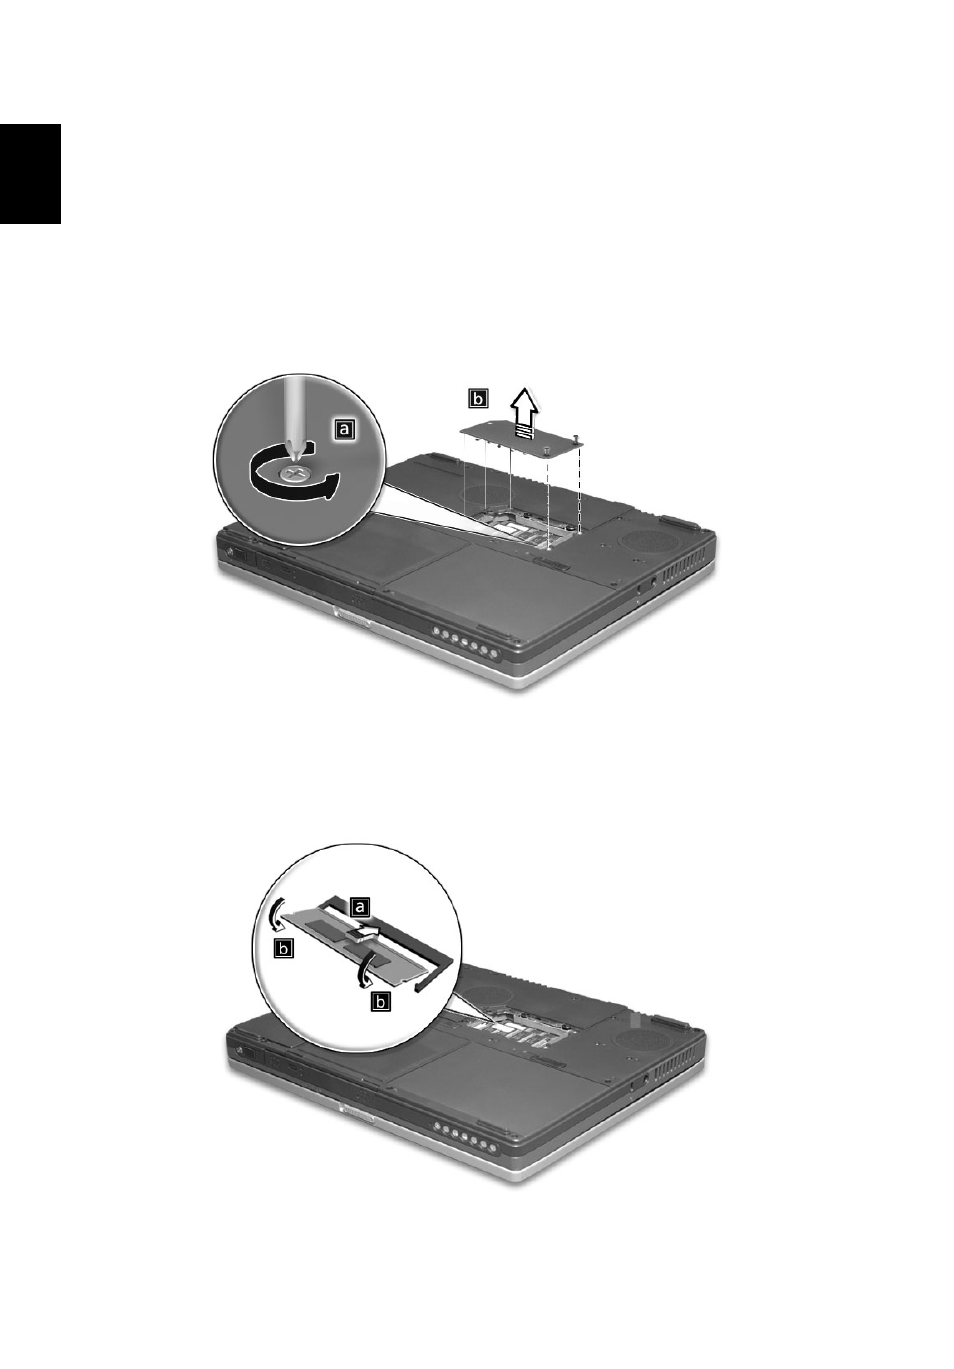
Follow these steps to install memory:
1
Turn off the computer, unplug the AC adapter (if connected) and
remove the battery pack. Then turn the computer over to access
its base.
2
Remove the screw from the memory cover (a); then lift up and
remove the memory cover (b).
3
Insert the memory module diagonally into the slot (a), then gently
press it down (b) until it clicks into place.
See also other documents in the category Acer Projectors:
- H5350 (53 pages)
- P1266i (126 pages)
- P1266i (16 pages)
- PH530 (41 pages)
- PD724W (59 pages)
- P1165P (66 pages)
- PD 321 (1 page)
- XD1270 (47 pages)
- XD1150 (45 pages)
- P5206 (22 pages)
- X1140A (9 pages)
- U5200 (52 pages)
- S5201M (2 pages)
- PD525P (56 pages)
- PROJECTOR P7205 (62 pages)
- PD723P (2 pages)
- X1230K (2 pages)
- PW730 (46 pages)
- X1261N (2 pages)
- P3150 Series (53 pages)
- ALTOS 1100E (161 pages)
- P7280I (61 pages)
- P7270 (2 pages)
- X1260 (2 pages)
- P5271n (70 pages)
- P5271 Series (2 pages)
- P5271i (69 pages)
- P5281 (2 pages)
- X1160P (53 pages)
- X1160 (52 pages)
- S5201 (65 pages)
- S5200 (59 pages)
- S5200 (2 pages)
- DNX0708 (2 pages)
- X1230S (56 pages)
- PD 323 (2 pages)
- H7530D Series (58 pages)
- S5200 (2 pages)
- Projector (35 pages)
- PD117D series (47 pages)
- P3250 (2 pages)
- RS232 (2 pages)
- S1200 (2 pages)
- H5360 (2 pages)
- H5360 (57 pages)