Hardware description and quick installation/usage, Ajor hardware components, Major hardware components – Monoprice 9206 Pan/Tilt/Zoom IP Camera User Manual
Page 8
Pan/Tilt IP Camera
2. Hardware description and quick installation/usage
The IP CAM is designed to be very easy to install and use. First, let’s see the
major components of the IP CAM products.
2.1. Major hardware components.
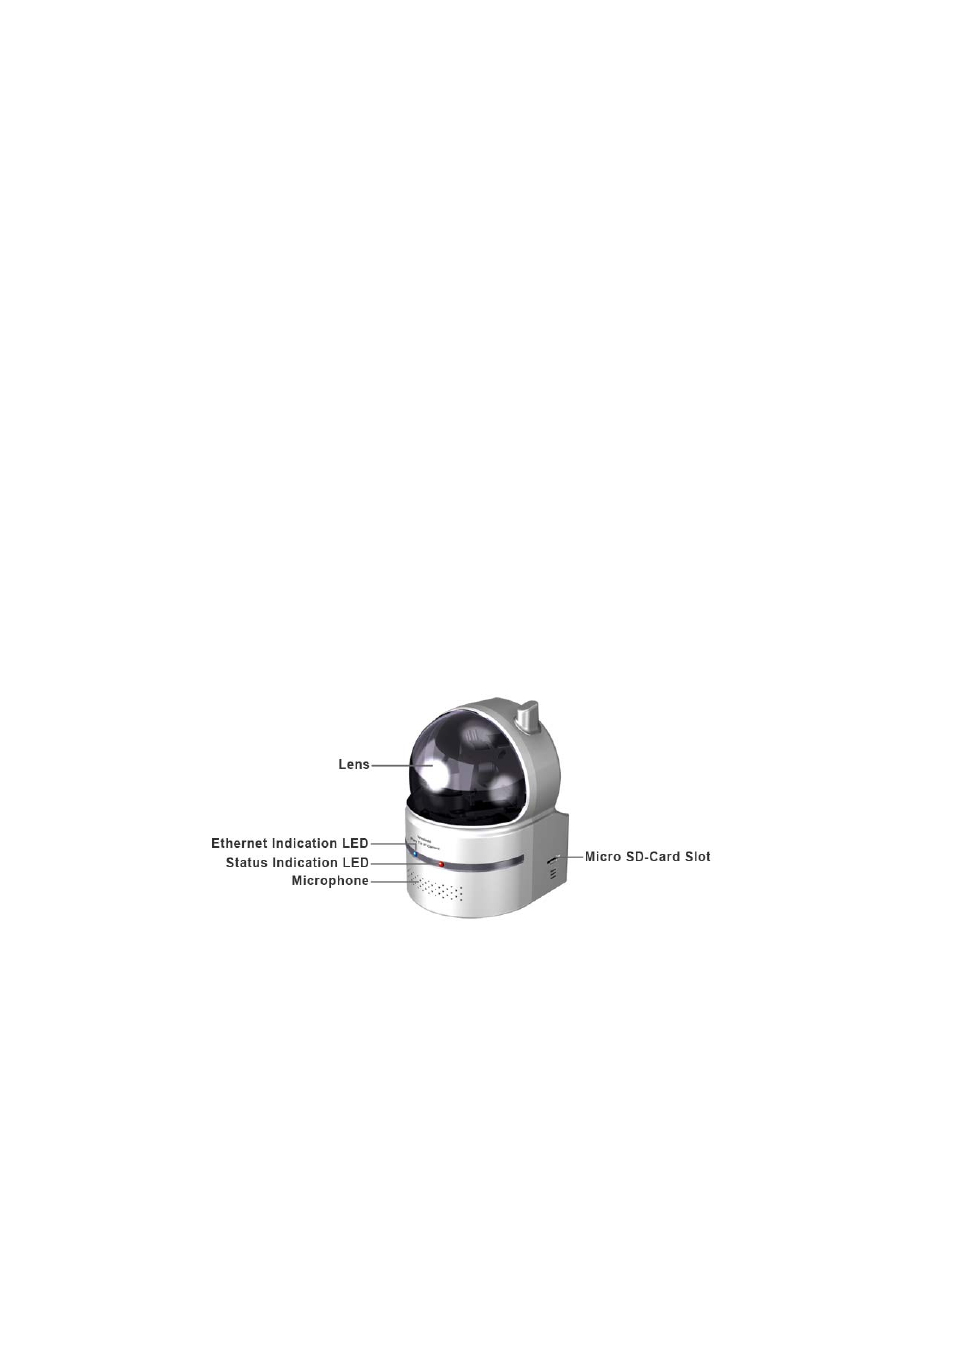
The major components on the front panel of the IP CAM products are the built-in
microphone, lens and LEDs :
1. Microphone – for receiving the audio/voice. Effective distance is about 5 meters.
2. Lens – the lens is inside the mask and the focus of the lens is fixed, you do not
need to spend time to adjust the focus, the effective focus range is from 30cm to
infinity.
3. Status indication LED (red) – this LED is to indicate the Internet connection status.
When the Internet connection is connected, the LED will be constant red light. If
there is any Internet connection problem, the LED will be blinking red light.
4. Ethernet indication LED (blue) – this LED is to indicate if the Ethernet link is ok
and packet traffic is sending/receiving. When the Ethernet cable is connected, the
LED is constant blue light. When there is packet sending/receiving, the LED is
blinking blue light.
Figure 2-1: Major components in the front panel
The major components on the back panel of the IP CAM products are the bracket
screw jack, power jack, Ethernet jack and reset button:
1. Bracket screw jack – this is the position to screw in the bracket of the IP CAM.
With the bracket, you can put the IP CAM on the desk, on the wall or on the ceiling.
(Bracket not provided)
2. Power jack – this is the place to plug in the power adaptor. The power needed for
this IP CAM is 5V/1.0A, please make sure you are using the correct power
adaptor.
8