Monoprice 6529 MHP-100 User Manual
Page 7
7 of 8
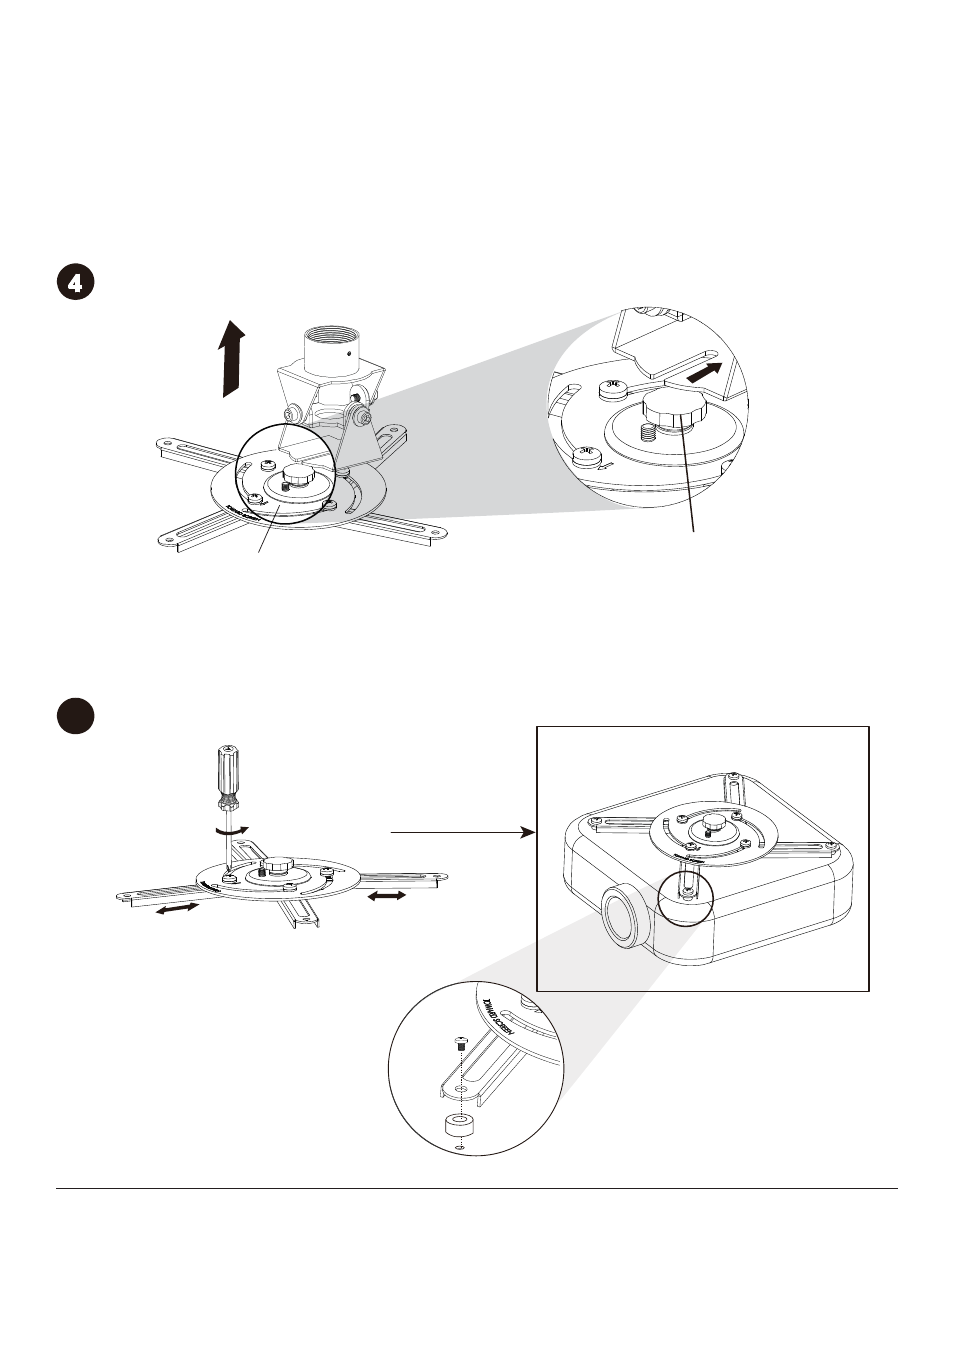
Removing the ceiling plate from the flush
mount assembly
Pull out extension columns and install them to the projector
NOTE: loosen Thumb knob and
slide spider-plate from ceiling
mount.
Thumb tightening knob
Spider-plate
Loosen screws on spider arms.
5
NOTE: Adjust spider arms to
4 mounting holes, install screws
and firmly tighten. Be sure to
maintain center balance point.
Place the Bottom Spacers in
between the Extension Brackets
and the Projector, and align the
mounting.