Monoprice 3411 Wall Mount Bracket User Manual
Page 3
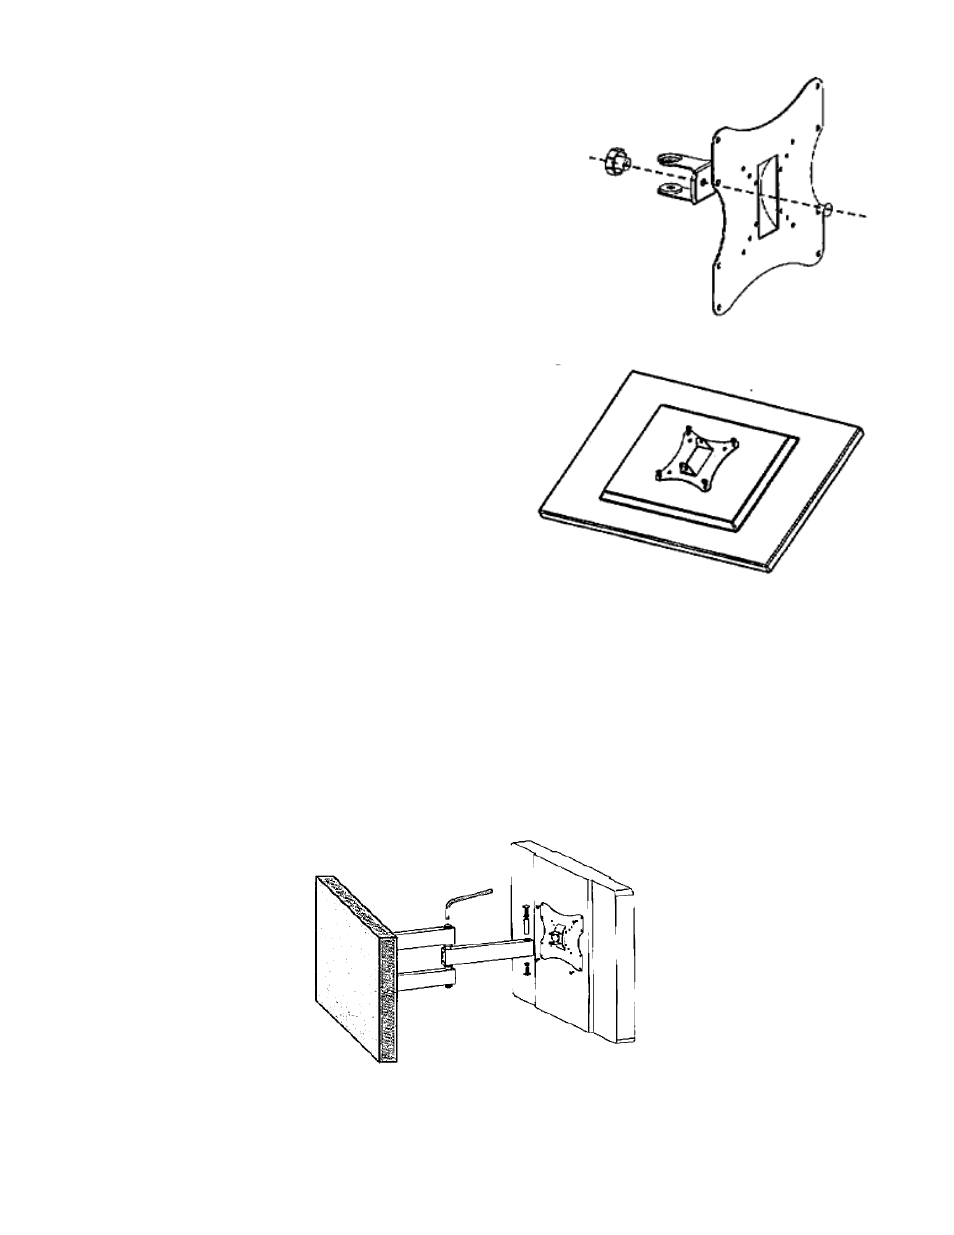
Step Four:
Assemble The Display Mounting Plate Assembly - Connect
the display plate (part K) to the “C” bracket (part I) and insert
the small retaining bolt (part D) through the front of the
mounting plate, into the hole in the “C” bracket and secure it
with the retaining knob (part F).
Step Five:
After having prepped your flat panel display by
removing any table top stands as instructed in the
manual for your display, attach the display mounting
plate assembly from step four to the back of your
display. Make sure it is in the correct orientation. The
square shaped hole on the “C” bracket should be on the
top. Use four of the machine screws included with the
mount (Part G or H) or included with your display to
attach the plate to the back of the display. If none of
the included screws fit, contact the manufacturer of
your display to find out the appropriate size needed and
purchase them at a local hardware store.
Step Six:
Have some one assist you by lifting the display with the attached display plate assembly up to the
extension arm on the wall plate assembly from step one. Attach the “C” bracket to the end of the arm
and fasten it with the large retention bold (part C). Lock the bolt in place with the nut (part E). If the
extension are is too still or too loose, you can adjust the tension by turning the allen bolt at the joint of
the arm using the included allen key.
Congratulations, you’re done!
Figure 4
Figure 5
Figure 6