Monoprice 3411 Wall Mount Bracket User Manual
Page 2
Installation:
Step One:
Mark Your Wall - Use a level to positions the wall
plate of the arm assembly (part J) at the place on
the wall you want to install the mount and make sure
the plate is vertically straight. Holding the wall plate
to the wall, use a pencil to mark the 6 points the
mount will attached to the wall.
If you are installing on to a wood studded wall, you will need to use a stud finder to locate a stud in
the wall. Mark your stud. Use a level to position one side of the wall plate of the arm assembly (part
J) along the stud so that one column of holes is centered on the stud and make sure the plate is
vertically straight. Holding the wall plate to the wall, use a pencil to mark the 3 points the mount will
attach to the stud and the 3 points that will attach to plain drywall.
Step Two:
Drill Pilot Holes - If you are installing on to concrete or
solid brick, you will need to use the included concrete
anchors (part B). Drill 10 mm pilot holes approximately
60mm deep. Insert the anchors into each of the holes.
If you are installing onto a wood board wall, you will not
need any anchors as long as the wood board is
substantially thick. Drill 3 mm pilot holes approximately
60mm deep.
If you are installing onto drywall with wood studs, drill 3 mm
pilot holes approximately 60mm deep into the stud. For
the other side, you will need drywall anchors and bolts from
a local hardware store.
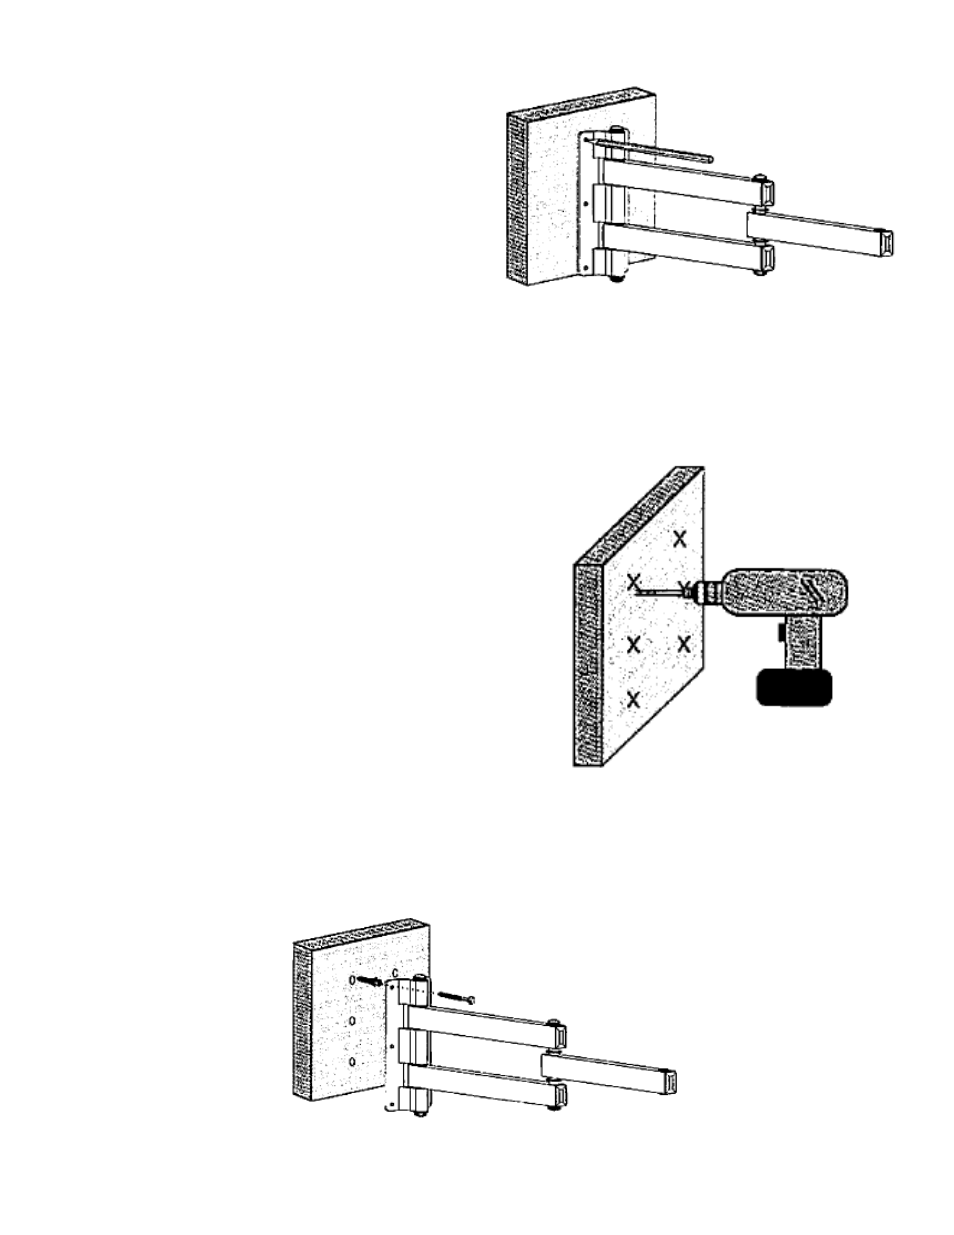
Step Three:
Attach The Arm Assembly To The Wall - Hold up the arm assembly to the wall. Line up the holes on
the wall plate to the pilot holes and fasten the plate to the wall with the lag bolts (part A).
Figure 1
Figure 2
Figure 3