Video sharpness adjustment, Video.sharpness.adjustment – Adder Technology X50 User Manual
Page 13
inst
all
ation
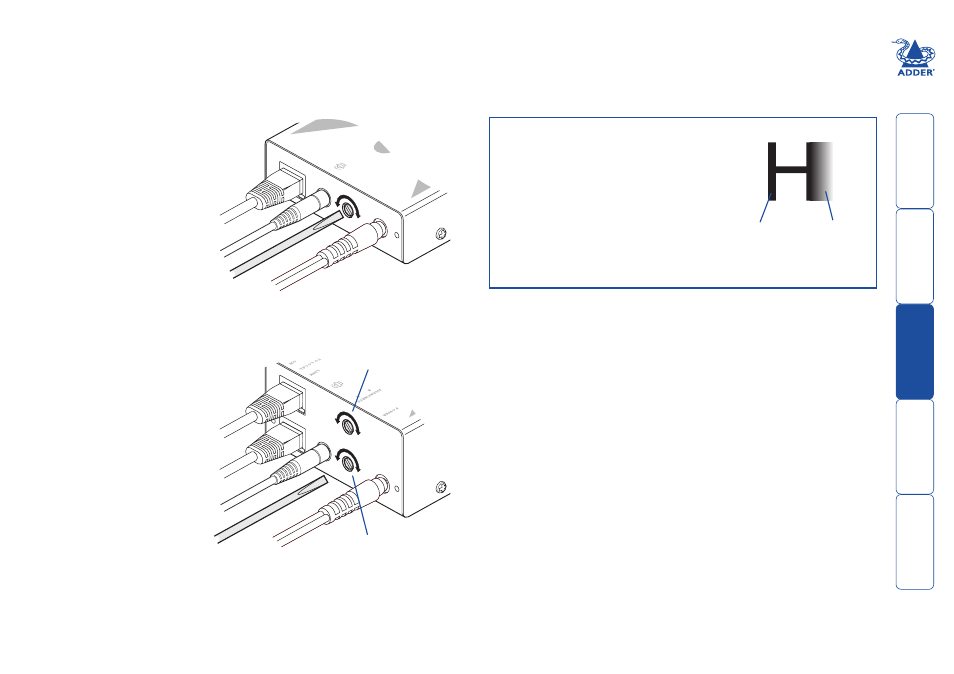
Video sharpness adjustment
The Adder X50 remote module includes a straightforward video adjustment to
control picture sharpness on the remote monitor.
To adjust video sharpness
1 On the computer, display a suitable
high contrast image (see right).
2 Insert a small flat-bladed
screwdriver into the SHARPNESS
adjustment hole so that it engages
with the slot in the rotary dial.
3 Turn the rotary dial fully
clockwise - you should see
a bright white shadow
to the right of your high
contrast image:
4 Turn the rotary dial anti-
clockwise until the white
shadow disappears and the
edges of your image become sharp.
To display a suitable high contrast image
The best way to clearly view the effect of
sharpness and brightness adjustments is to
display a high contrast image, with vertical
edges, on the screen.
• Open a word processor, type the capital
letter ‘H’, or ‘M’ and increase the point
size to 72 or higher. For best results, the
background should be white and the
character should be black.
High contrast
black character
on white
background
Black or bright
white shadow
on the right
indicates
the need for
sharpness
adjustment
PO
W
ER
SH
AR
PN
ESS
LIN
K
TO
LO
CA
L
ON
The remote module for
the dual video MS2 variant
includes two separate
sharpness adjustments for
each video channel (the upper
dial corresponds to the upper
video output socket).
Sharpness control
for the first (A) video
channel
Sharpness control for
the second (B) video
channel