Maintenance, Operating instructions and replacement parts list, Deckmate 25 freefall pontoon windlass – Powerwinch Deck Mate 25 User Manual
Page 13
13
Light Bulb Replacement
To prevent damage
to light, do not oper-
ate light for longer than 15 minutes.
1. Remove the two screws that hold the lens
against the winch cover.
2. Remove gasket and inspect for tears or dam-
age, replace if necessary.
3. Rotate the expired light bulb a 1/4 turn or 90
degrees inside the clips and pull out.
4. Replace with new light bulb and reinstall gas-
ket, lens and hardware. The light bulb is a 212-2
automotive bulb.
Operating Instructions and Replacement Parts List
Deckmate 25 Freefall Pontoon Windlass
Maintenance
Periodic maintenance to the Free Fall Pontoon
Windlass will help to extend the service life of the
equipment and the following steps can be taken to
do this.
Always disconnect power to the windlass at the
battery before preforming any maintenance on
the unit.
1. Lubricate the gear train with a lithium grease
at the beginning of each boating season.
2. Lubricate the shaft on the davit roller with a
small amount of lithium grease at the beginning
of each boating season.
3. Inspect the anchor line at the beginning of
each boating season. Replace the 3/16” diameter,
3 strand nylon rope if it is frayed, cut or kinked.
When replacing the rope refer to the following
instuctions.
Anchor Line Replacement
Make sure that the windlass is in the free fall
mode of operation. Next, disconnect the power
to the windlass at the battery. Locate the portion
of the rope that inserts through the hole of the
rope spool. Push on this end so that the knotted
portion of rope on the opposite side of the fl ange
is pushed out of the counter bore and is exposed.
Take a thin screwdriver or fl exible piece of
wire and pull the knotted rope end out from be-
tween the frame and rope spool fl ange. Untie the
knot or cut the rope just below the knot and pull
the rope out of the spool.
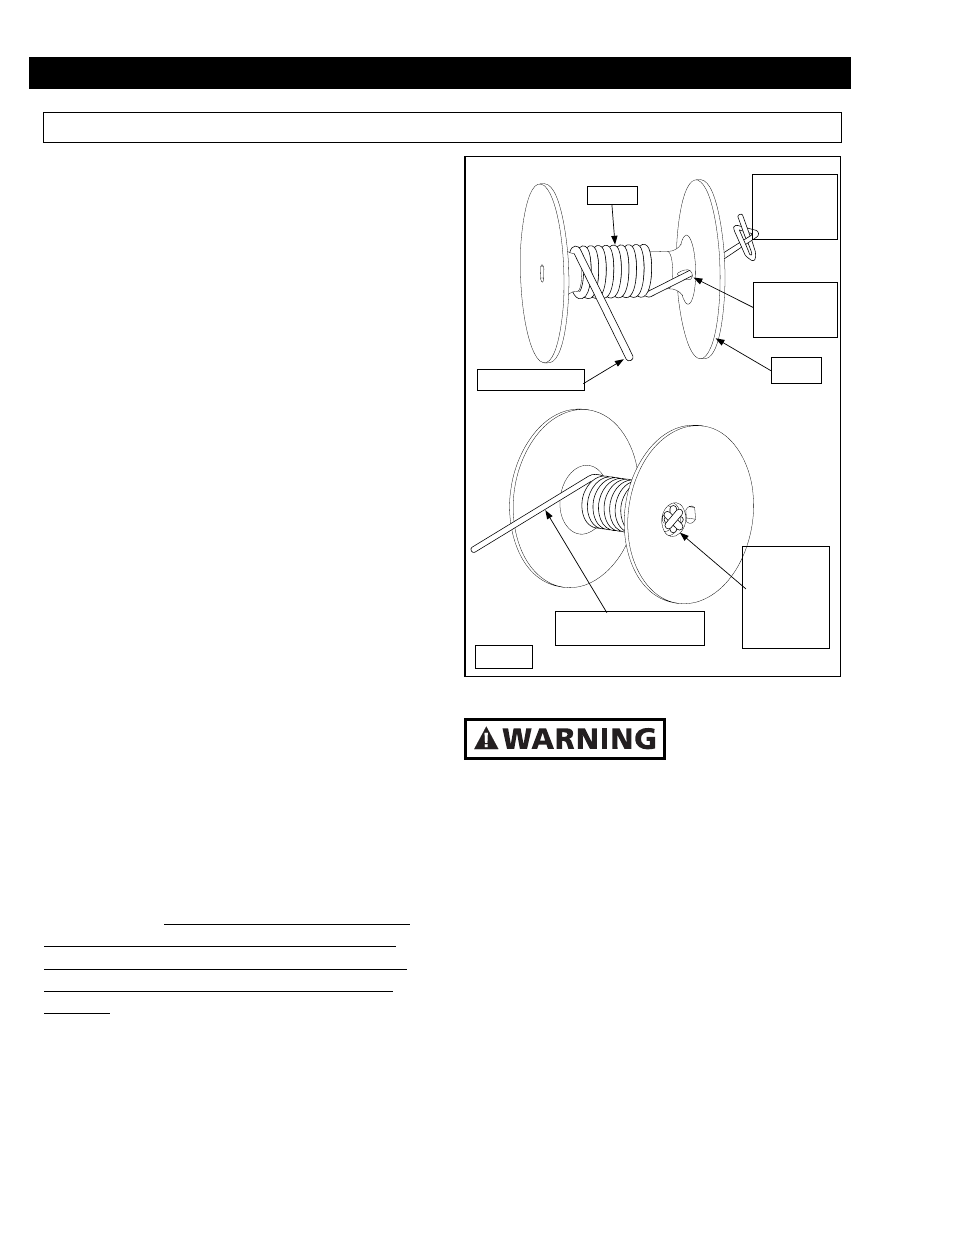
Take the new rope and hold onto the non looped
end and throw the rope out into the water. Fol-
low the illustration in Figure 22 to install the rope
onto the spool. Note: The illustrations in Figure
# depict the rope spool unattached to the wind-
lass for clarity purposes. The rope spool can be
left assembled to the windlass when replacing
the rope. Reconnect the power to the windlass at
the battery. Finally, wind the rope onto the rope
spool while being careful to maintain even wraps
of rope as it winds.
nents.
PULL THE
END OF ROPE
THROUGH AND
TIE END IN
KNOT
ROPE WINDS ONTO THE
SPOOL OVER THE TOP
PULL KNOT
FIRMLY INTO
PLACE IN
THE COUN-
TER BORED
RECESS OF THE
FLANGE
INSERT END
OF ROPE INTO
HOLE IN ROPE
SPOOL
OUT TO ANCHOR
ROPE
SPOOL
ROPE
Figure 22