Mounting and calibrating the dl-32 – Innovate Motorsports DL-32 User Manual
Page 12
- 12 -
A log window will be opened:
Sessions are named “Session 1”, “Session 2”, etc. If a DL-32 session is too long for LogWorks
(longer than 1-1/2 hours), it is broken up and a letter is used (ex. “Session 2a”, “Session 2b”,
etc.).
4.7 Deleting log files from the SD-card
The SD-card must be inserted into an SD card reader connected to your computer.
The SD-card looks to your computer just like any other mass-storage device like a CD, Floppy or
hard-drive. Open the SD-card and drag the log files to be deleted to the trash icon on your
computer.
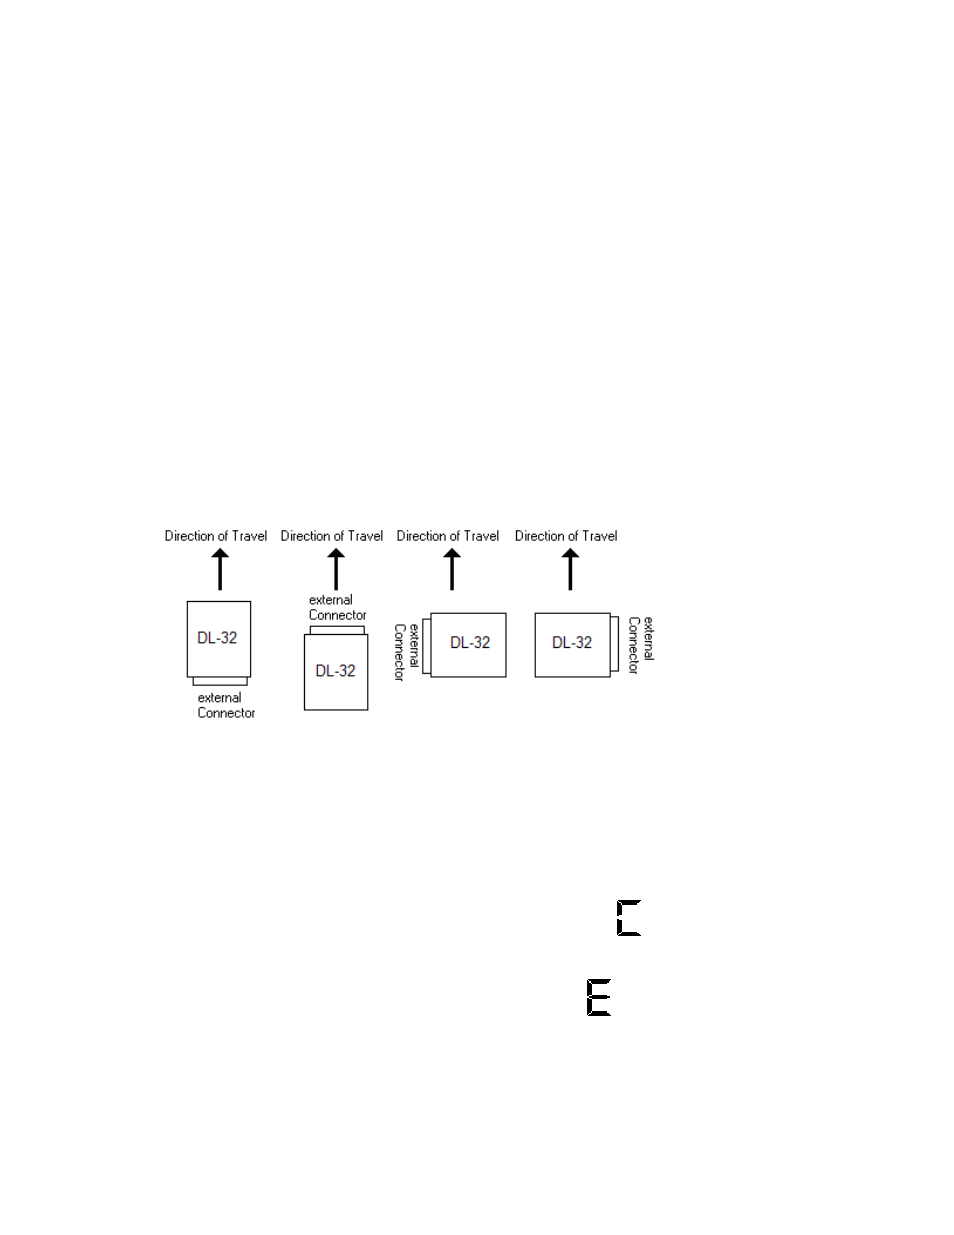
5. Mounting and calibrating the DL-32
In order to use the acceleration sensor of the DL-32, care must be taken to mount the DL-32
correctly on a horizontal surface in the car. The DL-32 MUST be aligned with the direction of
travel. The following pictures show the four possible mounting positions.
The mounting position should not deviate more than 3 degrees from horizontal.
5.1 Calibrating the Acceleration Sensor to the mounting position
Lay the DL-32 down on the mounting surface, but don’t mount it yet. Switch the 12V supply to
the DL-32 on.
Press the ‘Calibrate’ button until the digit display shows a blinking C
If the mounting surface is not within the 3 degrees of horizontal, the acceleration sensor can’t be
calibrated for zero g and the DL-32 shows a blinking E for Error:
After the zero g acceleration calibration is performed, hold the DL-32 such that the side of the DL-
32 pointing in the intended direction of travel points vertically up. Then press the Calibrate
button again until the blinking C shows up.
If the DL-32 shows the blinking ‘E’, even when the device is calibrated on a flat, horizontal,
surface, the device may need to be reset. To reset the DL-32’s accelerometers, place the device