STEINEL HIPURFORMER User Manual
Page 5
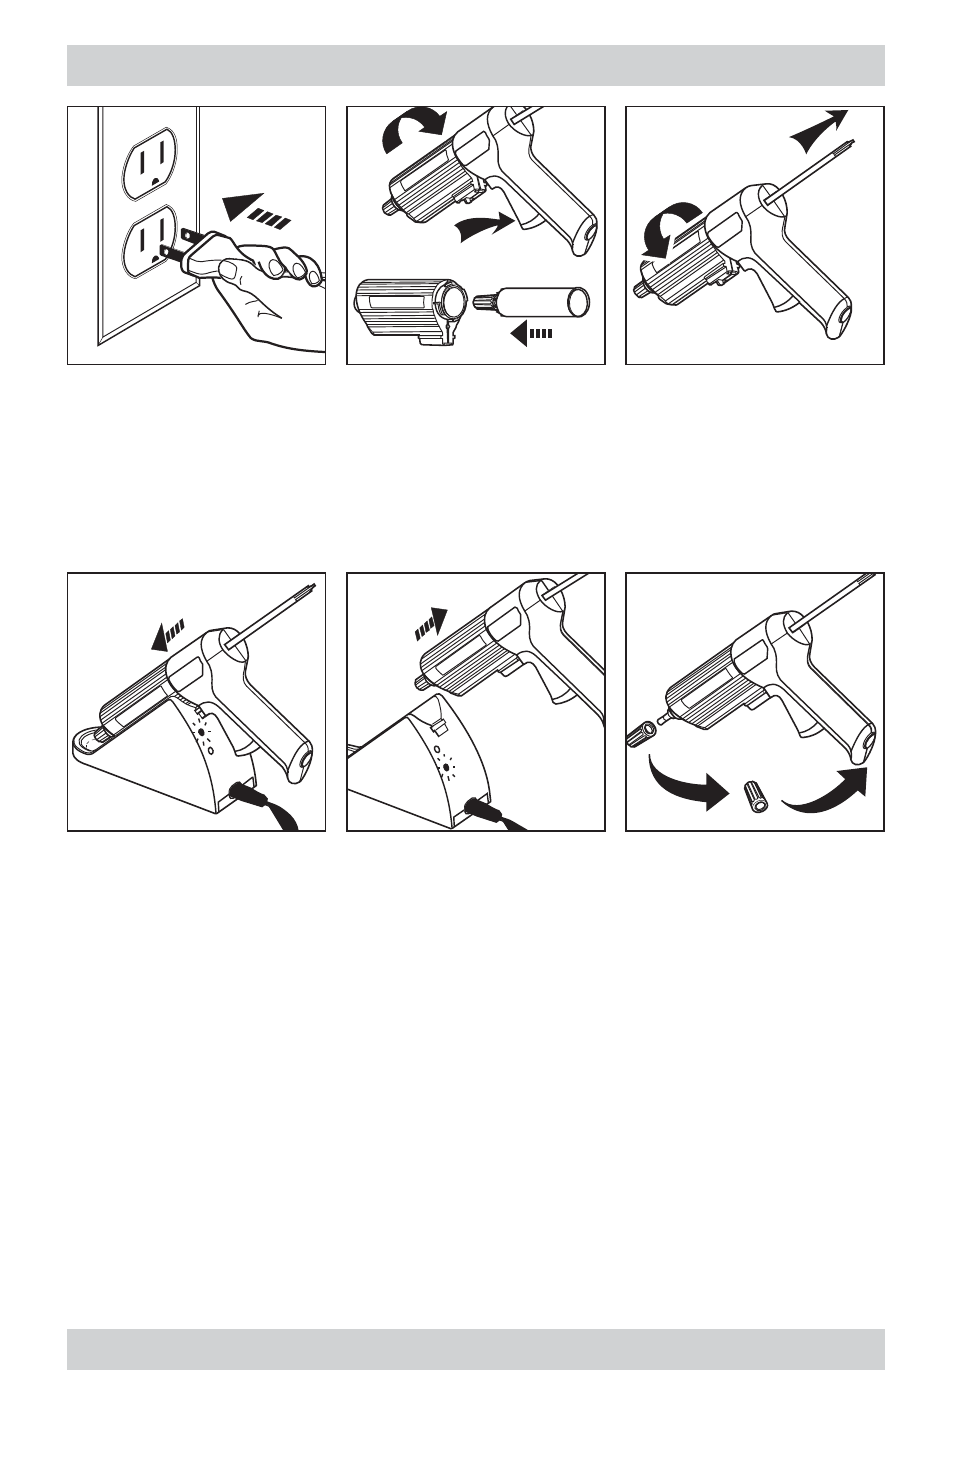
GETTING STARTED
1
2
3
1. First plug the power cord into the base station and then into the power source.
Green LED will light up.
2. Depress trigger and turn heating cylinder counterclockwise to separate the two
applicator components. Remove adhesive cartridge from foil pouch and insert into
heating cylinder.
3. Reassemble the applicator by retracting the feed rod and twisting the cylinder until it
locks into place.
4. Insert tool into contact slots on base station to heat adhesive. Status indicator remains
RED during heat-up (approx. 10-13 minutes). When the status indicator turns GREEN,
the adhesive has reached bonding temperature and is ready to use.
5. Always wear gloves. Remove tool from base station.
6. Unscrew cap (store in handle). Depress trigger to extrude adhesive. Feed rod will
advance and press against cartridge plunger.
7. Apply the adhesive sparingly in either a spot or continuous bead. Do not spread.
8. Join the surfaces to be bonded together, ensure proper alignment of pieces and hold
firmly in place until the adhesive sets (working times vary).
9. Substrates may be machined or planed after 1 hour, however, do not subject the
bond to stress for 24-48 hours.
10.After work is completed unplug the power cord from the power source before
disconnecting the power cord from the base station. To provide continued
protection against electric shock always disconnect the power cord from the power
supply when not in use. To avoid damage store the HiPURformer and cord in a
safe place. For a replacement cord please refer to the spare parts list on Page 7.
4
5
6
If desired, the base station may be mounted on a firm surface. Use 2.9mm (1/9")
diameter screws to secure, using the holes provided on the bottom of the unit.
MOUNTING BASE STATION
5