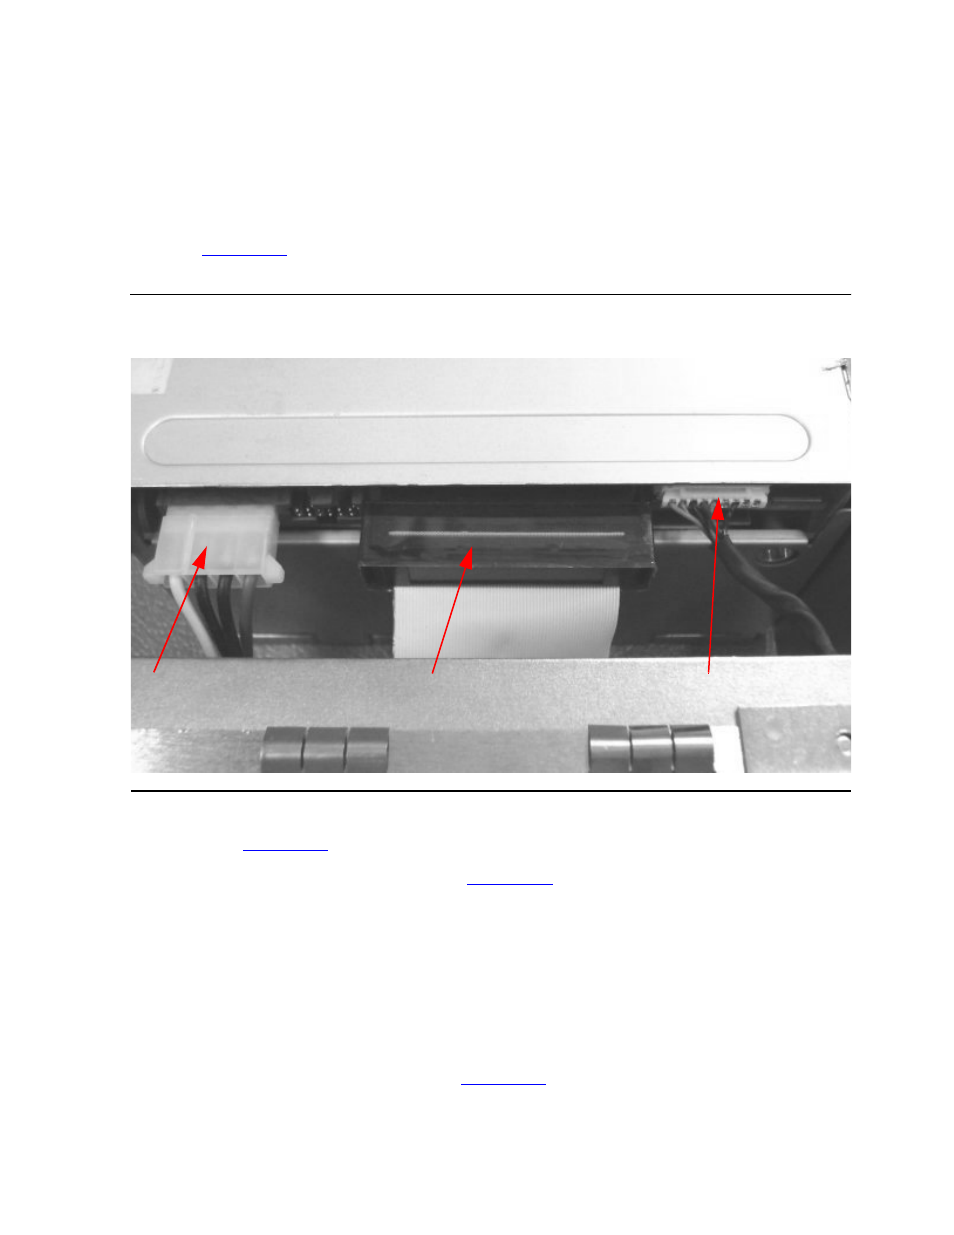
Figure 6-3, Location of cables – HP Integrity NonStop H-Series User Manual
Page 63
Troubleshooting
N1528A and N1529A ACL Tape Drive Installation and User’s Guide— 544594-002
6 -3
Stuck Tape Removal Procedure
3. Unplug the following cables from the brick:
a. DC power cable
b. SCSI cable
c.
SCSI ID cable
See
for the location of the cables.
4. Place the brick on the side with the front of the brick facing towards the left as
shown in
.
5. Turn the RD Thumbwheel (shown in
) by hand toward the back of the
drive as far as possible (there is no hard stop, but the wheel will begin to spring
back). This positions the grabber into the parking position. Note that the grabber
may already be positioned in the parking position.
6. Using a T-10 Torx driver, rotate the front reel motor clockwise as far as possible.
This unthreads the tape. The front reel motor will stop rotating clockwise when the
tape is completely unthreaded and the tape leader is successfully parked. If a
significant length of tape is threaded, this step could take a long time.
7. Turn the RD thumbwheel (shown in
) by hand toward the front of brick
until the cartridge is fully ejected. There will be some resistance as the cartridge
Figure 6-3. Location of Cables
DC Power Cable SCSI Cable SCSI ID Cable