Great Planes Zero Fun Force EP ARF - GPMA1195 User Manual
Page 10
❏
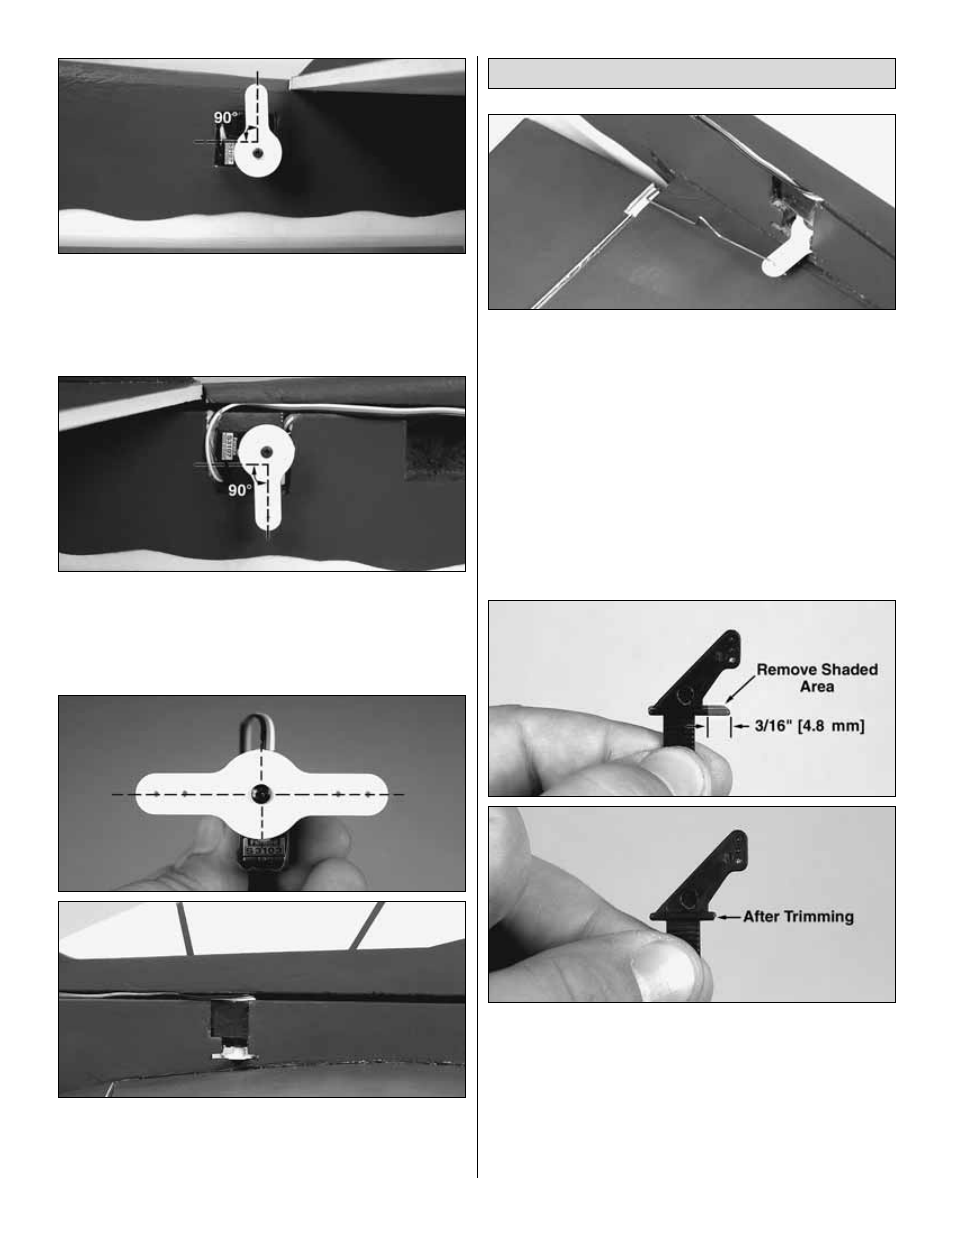
4. Epoxy a servo into the bottom of the rear servo cutout
from the left side of the plane. The output shaft should be
toward the front of the fuselage. Center the servo with your
radio and screw the extended arm onto the output shaft with
the arm oriented straight up.
❏
5. Epoxy the other tail servo into the cutout from the right
side of the plane side with the output shaft toward the front.
Center the servo with your radio and screw the extended arm
onto the output shaft with the arm oriented straight down.
❏
6. Center your aileron servo with your radio and screw the
extended double-sided arm onto the servo. When you glue the
extended servo arm, be sure it is exactly centered as shown.
Epoxy the aileron servo into the cutout in the fuselage.
❏ ❏
1. Locate the two 2-3/4" [70 mm] prebent aileron
pushrods. Slightly enlarge the outer hole on the aileron
servo arm. Insert the Z-bend end of the pushrods into the
outer hole on the aileron servo arm.
❏ ❏
2. Center your aileron servo to ensure it is at neutral. Use
a small clamp or some masking tape to hold the aileron at
neutral. Align the pushrods straight back towards the ailerons.
❏ ❏
3. Locate a black nylon control horn. Trim the small
plastic section away as shown.
❏ ❏
4. Make a small 1/4" [6.4 mm] long cut in the aileron
behind the bearing. Insert the 90° bend of the pushrod into
the middle hole of one of the black nylon control horns.
Install the Control Horns & Pushrods
10