Adjusting osd settings, Osd menu – HP w19e 19 inch LCD Monitor User Manual
Page 15
Adjusting OSD Settings
1 Press the MENU button to activate the OSD menu.
2 Press
or
to navigate through the functions. Once the desired function is highlighted, press the MENU
button again to activate it. If the selected function has a sub-menu, it will be displayed. Press
or
again
to navigate through the sub-menu functions. Once the desired sub-function is highlighted, press the MENU
button to activate it.
3 Press
or
to change the settings of the selected function.
4 To exit and save, select the Exit function. If you want to adjust another function, repeat steps 2–3.
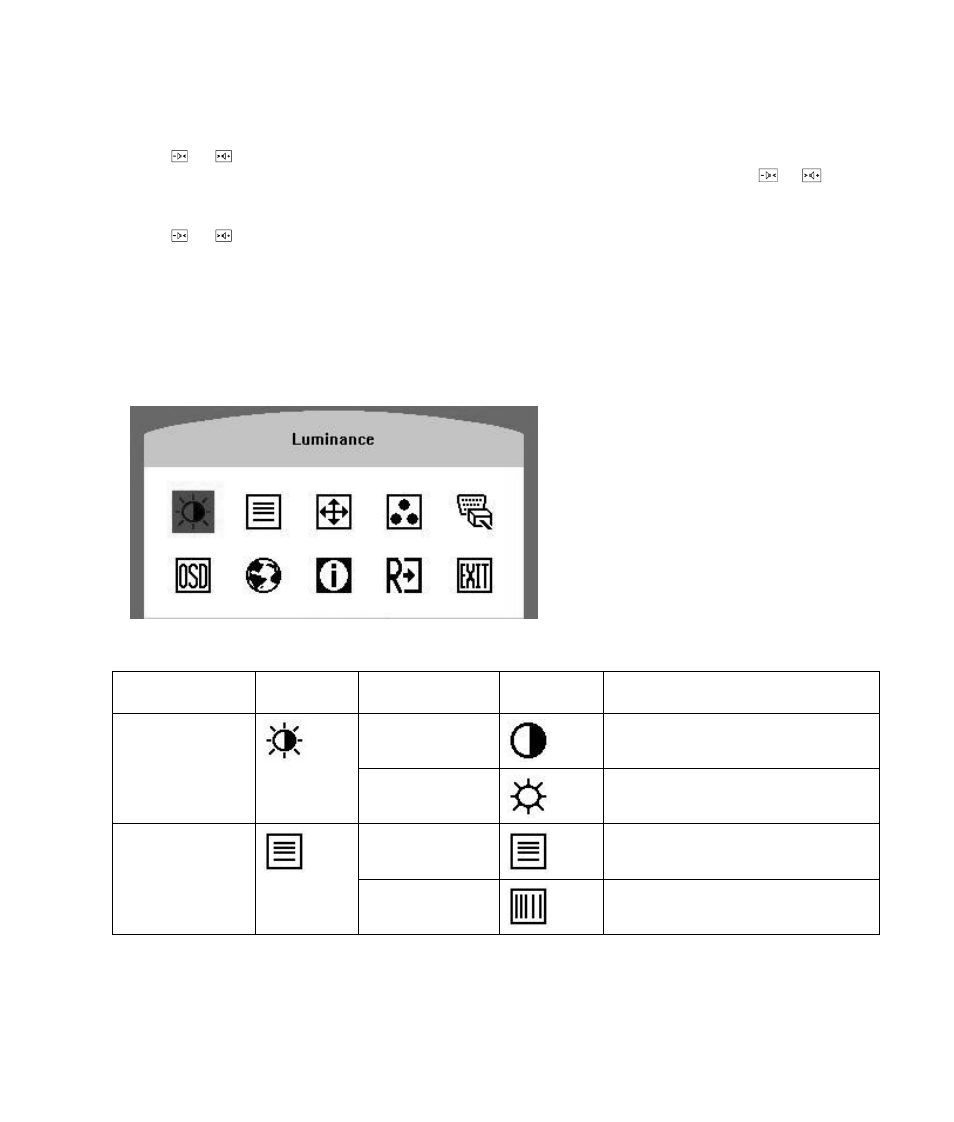
OSD Menu
The figure below shows the OSD menu that appears when you first press the MENU button. In this figure, the
Luminance icon has been selected, so it is highlighted and its title is displayed. Pressing MENU again will display
the sub-menu for this function.
Main Menu and Sub-Menu Items for Adjusting the OSD
Main Menu Item
Main Menu
Icon Sub-Menu
Item
Sub-Menu
Icon Description
Contrast
Contrast from digital-register
Luminance
Brightness
Backlight adjustment
Focus
Adjust picture phase to reduce horizontal-
line noise
Image Setup
Clock
Adjust picture clock to reduce vertical-line
noise