Head, Mount, Optional – ATN Thermal Vision Monocular OTIS-14 User Manual
Page 5: Helment, External, Power, Source
4
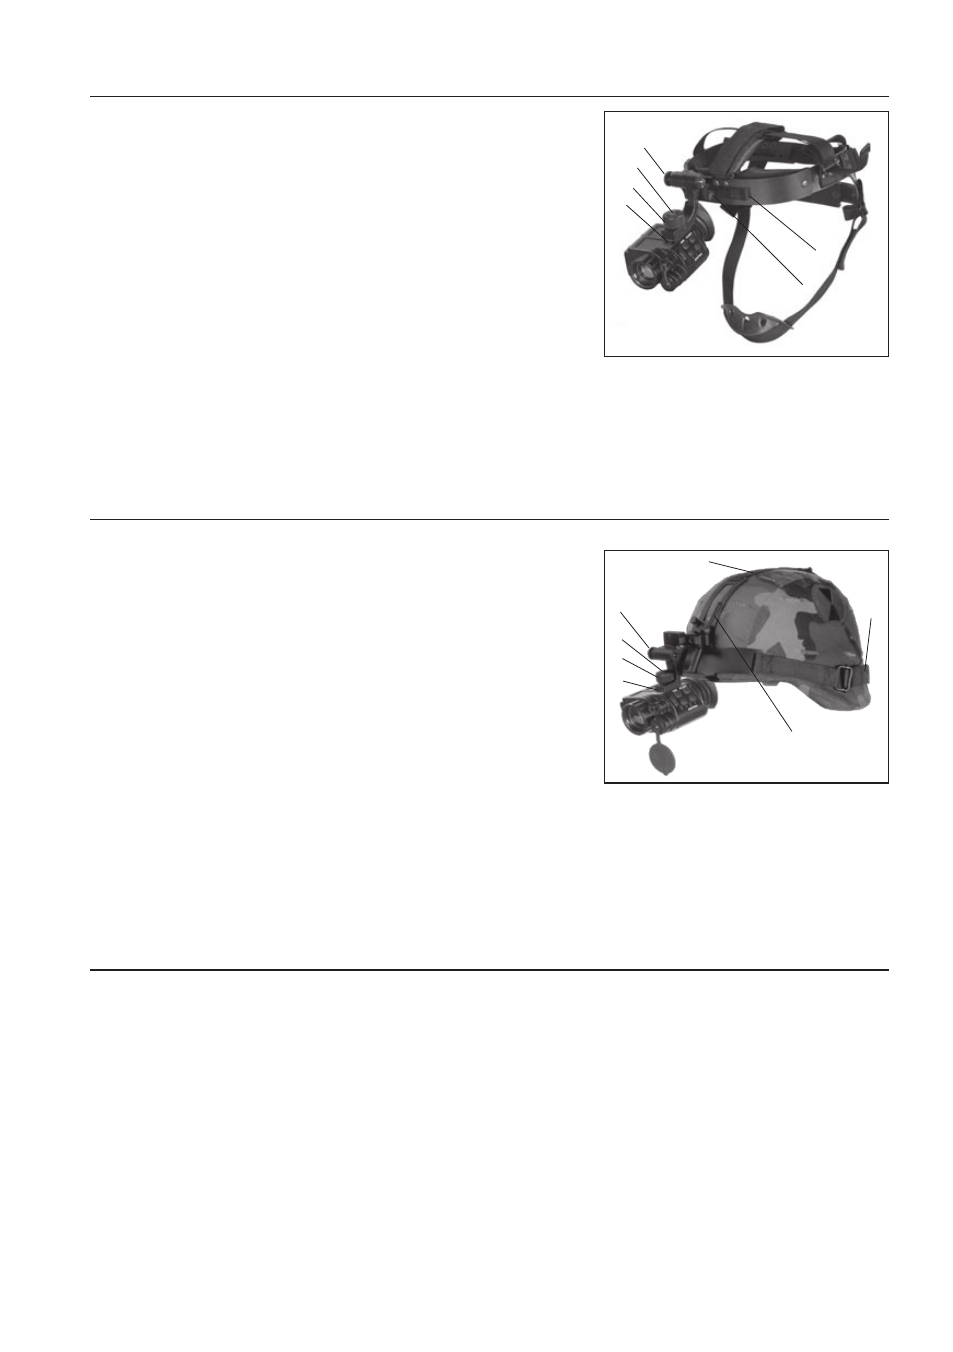
head
mount
(
optional
)
The operator can mount the monocular onto the head bracket
using any of two Mounting Rail located on the opposite sides
of the body, to be able to see through the eyepiece with his/her
right or left eye correspondingly.
To mount the OTIS-14 to a headmount, perform the following:
1. Loosen the screw (A). Push the button (B) and insert the rail of
the OTIS-14 into the socket (C) of the headset.
2. Place the headmount with OTIS-14 onto a head.
3. Loosen the screw (A) and move the unit along the rail for eye
relief adjustment.
4. The OTIS-14 headmount has a flip-up mechanism. Push the
button (D) on the side of mount and lift the unit up until the unit
fixates in the top position.
5. Push the same button (D) to lower OTIS-14 to the viewing position.
6. The OTIS-14 can be placed onto the right or left eye. In order to readjust the monocular for use with
the other eye, take the unit off the adapter, turn the unit to other side (for 180º) and mount it on the head-
mount adapter through the rail on this side. Push the button (E) and move the device along the slide-rail
(F) for comfortable position.
helment
mount
(
optional
)
Attachment of OTIS-14 to a standard PASGT helmet. The Helmet mount fits securely onto helmet
via a rugged strapping device and grooved hooks. With helmet
mount, the OTIS-14 can be positioned directly in front of user’s
eyes or flipped up out of viewing position.
1. Install the mount onto helmet as shown on the picture.
2. Tighten and fixate the straps (A)
3. Attach the monocular to the rail.
4. Loosen screw (C). Push button (B) and insert the bracket of
the OTIS-14 into rail (D) of the helmet mount.
5. Place the helmet with OTIS-14 onto head.
6. Loosen the screw (C) and move the unit for proper eye relief
adjustment.
7. The OTIS-14 helmet mount has a flip-up mechanism. Push the
button (E) on the side of mount and lift the unit up until the unit fixates in the top position.
8. Push the same button (E) to lower OTIS-14 to viewing position.
9. The OTIS-14 can be placed onto the right or left eye. In order to readjust the monocular for use with
the other eye, take the unit off the headmount adapter, turn the unit to other side (for 180º) and mount it
on the adapter through the rail on this side. Push the button (E) and move the device along the slide-rail
(F) for comfortable position.
external
power
source
IMPORTANT: When the unit is to be powered with external sources, first make sure the batteries have
been taken out.
To connect an external power source you can use any of the cables of the monocular package. As an
external power source, a standard network controller with outer voltage of 6V and current of over 0.5A
can be applied.
Remove the protective cover off the connector input and attach the cable. To connect an external
source, we recommend you to use a 6mm standard double-pole socket in the way the positive contact
is the central contact.
B
C
A
D
E
F
B
C
A
D
E
F
A