American Dryer Corp. T30 User Manual
Page 25
113429 - 9
Telephone 01422 822282
25
!
!
!
Regulated Gas Valve
Refer to “Gas Pressure Adjustment” on this page to adjust
the gas valve to the appropriate burner pressure listed on
page 22. The supply pressure must also match what is
listed on page 22 for the type of gas to be used.
Important
Conversions done improperly can result in a fire or
explosion!
Conversion from Propane or Butane Gas
to Natural Gas
The following conversion allows the dryer to be operated with
natural gas.
Parts Required for Conversion:
Description
P/N
Qty
Vent Cap and Spring
140415
**
Burner Orifice (Injector)
*
**
* Refer to page 22 for orifice (injector) size.
** T20 and T30 will require 1; T50 and T75 will require 2.
Instructions
Disconnect electrical power to the dryer.
Close all shutoff valves in dryer’s gas supply line.
Important
The T50 and T75 will require that the following
procedures be performed on both burner
assemblies.
Open the panel located just below the loading door.
Locate the gas train and disconnect the union, 3 electrical
plugs, and the gas train mounting screws from the burner.
Carefully slide the gas train out of the gas train enclosure.
(The carbon ignitor located at the far end of the gas train is
very fragile.)
Remove 2 burner tube mounting screws and remove burner
tube in order to gain access to the orifice.
Using a 3/8” wrench or socket, remove the existing orifice
and replace it with an orifice from the kit.
Important
Use extreme care when removing and replacing
orifice (injector). This orifice (injector) is made of
brass, which is easily damaged.
Reinstall the burner tube onto the burner base.
Select from the following 3 options, the conversion to be
performed:
• Converting from unregulated L.P. to regulated natural
gas: use a flat screwdriver to remove the cap with
blocking pin and install the regulator vent cap from the kit
(P/N 140415).
• Converting from unregulated L.P. to unregulated
natural gas: no change to the regulator is required.
• Converting from regulated L.P. to regulated natural gas:
remove the white plastic regulator adjustment screw
(under vent cap). Remove spring under screw and
replace with spring from kit (P/N 140415). Replace
regulator adjustment screw.
Install the gas train back into the dryer gas train enclosure.
Be sure the tab at the rear of the gas train engages into the
mounting slot.
Connect the union and the 3 electrical plugs.
Open all shutoff valves, reconnect electrical power to the dryer,
and test for leaks.
Operate the dryer through 1 complete cycle to ensure proper
operation.
With dryer operating, check the manifold (burner) pressure
at the tap on the gas valve to ensure proper operating pressure
(refer to chart on page 22).
Gas Pressure Adjustment
Disconnect electrical power to the dryer.
Important
The T50 and T75 will require that the following
procedures be performed on both burner
assemblies.
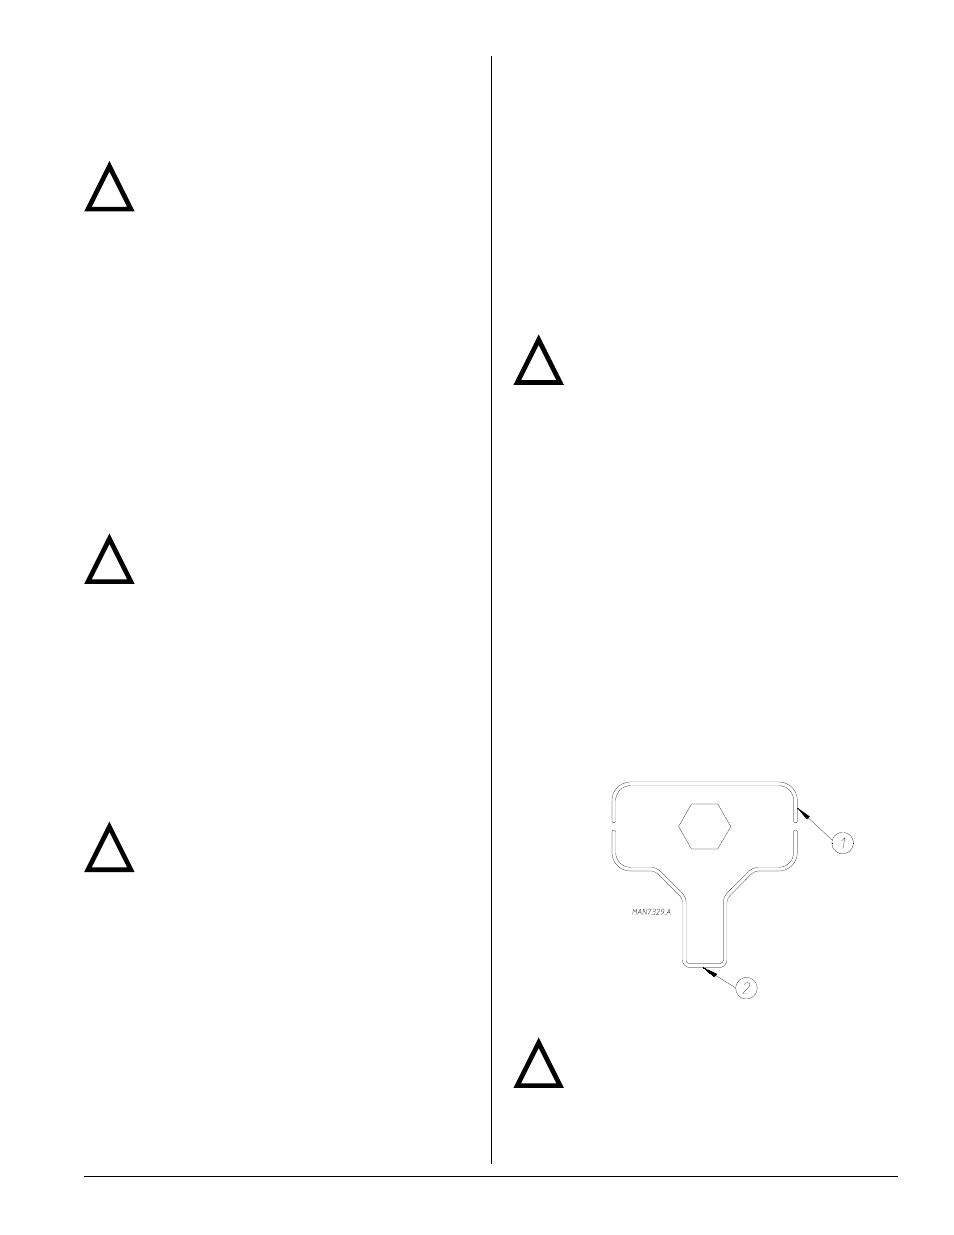
To adjust gas valve’s internal regulator, remove the regulator
vent cap with the regulator adjustment tool, which is located
on the back guard between the gas inlet and exhaust outlet
(refer to the illustration below for proper use of adjustment
tool). Be sure to use one of the wide ends of the adjustment
tool for removal of the vent cap. Once vent cap is removed,
the narrow end of the adjustment tool can be used to turn the
plastic adjustment screw in the valve. Turn the screw
clockwise to raise pressure and counterclockwise to lower
pressure.
Gas (burner) pressures are measured with the burner in
operation for all burner adjustment conditions. Therefore
once the necessary adjustments have been made, the dryer
must be operated in a heating cycle to verify that the pressure
is correct. If it is not correct, you must discontinue the power
to the unit and make further adjustments. Repeat these steps
as many times as necessary to achieve the correct burner
pressure. Once the adjustment of the valve is complete, the
vent cap must be replaced and sealed with, for example,
paint to prevent maladjustment by the user.
!
!
Edge #1 for vent cap
Edge #2 for adjustment screw
Warning (CE Dryers)
This appliance must only be operated with the gas
type indicated on the dryer’s data plate. If the
appliance is converted (gas type changed), a data plate
amendment must be obtained from JLA Limited.
Conversions done improperly can result in a fire or
explosion!