LG SP520 User Manual
Page 19
Connecting
19
C
onnecting
2
2. The [Connection Setting] menu appear on the
screen. Use W/S to select [Wireless] and press
ENTER (b).
3. Select [Yes] and press ENTER (b) to continue.
The new connection settings reset the current
network settings.
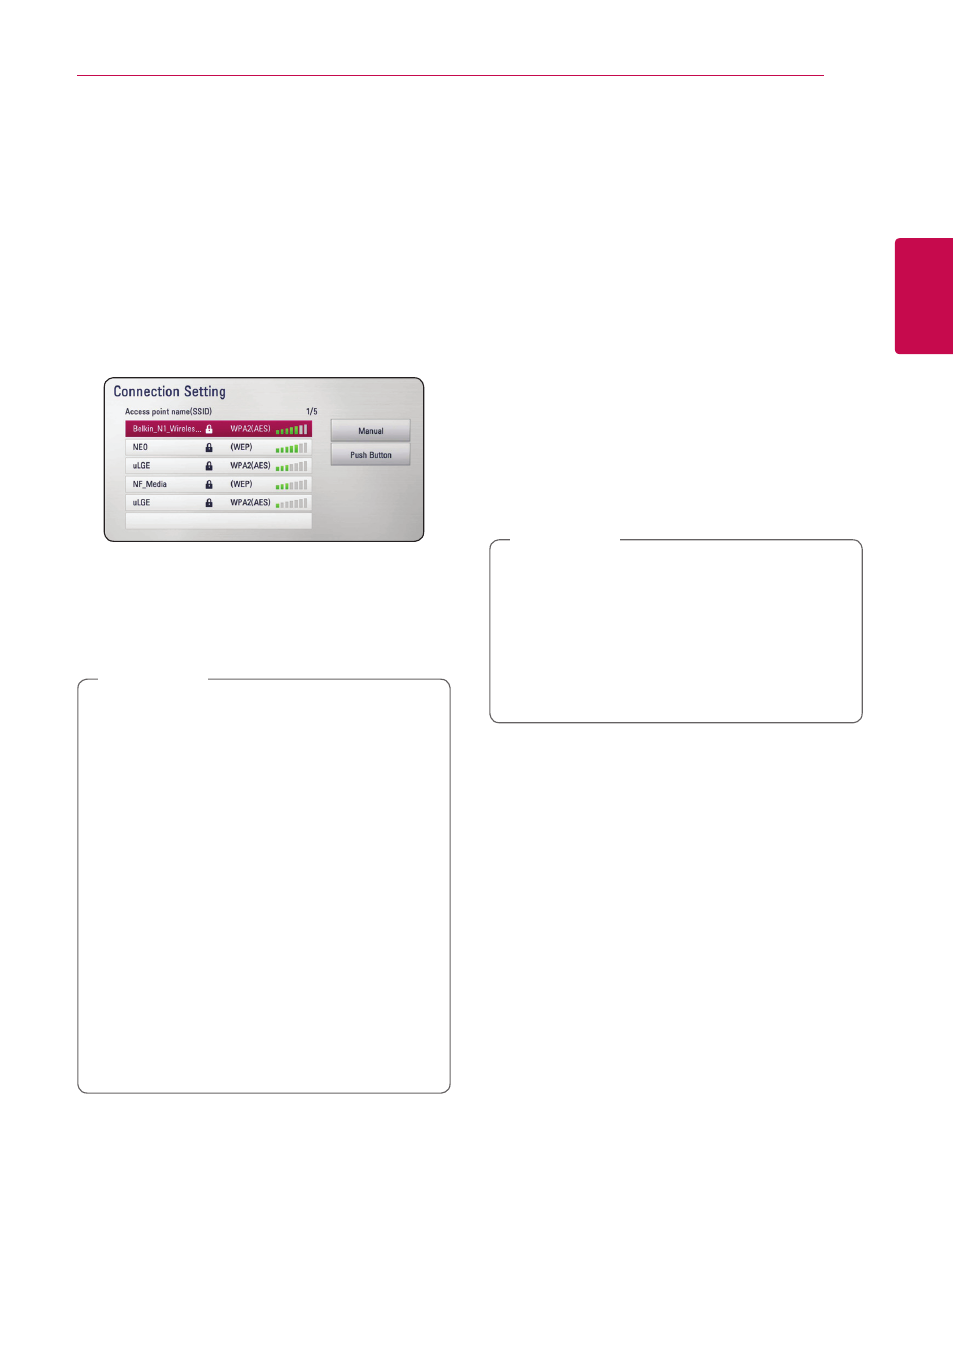
4. The unit scans the all available access points or
wireless routers within range and display them
as a list. Use W/S to select an access point or
wireless router on the list, and then press ENTER
(b).
If you have security on your access point or
wireless router, verify that the WEP or WPA key
that was entered into the unit matches the
router’s information exactly. You need to input
the security code as necessary.
y WEP security mode generally have 4 keys
available on an access point or wireless
router’s setting. If your access point or
wireless router use WEP security, enter the
security code of the key “No.1” to connect
on your home network.
y An Access Point is a device that allows you
to connect to your home network wirelessly.
y If your access point or wireless router
supports the PIN Code configuration
method based on WPS(Wi-Fi Protected
Setup), press yellow (Y) colored button and
note the code number on the screen. And
then, enter the PIN number on a setting
menu of your access point or wireless router
to connect. Refer to the documentation for
your network device.
,
Note
[Manual] – Your access point may not be
broadcasting its access point name (SSID).
Check your router settings through your
computer and either set your router to
broadcast SSID, or manually enter the access
point name (SSID) in [Manual].
[Push Button] – If your access point or
wireless router that supports the Push Button
Configuration method, select this option and
press the Push Button on your access point or
wireless router within 120 counts. You do not
need to know the access point name (SSID) and
security code of your access point or wireless
router.
5. Use W/S/A/D to select the IP mode
between [Dynamic] and [Static].
Normally, select [Dynamic] to allocate an IP
address automatically.
If there is no DHCP server on the network and
you want to set the IP address manually, select
[Static] then set [IP Address], [Subnet Mask],
[Gateway] and [DNS Server] using W/S/
A/D. If you make a mistake while entering
a number, press [<–] to clear the highlighted
part.
,
Note
6. Select [OK] and press ENTER (b) to apply
network settings.
7. The unit will ask you to test the network
connection. Select [OK] and press ENTER (b) to
complete the network connection.
8. If you select [Test] and press ENTER (b) at
step 7 above, the network connection status is
displayed on the screen. You can also test it on
the [Connection Status] in the [SETTING] menu.