LUMATEQ LL50 User Manual
Page 2
LUMATEQ is a division of TACO Metals, Inc.
To view the entire portfolio of LUMATEQ products and for Warranty and Product Information, go to lumateq.com
Corporate Headquarters 50 NE 179 Street, Miami, FL 33162 • 305.770.2392 • Fax: 305.653.8569 ©2014 All Rights Reserved
INSTRUCTIONS
Occupation of the Connection-Wires
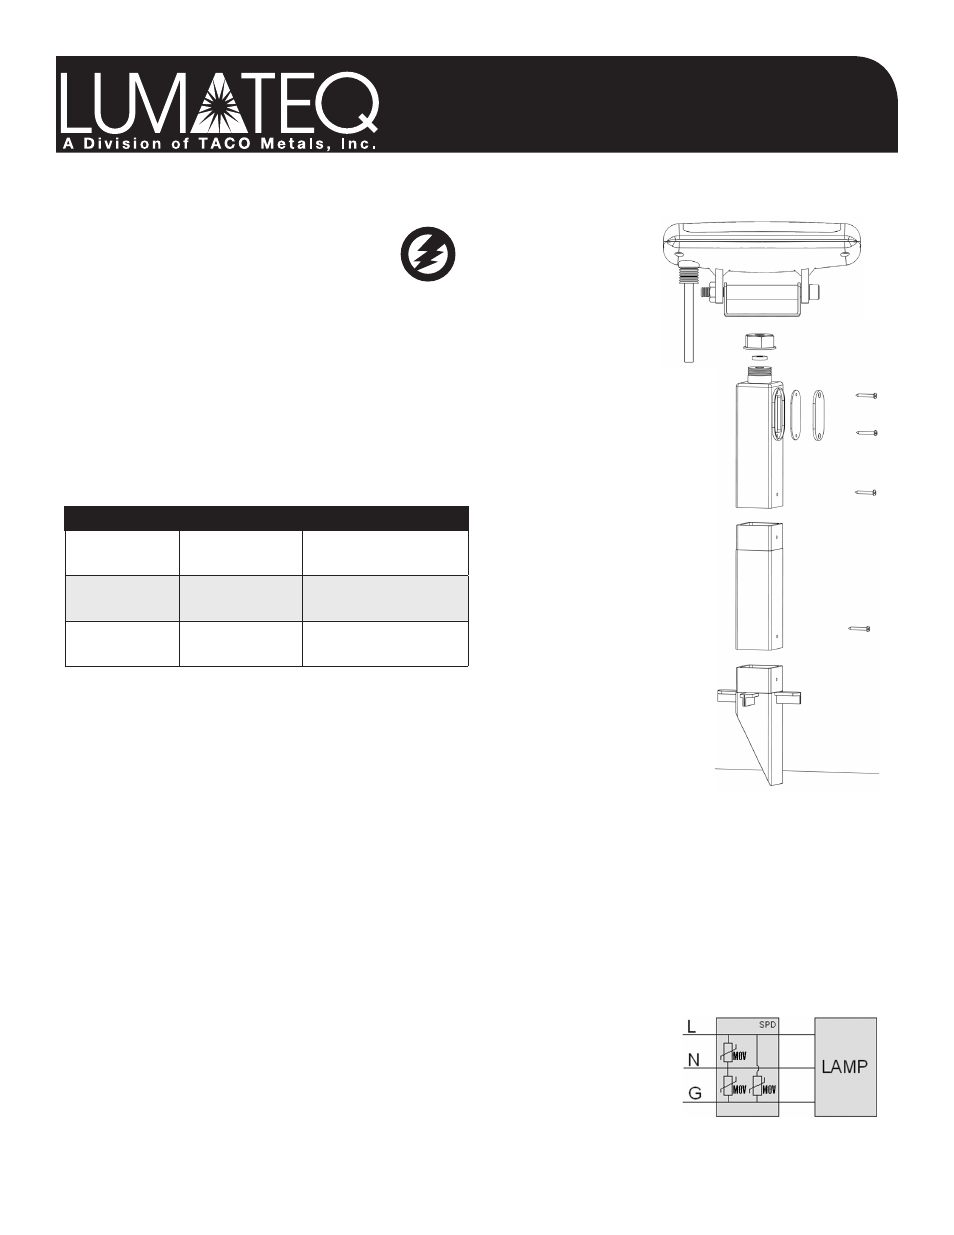
Installation Instructions
1) Assemble the spike body
(C) as shown in diagram using the screws (D)
provided to attach the 3 sections of the body together.
2) Slide the Nut
(A) over the wire from the light.
3) Slide the rubber washer
(B) behind the nut.
4) Place the large mounting hole in the light bracket over the threaded stud on top of the spike.
5) Pass the wire through the hole and tighten the nut down to the spike.
6) Connect with wire nuts through access port on the side of the spike, and seal with gasket
(E) and cover plate (F).
LED Landscape Light 6-Watt (LL50)
A
B
E F
C
C
C
D
W
A
RN
ING!
Electrica
l D
ev
ic
e
V
oltage
W
IrIng
C
olors
C
onneCtIon
110-240V AC
B
LACK
W
hIte
L
INe
(L)
N
eutRAL
(N)
12-28V AC
B
LACK
W
hIte
L
INe
(L)
N
eutRAL
(N)
12-28V DC
B
LACK
W
hIte
N
eGAtIVe
(-)
P
ostItIVe
(+)
INSTRUCT
-LL50
Contents
• 1- LED floodlight with stainless steel bracket
• 1- Plastic Stake (3 pieces)
• 1- Electrical cover for stake
• 1- Hardware
Tools Needed
• Phillips screwdriver (manual/powered)
• Pliers
• Circuit tester
• Silicone caulking
• Wire nuts (3)
Addendum:
LUMATEQ equipment that is directly connected to AC mains (e.g. 120/220/277VAC) can be damaged by short circuit and overload
conditions. In addition, lightning surges or load switching transients (originating outside the bulb) can create voltage spikes or ring waves
that can stress and ultimately damage components and render the fixture inoperable. Given that the value proposition for LED bulbs is
not only lower energy usage, but longer lifetimes, it will be crucial that transient voltage protection is taken into account to eliminate field
failures driven by the electrical environment.
Ensure the following steps are taken to decrease the chance of damage from short circuits and overload conditions:
1. Do not use mechanical timers or contactors to switch on the lamp. These contacts are known
to produce voltage spikes which are detrimental to the circuitry of the lamp.
It is recommended to use a solid state relay to provide power to the fixture.
2. Replace old circuit breakers, as corroded contacts on both the bus bar and internal contacts
of the breaker can cause destructive electrical spikes.
3. Use a surge protection device (SPD) spanning both Line, Neutral and Ground.
These devices contain MOV’s (a metal oxide varistor) which can help protect the LED bulb from
overvoltage surges and ring-wave effects by clamping short-duration voltage impulses as shown in drawing.