Installation, 2 closing the door, 1 positioning – Electrolux EN3450COW User Manual
Page 26: 2 electrical connection, 3 location, 4 rear spacers
Only service is allowed to replace the con-
trol unit. Contact your Service Center.
7.2 Closing the door
1.
Clean the door gaskets.
2.
If necessary, replace the defective
door gaskets. Contact the After Sales
Service.
8. INSTALLATION
WARNING!
Read the "Safety Information"
carefully for your safety and cor-
rect operation of the appliance
before installing the appliance.
8.1 Positioning
Install this appliance at a location where
the ambient temperature corresponds to
the climate class indicated on the rating
plate of the appliance:
Cli-
mate
class
Ambient temperature
SN
+10°C to + 32°C
N
+16°C to + 32°C
ST
+16°C to + 38°C
T
+16°C to + 43°C
8.2 Electrical connection
Before plugging in, ensure that the volt-
age and frequency shown on the rating
plate correspond to your domestic power
supply.
The appliance must be earthed. The pow-
er supply cable plug is provided with a
contact for this purpose. If the domestic
power supply socket is not earthed, con-
nect the appliance to a separate earth in
compliance with current regulations, con-
sulting a qualified electrician.
The manufacturer declines all responsibili-
ty if the above safety precautions are not
observed.
This appliance complies with the E.E.C.
Directives.
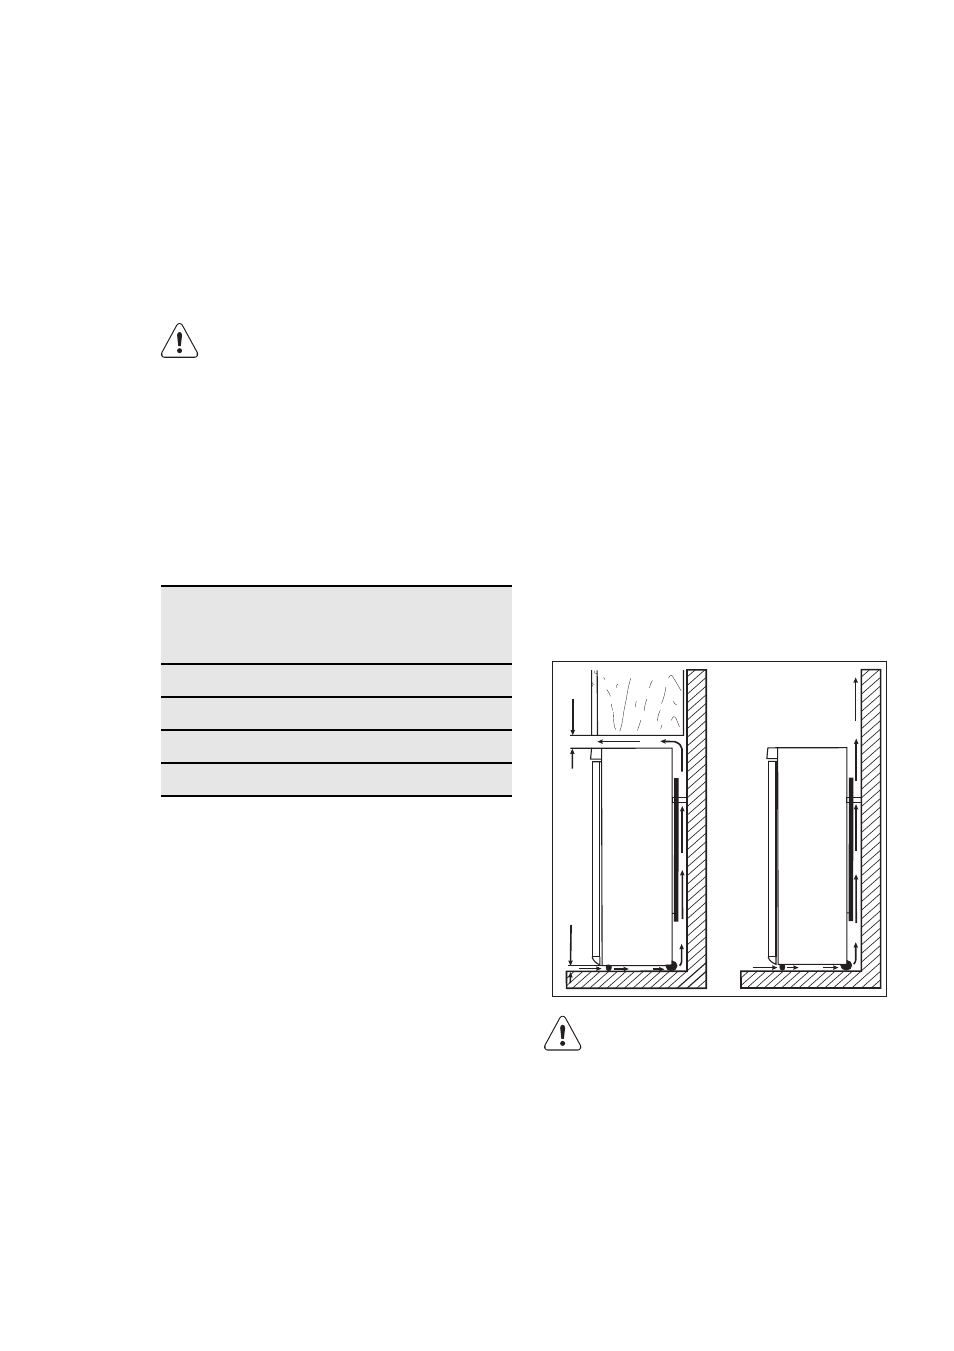
8.3 Location
The appliance should be installed well
away from sources of heat such as radia-
tors, boilers, direct sunlight etc. Ensure
that air can circulate freely around the
back of the cabinet. To ensure best per-
formance, if the appliance is positioned
below an overhanging wall unit, the mini-
mum distance between the top of the
cabinet and the wall unit must be at least
100 mm . Ideally, however, the appliance
should not be positioned below overhang-
ing wall units. Accurate levelling is ensur-
ed by one or more adjustable feet at the
base of the cabinet.
A
B
100 mm min
20 mm
WARNING!
It must be possible to disconnect
the appliance from the mains
power supply; the plug must
therefore be easily accessible after
installation.
8.4 Rear spacers
You can find the two spacers in the bag
with documentation.
Do these steps to install the spacers:
1.
Release the screw.
26 www.electrolux.com