Operation – Agri-Fab 45-03641 User Manual
Page 8
8
USING YOUR SPREADER
We do not recommend the use of any powdered lawn
chemicals, due to diffi culty in obtaining a satisfactory or
consistent broadcast pattern.
1. Determine approximate square footage of area to be
covered and estimate amount of material required.
2. Before fi lling the hopper make sure the fl ow control arm
is in the off position and the closure plate is shut.
3. Break up any lumpy fertilizer as you fi ll the hopper.
4. Set the adjustable stop with the fl ow control arm still in
the off position. Refer to the application chart on this
page and to the instructions on the fertilizer bag to select
the proper fl ow rate setting.
5. The application chart is calculated for light to heavy
application at a vehicle speed of 3 mph, or 100 ft. in 23
seconds. A variation in speed will require an adjustment
of the fl ow rate to maintain the same coverage. The
faster you drive, the wider the broadcast width.
6. Make sure the drive pin is installed in the axle before
starting the spreader.
7. Always start the tractor in motion before opening closure
plate.
8. Always shut the closure plate before turning or stopping
the tractor.
9. If fertilizer is accidentally deposited too heavily in a small
area, soak the area thoroughly with a garden hose or
sprinkler to prevent burning of the lawn.
10. To insure uniform coverage, make each pass so that the
broadcast pattern slightly overlaps the pattern from the
previous pass as shown in fi gure 17. The approximate
broadcast widths for different materials are shown in
the application chart on this page.
11. When broadcasting weed control fertilizers, make sure
the broadcast pattern does not hit evergreen trees,
fl owers or shrubs.
12. Heavy moisture conditions may require a cover over the
hopper to keep contents dry. The vinyl cover acts as a
wind and moisture shield, but should not be used as a
rain cover.
OPERATION
HOW TO USE YOUR SPREADER
SETTING THE FLOW CONTROL
(Refer to fi gure 13 on page 7.)
1. Loosen the nylon wing nut, set the adjustable stop to the
desired fl ow rate setting and retighten the wing nut. The
higher the setting number, the wider the opening in the
bottom of the hopper.
2. Refer to the application chart on page 9 and to the
instructions on the fertilizer bag to select the proper fl ow
rate setting.
3. Pull the fl ow control arm against the adjustable stop for the
on position and toward the hopper for the off position.
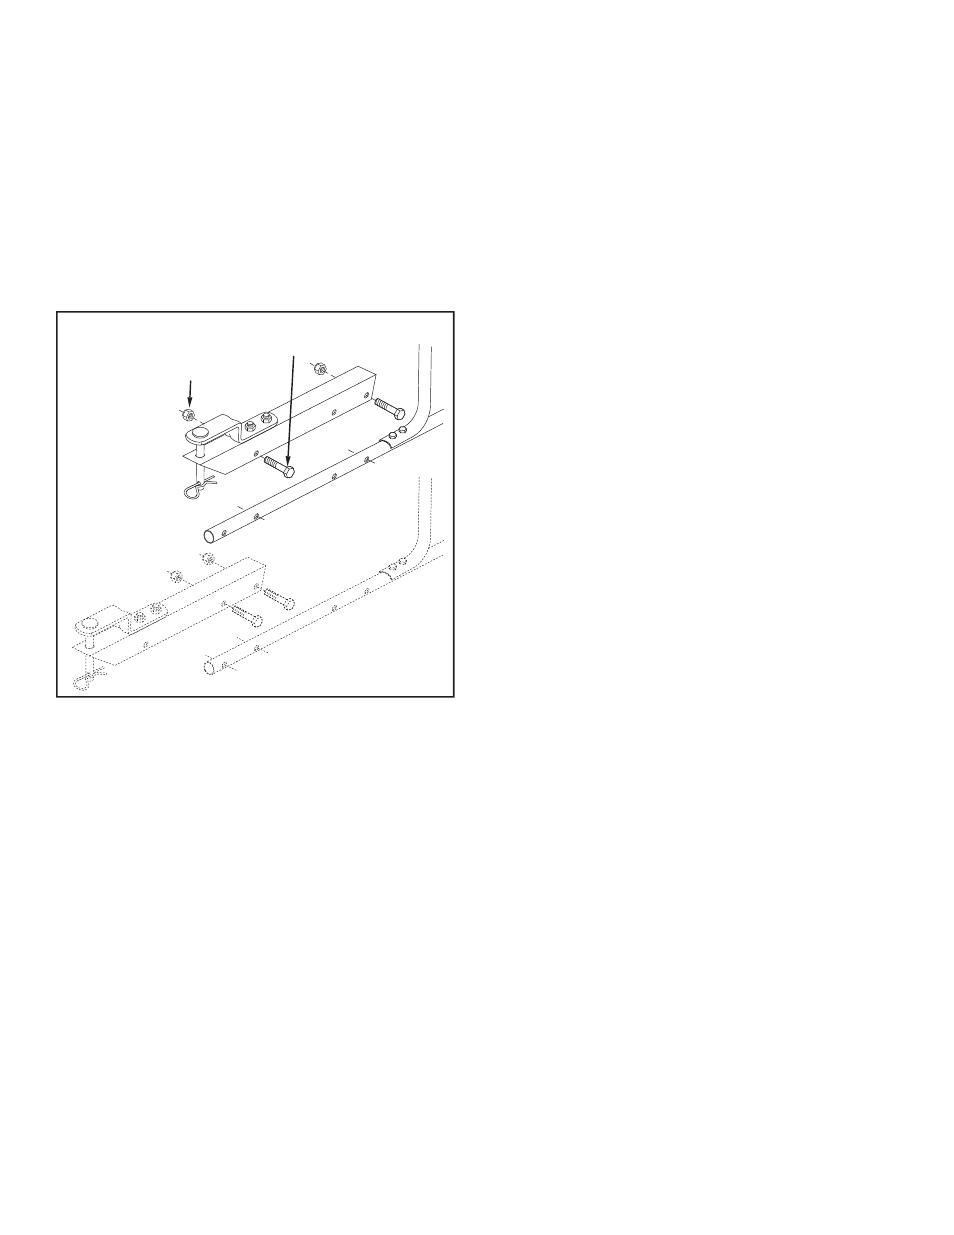
FIGURE 16
(G) 1/4" NYLOCK
HEX NUT
(B) 1/4" x 1-3/4"
HEX BOLT
28. For most vehicles, assemble the hitch extension bracket
to the holes in the hitch tube shown at the
top of fi gure
16. Use two 1/4" x 1-3/4" hex bolts (B) and 1/4" nylock hex
nuts (G) tightened only fi nger tight. Attach the spreader
hitch to your vehicle hitch. Check for interference with
the spreader directly behind and out to both sides of
the vehicle. Lift the spreader at each position to make
sure there is no interference with the spreader's fl ow
control. If there is interference with the rear of the vehicle,
assemble the hitch extension bracket as shown at the
bottom of fi gure 16.
29.
Tighten the bolts and nuts when fi nished.
THE FREE WHEELING FEATURE
(Refer to fi gure 4 on page 5.)
The spreader is equipped with a removable pin in the left
(drive) wheel. Remove the pin to disengage the drive wheel
so that the axle, gears and spreader plate do not rotate. With
the drive wheel disengaged, the spreader may be towed at
speeds up to 20 mph. If the drive wheel is engaged do not
exceed 6 mph.