Installation continued, Operation continued, Figure 4 – ProMariner TruePower 400PS User Manual
Page 9: Figure 3
I n s t a l l a t i o n G u i d e l i n e s
7
12
INSTALLATION CONTINUED
To Connect the Chassis Ground: Refer to figure 3
1
.Using the #3 standard Phillips screwdriver, loosen the screw on the chassis ground lug.
2
.Using a #8 Ring Terminal connect a No. 8 AWG copper cable between the inverter’s
chassis ground lug and the DC grounding point for your system. Tighten the screw to a
torque of 15 inch pounds.
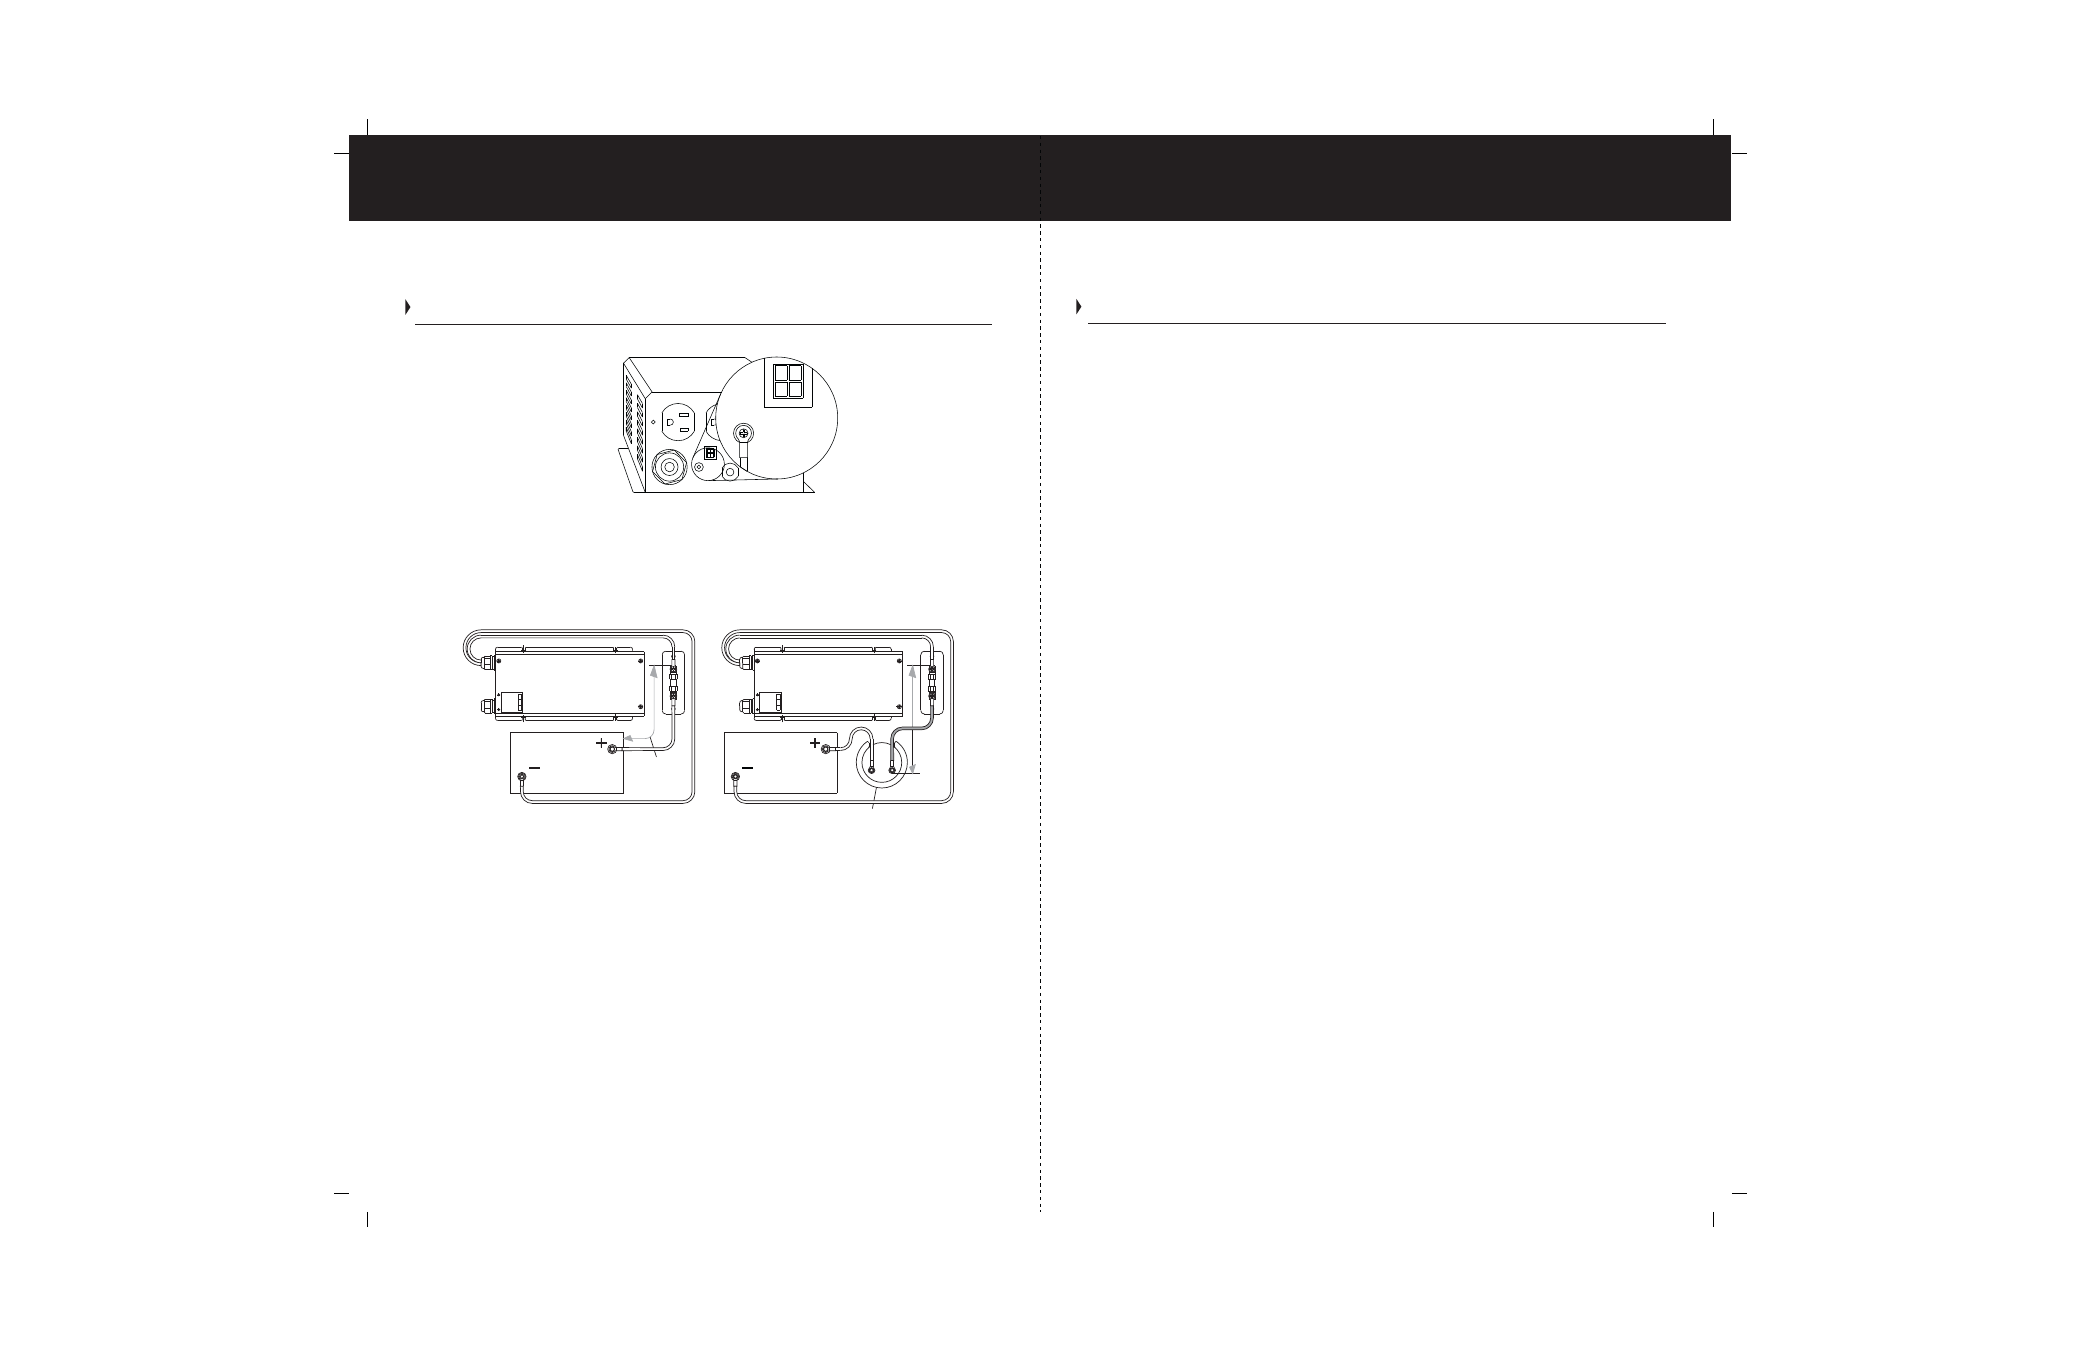
Connecting the DC Cables: Refer to figure 4
Figure 4 - Connecting the DC Cables
1
. Switch the inverter On/Off switch to the Off position.
2
. Route the DC cables from the inverter towards the battery.
3
. Using a #8 AWG or larger red wire install a 70 Amp DC fuse or a DC circuit breaker
within 7 inches of the battery or battery switch as shown in fig. 4. Remove the fuse or
switch off the breaker for the remainder of the installation.
4
. Connect the RED positive (+) lead coming from the inverter DC input to the output
side of the fuse or circuit breaker. Tighten the connection terminals to the
manufacturer’s recommendations. Test that the cable is secure.
5
. Connect the BLACK negative (-) lead coming from the inverter DC input to the
negative battery terminal [or to the current shunt if an amp hour counting device is
used. Tighten the connection terminals to the manufacturer’s recommendations.
Test that the cable is secure.
Figure 4
OPERATION CONTINUED
Resetting the Inverter:
To reset the TruePower400PS, turn the ON/Off switch to Off and
then back to ON.
Resetting the Supplemental Circuit Protection Button:
If there is a short circuit or an
overload condition, the supplemental circuit protection button trips. To reset the TruePower400PS,
clear the overload condition then press the supplemental circuit protection button.
Resetting the Ground Fault Circuit Interrupter (GFCI):
Function- The GFCI receptacle
protects the receptacle output against a ground fault.
Correcting a Ground When a ground fault condition is detected, the Reset button on the
GFCI receptacle Fault- will trip and the power to an appliance is interrupted. To resume
normal operation, determine and correct the ground fault, then press the Reset button.
G e n e r a l O p e r a t i o n
Monthly Testing - Once a month, with either shorepower or the TruePower400PS turned
ON, press the Test button on the GFCI receptacle. The Reset button should trip. Press
it to reset the GFCI and to continue with normal operation. If the Reset button does not
trip, the GFCI may have failed. Contact your dealer or ProMariner to have a qualified
technician inspect the unit.
Resetting as the Result of an Overload:
The TruePower400PS has a high surge capacity of 1000 watts for 5 seconds.
If the appliance(s) connected to the unit try to draw excess power for more than
5 seconds, the TruePower400PS will shut down and the Red Fault light will illuminate.
After removing the overload condition, the TruePower400PS will cycle through a
15 second self check and automatically reset to operating levels.
Operating Several Appliances at the Same Time:
If you are going to operate several appliances from the TruePower400PS at the
same time, turn them on independently, after you have powered up the inverter.
This action ensures that the TruePower400PS does not have to deliver the starting
current for all of the appliances at once. The TruePower400PS can accommodate
several appliances at once as long as they do not exceed more than a combined
total of 400 watts.
Recharging Your Batteries:
We recommend you recharge your batteries before they are 50% discharged. This
will provide a much longer life cycle than recharging them when they are almost
completely discharged. It is recommended to use a Remote Battery Status indicator
to monitor the battery levels and determine optimum recharge times and cycles.
Ground
Termination
DC Input
Remote
DC Grounding
Connector
Battery Switch
Battery
Battery
G
L
N
AC OUTPUT WIRING
AC OUTPUT WIRING
N
L
G
7" Maximum
Distance
from battery
7" Maximum
Distance
from battery
Figure 3