Troubleshooting continued, 12 volt wiring diagrams, Periodic maintenance – ProMariner ProTech-4 User Manual
Page 12
5
Troubleshooting Continued
3) If the Voltage is correct keep the charger powered up but disconnected from
the batteries number of hours as set by the (S1) dipswitches (shown on Page 4)
The green LED should become illuminated. Recheck the Voltage; it should be 13.5
Volts Lead Acid and 13.5 Volts for GEL from each positive lead to the negative lead.
4) If you see all of the above, your charger is most likely working correctly.
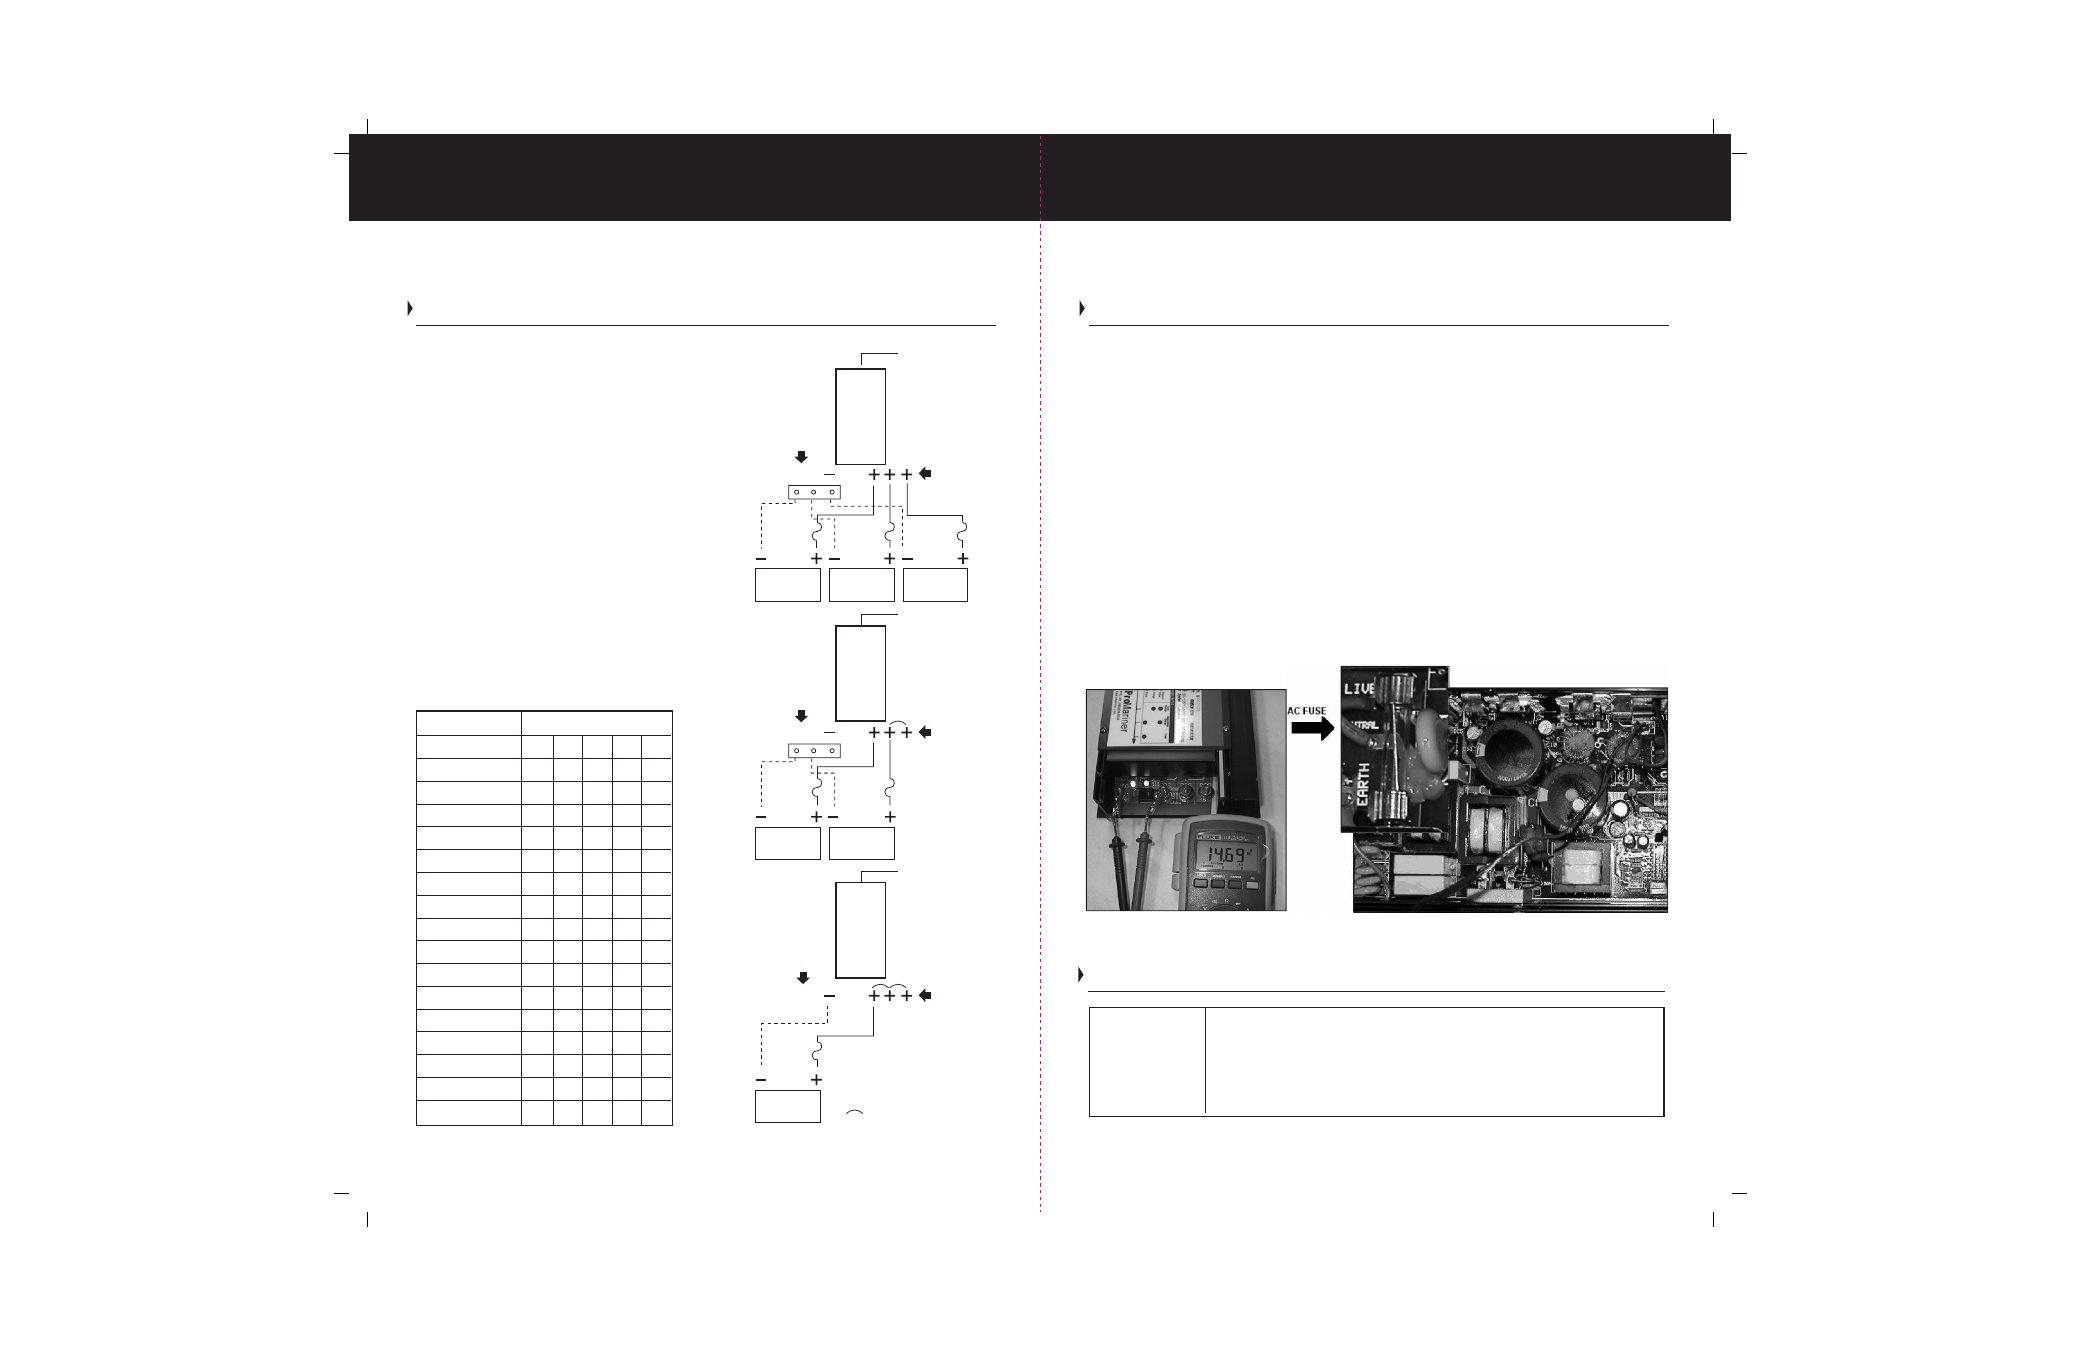
5) If you do not see the initial 14+ Volts, the charger either has a blown fuse, or circuit
board failure. Turn off AC power; remove the small cover and the large cover with
the fan. The fan and the AC (120 Volt or 240 Volt) terminal block are attached to the
main circuit board. There is a glass cylinder fuse (AC fuse) if it is blown replace it (the
fuse says 250 Volts- however if your boat doesn’t leave the United States and is a 30
Amp service. It can replace with a 120 Volt same amperage fuse. If it blows a second
time then a circuit board failure has occurred.
Professional Mariner Customer Service 1-800-824-0524 or email [email protected]
I n s t a l l a t i o n G u i d e l i n e s
10
Tr o u b l e S h o o t i n g / M a i n t e n a n c e
12 Volt Wiring Diagrams
bank 1
bank 2
bank 3
ProTech 4
ProTech 4
AC Input
AC Input
Common
Negative
DC Outputs
Common
Negative
DC Outputs
bank 1
bank 2
ProTech 4
AC Input
DC Outputs
Common
Negative
bank 1
Indicates Jumper Wire
Periodic Maintenance
Process:
When:
Per battery manufactures instructions monitor and maintain
proper levels of distilled water (not tap or bottled water that
contains minerals) in each battery.
Monthly
12 Volt 30 Amp Length Out and Back
Wire length 10' 15' 20' 25' 30'
AWG 10 8 6 6 4
12 Volt 40 Amp
Wire length 10' 15' 20' 25' 30'
AWG 8 6 6 4 4
12 Volt 50 Amp
Wire length 10' 15' 20' 25' 30'
AWG 6 6 4 4 2
24 Volt 25 Amp
Wire length 10' 15' 20' 25' 30'
AWG 12 12 10 10 8
36 Volt 15 Amp
Wire length 10' 15' 20' 25' 30'
AWG 14 12 12 10 10
32 Volt 16 Amp
Wire length 10' 15' 20' 25' 30'
AWG 14 12 12 10 10
Three Bank Wire Installation
A) Batteries negative wires are run separately
to the boats DC bus bar (not provided). Then a
single connection is made to the chargers
negative stud.
B) 3 separate positive wires attach to the 3
positive posts on the charger.
Two Bank Installation
When wiring for two batteries you will need to
use the jumper wire provided. The jumper goes
on the unloaded positive terminal and connects
to an adjacent positive terminal (Note: do not
leave a terminal post unloaded).
One Bank Installation
(See above) Use the provided jumper wire
and create another. We recommend crimped or
soldered connections and 14 AWG wire. (Note:
do not leave a terminal post unloaded).