Battery types continued, Troubleshooting, Installation – ProMariner ProTech-4 User Manual
Page 11
Battery Types Continued
6
I n s t a l l a t i o n G u i d e l i n e s
9
B a t t e r y Ty p e s & C h a r g i n g I n f o r m a t i o n
All ProMariner chargers can be wired in parallel. For example if you need 100 amps to
recharge your batteries, you can run two Protech 1250’s (our 50 Amp battery charger)
in parallel to get 100 Amps (doubling the amperage)
Troubleshooting
This testing procedure has been provided should you feel your charger is not
functioning correctly.
Note: When working with tools near electricity serious electrical shock can occur
resulting in injury.
1) Turn off all power to the charger and disconnect all the DC cables at the batteries.
2) Making sure the cables are not touching each other, apply AC (120 Volt or 240 Volt).
The charger should be in either the Fast Charge Mode or the Absorption Charge
Mode. Check the Voltage between each positive and negative lead Voltage should
be 14.7 Volts (for lead-acid batteries) or 14.1 (for GEL cell batteries).
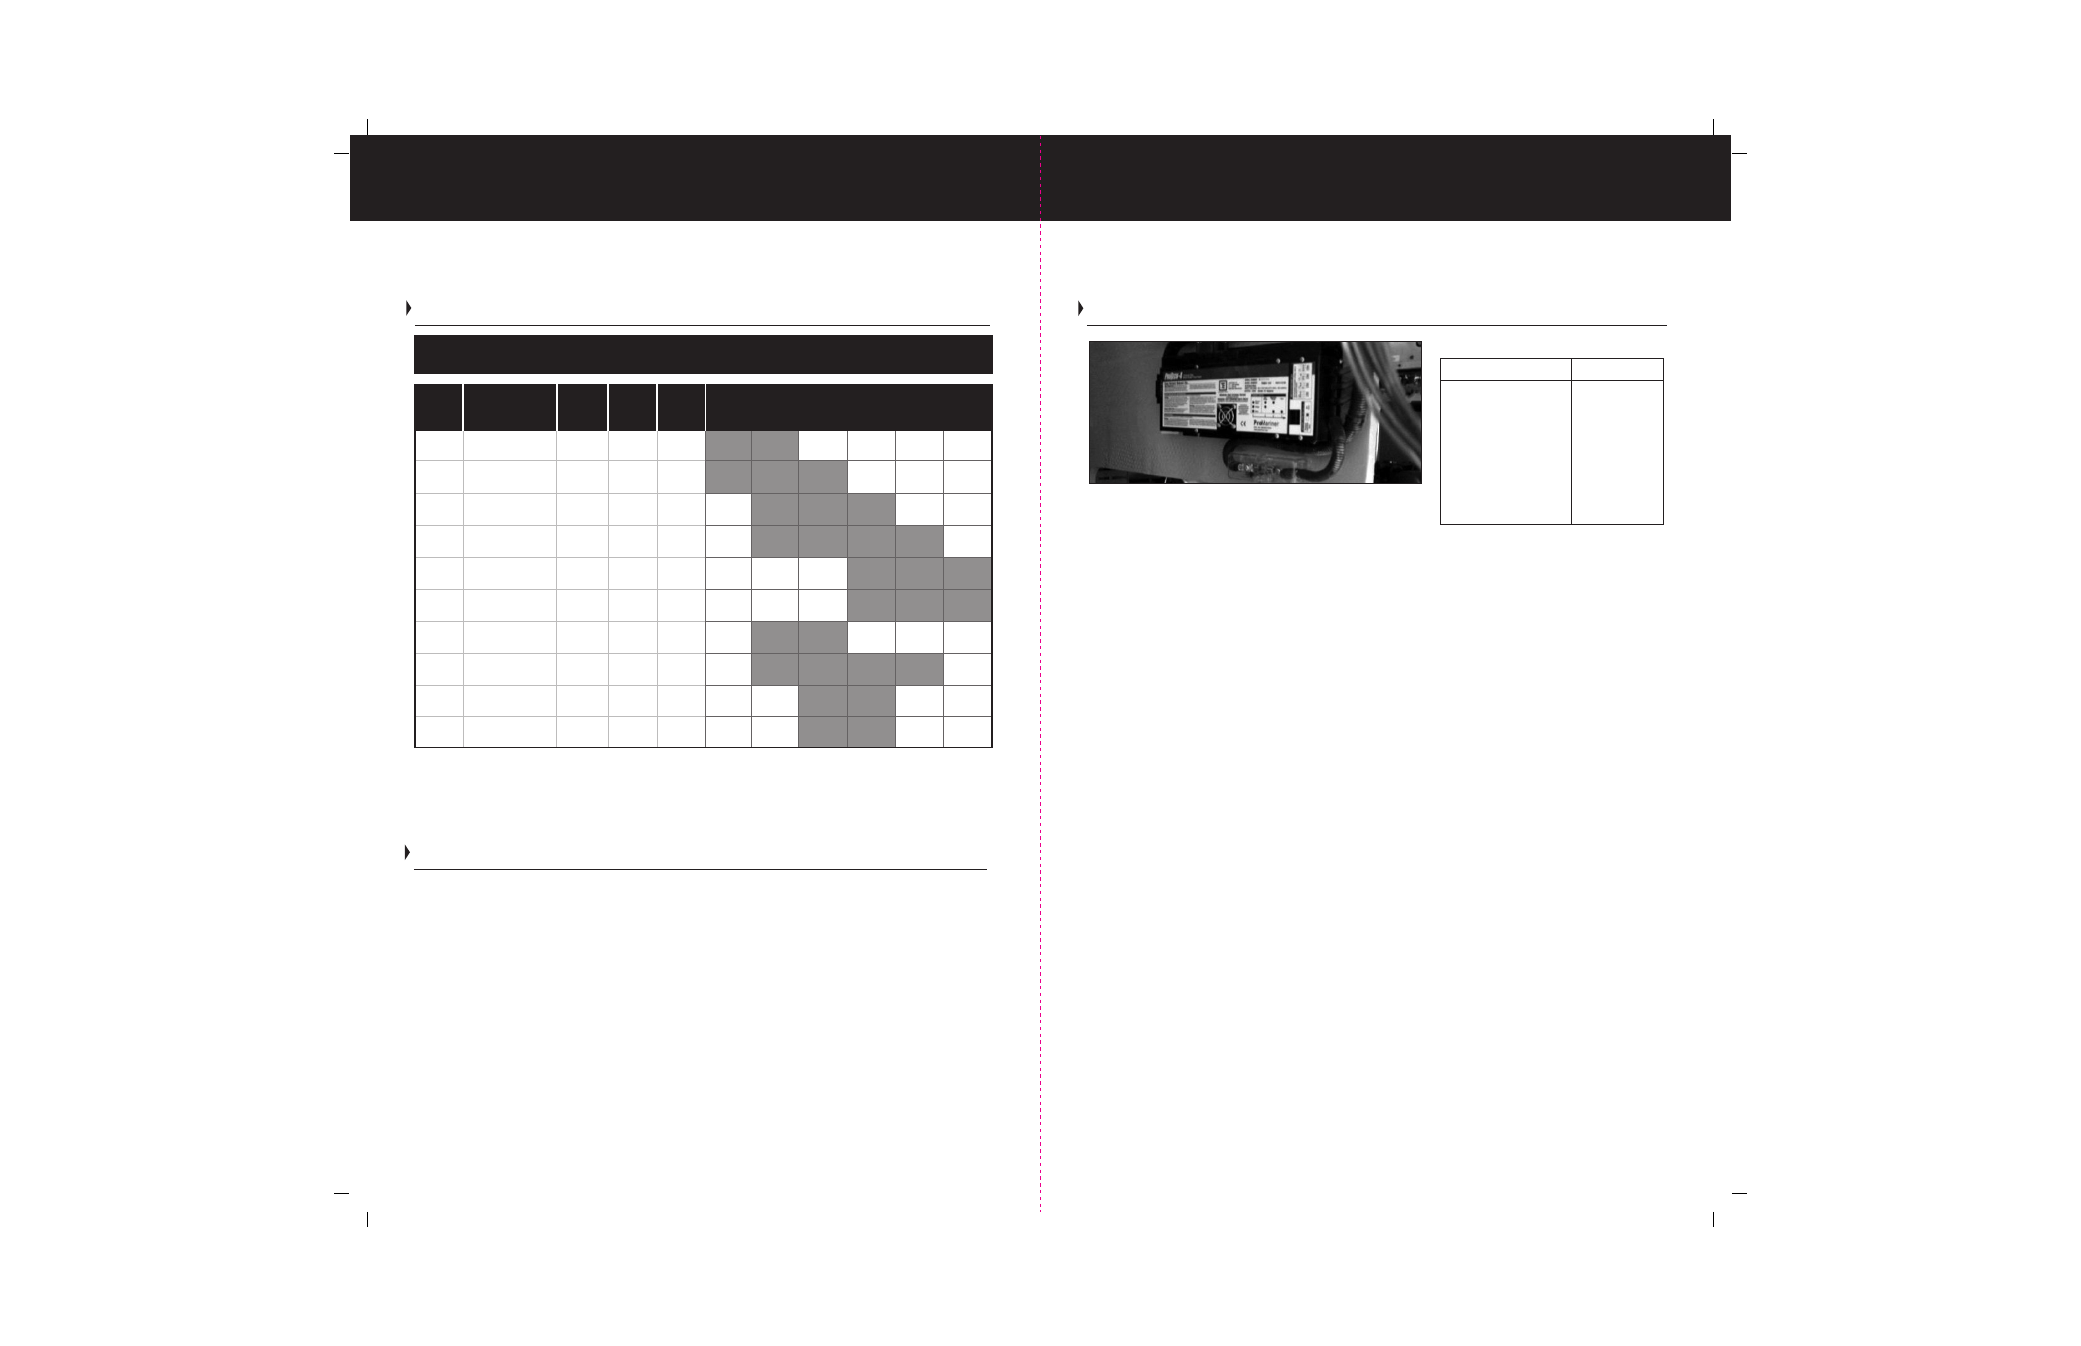
Installation
1) Make sure to mount the charger in a dry ventilated location with easy access. Remember to
leave plenty of room for battery cables and AC (120 Volt or 240 Volt) wires.
2) It may be helpful to create a template for mounting or to use the ProTech-4 as a template for
drilling four 1/8” pilot holes. Pilot holes help to prevent the material from cracking or splinting
while inserting a screw.
3) Battery cable wires should comply with ABYC A-20 standards, more importantly is that each
ungrounded DC conductor shall be provided with an over current protection fuse within 7
inches of connection to the DC electrical system or to the battery. The fuse rating should be 10
to 20 amps higher than the rated full output of the charger. Normally protection would be necessary
at the charger end of this wire but because the ProTech-4 series charger is self limiting (can not
exceed its rated current output) no fuse is necessary at the charger output. The provided fuse
in the negative lead protects the charger against an inadvertent reverse polarity connection.
4) We recommend strain relief on the cables within 6” of the charger for both AC and DC
conductors. Connect the DC cables to the charger first then to the batteries. Connect positive
battery end first, then connect the negative cables at the batteries.
5) Be cautious when connecting battery cables to the ProTech-4 charger and check to make
sure AC power is off. Be careful when placing battery cables near one another to avoid possible
shorting or arcing (sparking) that can occur when positive and negative wires touch.)
6) After all cables are in place check connections one last time and make sure all connections are tight
and that the charger is located in a dry place. Water damage will not be covered under the warranty.
7) Apply power and check to see that the LED lights are lit. If no LED’s are observed check shore power
AC (120 or 240 Volt connections). If LEDs are still not lit review the testing procedure on (Page 9).
AC CONNECTIONS: A terminal strip is provided on the charger for AC input. Connect Black (hot/line)
(Europe-Brown) to connection marked L. Connect White (neutral) (Europe-Blue) to connection marked
N. Connect Green (Earth/Ground) (Europe-Green/Yellow) to connection marked Earth. Install a circuit
breaker dedicated to the charger at the boat’s electrical panel to protect the AC wire to the charger.
Minimum AC wire size (105º C wire) - 16 gauge however, 14 or 12 is recommended. (See ABYC E-11
for exact wire sizes for length of run, ampacity, temperature, location and number of wires in bundles.)
61210 ProTech-4 1210 12 Volts 10 Amps 2 Bank
5 Hrs 10 Hrs
61215 ProTech-4 1215 12 Volts 15 Amps 3 Bank
3 Hrs 6 Hrs 10 Hrs
61220 ProTech-4 1220 12 Volts 20 Amps 3 Bank
5 Hrs 7 Hrs 10 Hrs
61230 ProTech-4 1230 12 Volts 30 Amps 3 Bank
3 Hrs 5 Hrs 7 Hrs 8 Hrs
61240 ProTech-4 1240 12 Volts 40 Amps 3 Bank
5 Hrs 8 Hrs 11 Hrs
61250 ProTech-4 1250 12 Volts 50 Amps 3 Bank
4 Hrs 6 Hrs 9 Hrs
62412 ProTech-4 2412 24 Volts 12 Amps 3 Bank
8 Hrs 10 Hrs
62425 ProTech-4 2425 24 Volts 25 Amps 3 Bank
4 Hrs 6 Hrs 8 Hrs 10 Hrs
63218 ProTech-4 3218 32 Volts 18 Amps 3 Bank
8 Hrs 10 Hrs
63616 ProTech-4 3616 36 Volts 16 Amps 3 Bank
9 Hrs 12 Hrs
Model
Number
Model
Name
Total
Charger
Output
No. of
Batteries
Charger
Output
0-95
95-195
195-295 295-395
395-595
595-895
Combined Total Number of Battery Amp Hours*
Dry Mount Chargers
Cruising and Sailing
120 VAC Single Phase 240 VAC single
12 volt 10 amp 10 amp 5 amp
12 volt 20 amp 10 amp 5 amp
12 volt 50 amp 20 amp 10 amp
12 volt 40 amp 20 amp 10 amp
12 volt 30 amp 15 amp 8 amp
24 volt 20 amp 10 amp 5 amp
24 volt 25 amp 15 amp 8 amp
32 volt 8 amp 8 amp 5 amp
32 volt 16 amp 15 amp 5 amp
36 volt 8 amp 8 amp 5 amp
36 volt 15 amp 10 amp 5 amp
Recommended AC Breaker
Note: The charger can be mounted horizontally (shown) or can be
mounted vertically. Make sure to allow for at least 6 inches clear
space around the charger for ventilation