Troubleshooting guide – Amerex 05602 User Manual
Page 7
6
10.
Check extinguisher for leaks by applying detecting fluid or a solution of soapy water to the
nitrogen charging adapter orifice, around the collar o-ring sealing area, cylinder welds and
gauge. Remove the nitrogen charging adapter. Blow air or nitrogen into the interior of the
valve assembly to remove any remaining leak detecting fluid. Wipe exterior of extinguisher
to remove any remaining residue.
11.
Install nozzle or hose and horn assembly.
12.
Install ring pin with ring facing the front of the extinguisher.
13.
Install tamper seal. Record recharge date and attach new recharge tag.
14.
Weigh assembled extinguisher and confirm that the total weight is within the allowable
tolerances indicated in the Maintenance section of the nameplate (label).
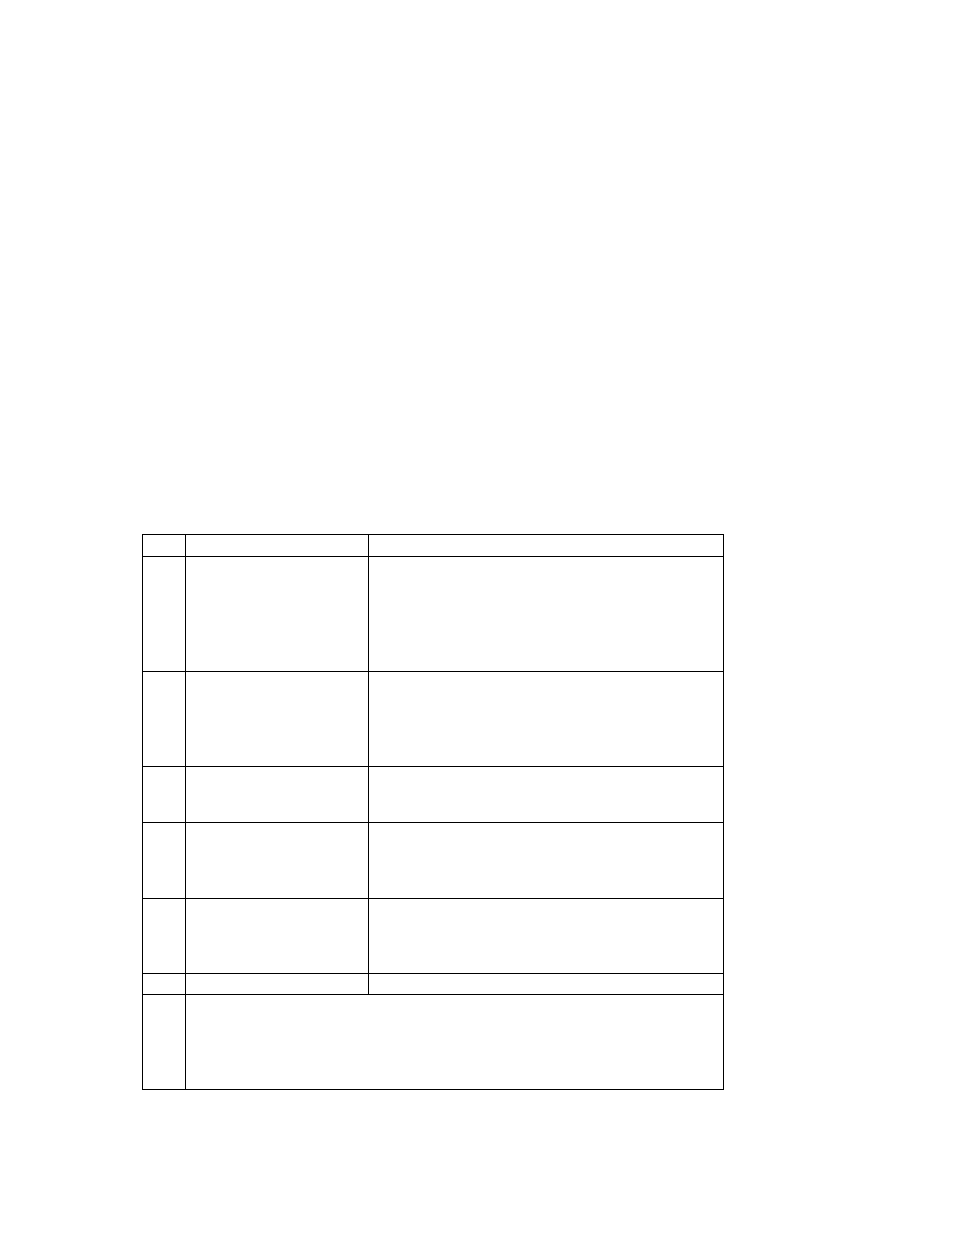
TROUBLESHOOTING GUIDE
WARNING:
Determine the source of a leak before the extinguisher is depressurized. The
extinguisher must be completely depressurized before any attempt is made to devalve it and
correct a leakage problem. To depressurize
– hold the extinguisher in an inverted position and
slowly squeeze the discharge handle. Some chemical remaining in the downtube will be
expelled so care should be taken in the area being used for depressurizing. Thoroughly clean
all valve parts after depressurization and valve removal.
PROBLEM
CORRECTIVE ACTION
1.
Leak at collar o-ring
Remove valve assembly, remove and
discard o-ring, clean collar and lube lightly
with Visilox V-711. Clean o-ring groove on
valve and install new collar o-ring. Lubricate
with Visilox V-711.
2.
Leak through valve
Check valve stem seating area for scratches
or foreign matter. Clean seating area with a
tooth brush and soft cloth. Install new valve
stem assembly.
3.
Leak around gauge
Remove gauge*, clean threads and reinstall
using Teflon tape on the gauge threads.
4.
Defective gauge
Remove defective gauge* an install the
proper Amerex pressure gauge using Teflon
tape on the gauge threads.
5.
Leak in the cylinder
Contact
Amerex
if
under
warranty,
otherwise mark "REJECTED" and remove
from service or return to owner.
* Pressure gauge threads are coated with a special epoxy at the
factory. For easy removal, soak the valve assembly in hot water
(180°F) for two to four minutes. Remove gauge with a thin 7/16"
open end wrench.