Troubleshooting guide, Problem corrective action – Amerex 05601 User Manual
Page 5
4
TROUBLESHOOTING GUIDE
WARNING: Determine the source of a leak before the extinguisher is depressurized. THE
EXTINGUISHER MUST BE COMPLETELY DEPRESSURIZED BEFORE ANY ATTEMPT IS
MADE TO DEVALVE IT AND CORRECT ANY LEAKAGE PROBLEM. To depressurize
–
hold the extinguisher in an inverted position and slowly squeeze the discharge handle. Some
liquid remaining in the downtube will be discharged so care should be taken in the area used
for depressurization. Thoroughly clean all valve parts after depressurization and valve
removal.
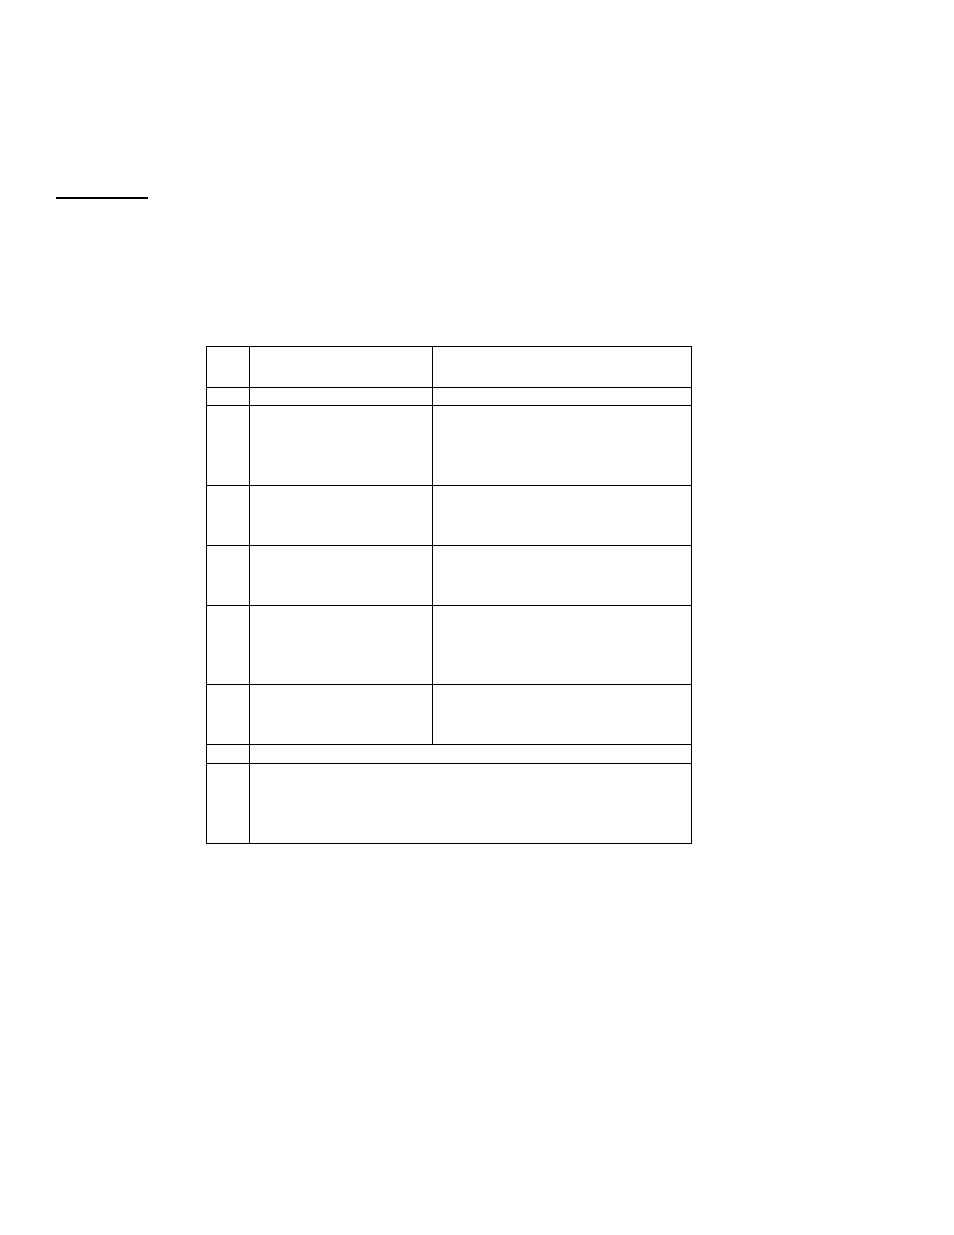
PROBLEM
CORRECTIVE ACTION
1.
Leak at collar o-ring
Remove valve assembly, clean
collar thoroughly and install
new o-ring. Lubricate the o-ring
with Visilox V-711.
2.
Leak through valve
Install
new
valve
stem
assembly. Check valve seat for
scratches or foreign matter.
3.
Leak around gauge
threads
Remove gauge* and reinstall
using Teflon tape on the gauge
threads.
4.
Defective gauge
Remove defective gauge* and
install a new P/N 06479 gauge
using Teflon tape on the gauge
threads.
5.
Leak in the cylinder
Contact
Amerex
if
under
warranty,
otherwise
mark
"Rejected" and return to owner.
* Pressure gauge threads are coated with a special
epoxy at the factory. For easy removal, soak the valve
assembly in hot water (180°F) for two to four minutes.
Remove gauge with a thin 7/16” open end wrench