쪽 13, Dc auto iris lens installation & adjustment – Revo REXN540-1 User Manual
Page 12
6
PK
To increase the speed of the lens reaction to the changing light, set the lens
adjustment to PK so the lens will adjust to the brightest or peak object in the
video. Use this setting if you want to see the brightest object and not the
background objects.
For Level adjustments:
Adjust the level control for the best picture during the day. A night adjustment may not
provide the proper setting for controlling the light during the day.
8. Set the back focus of the camera before the final adjustment of the video level.
9. If the auto iris has a gain adjustment and the picture oscillates between open and closed
under bright lights, slowly turn the gain adjustment counter clockwise until the oscillating
stops. Increase the light getting to The camera by adjusting the level control and
re-adjusting the gain control.
The camera supports DC-type auto iris lenses. Perform the following steps to install and
adjust a DC-type auto iris lens.
1. Solder the lens control wires to the connector supplied with the camera.
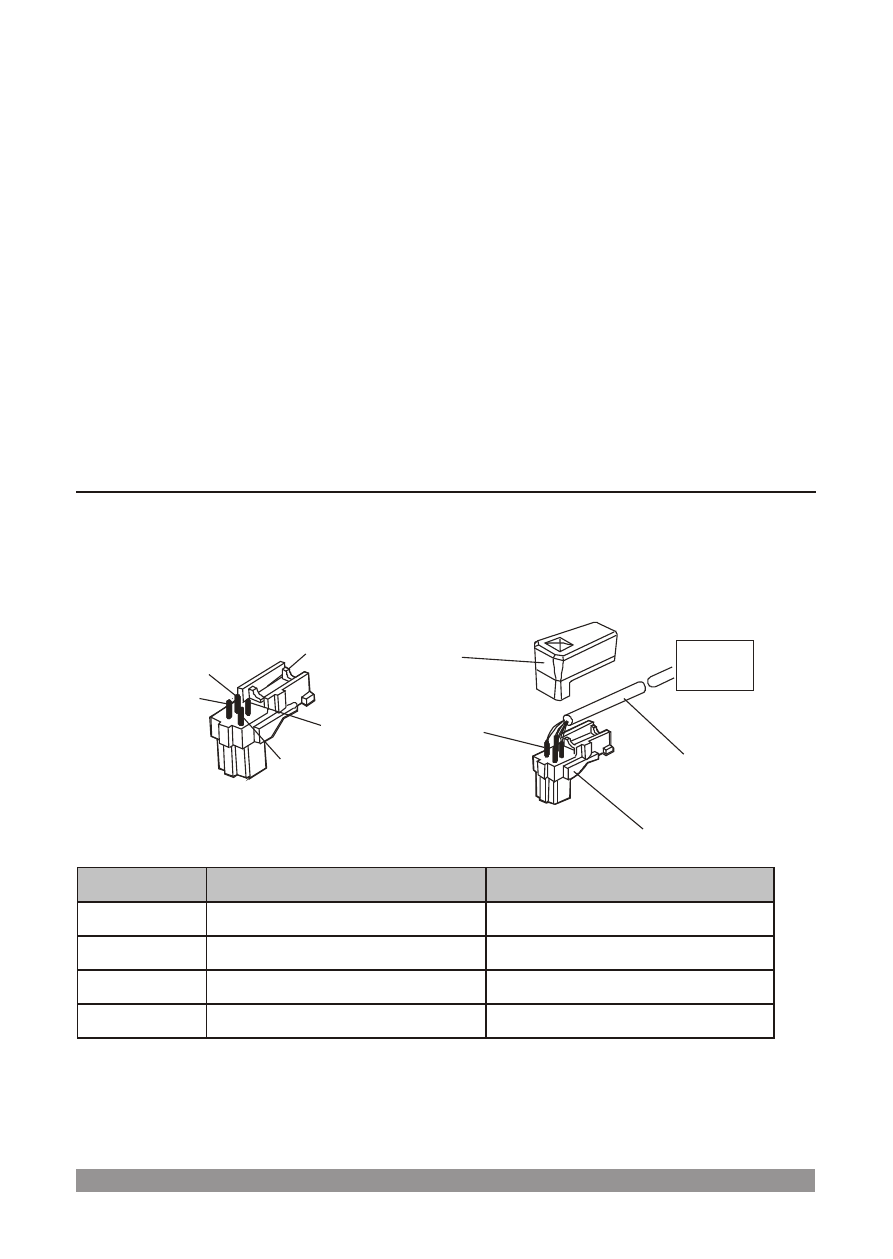
DC AUTO IRIS LENS INSTALLATION & ADJUSTMENT
Pin 3
Pin 1
Pin 4
Connector
Cover
Iris Control
Cable
Connector
Automatic
Iris Lens
Heat
Shrinkable
Tubes
Pin 2
Rib
PIN
NAME
1
Damp Coil -
2
Damp Coil +
3
Drive Coil +
4
Drive Coil -
WIRE COLOR
Blue
White
Green
Red
2. Attach the DC-type auto iris lens to the lens mount on the front of the camera.
3. Plug the connector into the auto iris jack on the side of the camera. The connector is
polarized and can only be inserted into the jack one way.