NSi Industries E201B User Manual
Page 3
7.0 NOTES:
1. MAN mode: Under this mode the unit disre-
gards the settings in the schedule mode and
remains in its manually set status ON or OFF.
NOTE: To resume regular schedule execution
press the mode key to return to AUTO mode.
2. Unit will go to RUN MODE automatically
(except on the MAN mode) if no key is pressed
for five minutes.
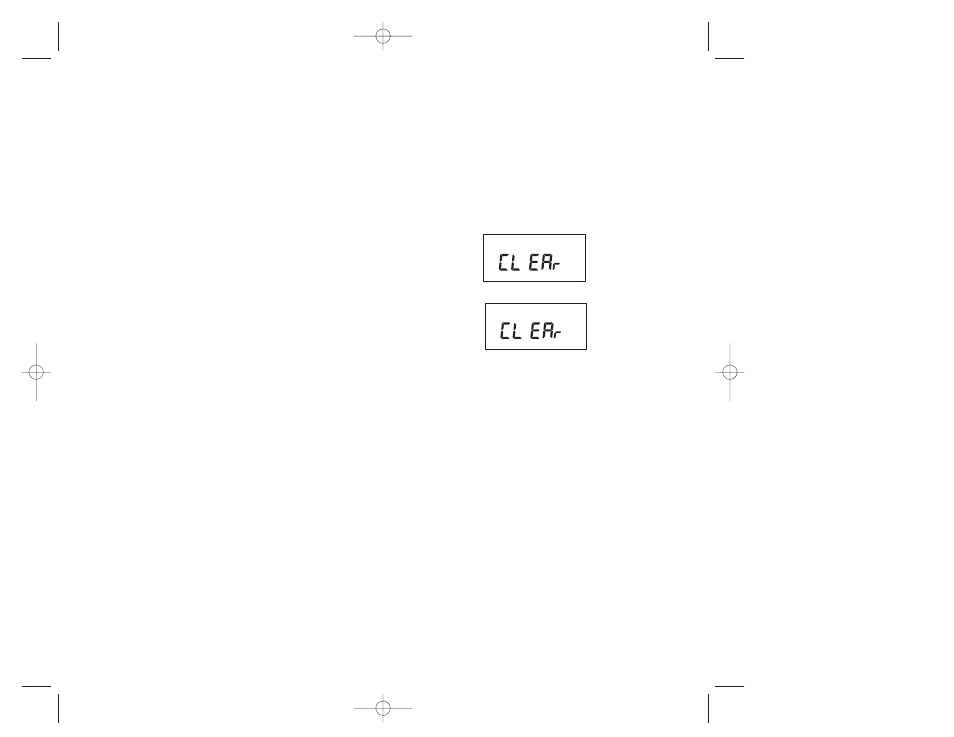
3. Clear all memory. All memory can be cleared
using the following procedure: While in the RUN
mode, press ENTER, display will show:
Use EVENT key to display:
Now press ENTER briefly and everything in the
timer memory will be erased, including real time
and date. NOTE: Unit has permanent memory
and will not be erased unless done through proce-
dure above.
5. Upon powering up your E201B the display will
at what frequency the unit is operating, 50 will
determine 50Hz or 60 for 60 Hz. NOTE: while
in the AUTO mode, if AC power is absent, the
display will show a PF (power failure) instead
of the seconds scrolling up.
6. A “Lo” on the display indicates that the super
8.0 USE AS MOMENTARTY UNIT.This unit can also
be field converted to be used as momentary unit.
To make this conversion, remove jumper in back
of the unit. Reset the unit by inserting a small pin
or paper clip into the small hole next to the EVENT
key and re-setting the clock and date.
cap has run low and the unit needs to be pow-
ered with AC. A minimum of 8 hours is required
to fully charge the super cap.
7
ON
OFF
CLK DATE SCH
AUTO
MAN
ON
OFF
CLK DATE SCH
AUTO
MAN
KEY FUNCTIONS:
Unit should be program with AC power. Do not pro-
gram on super cap back up power.
Mode: Press to go to the next mode.
Enter: Stores or saves current entry.
DAY/YEAR:
a. Press to set the year in the DATE mode.
b. Selects the desired day of the week in the DST
(Daylight Savings Time) mode.
CH1/CH2/OVR1:
a. Press to change the load status in the AUTO
(automatic) and the MAN (manual) mode for CH1.
b. Press to select the channel during schedule
programming.
c. Press to change the load status in the AUTO and
manual mode for CH2.
DEL/PREV/OVR2:
a. Press to delete the displayed entry.
b. Decrement the last selected entry.
HOUR/MONTH:
a. Press to set hour in CLK (clock) mode and the SCH
(schedule) mode.
b. Press to set month in the DATE mode and DST
(Daylight Savings Time) mode.
MINUTE/DATE:
a. Press to set minutes in CLK (clock) mode and SCH
(schedule) mode.
b. Press to set date in the DATE mode.
c. Press to select the week of the month in DST
(Daylight Savings Time).
ENTER:
a. Press to store the displayed information into memory.
Information will not be stored until the ENTER key
is pressed.
Note: During settings, each press of the key will
advance one number. For rapid advance hold key in.
EVENT:
a. Press to select ON/OFF in the schedule.
b. Press to update the load status In the AUTO (auto-
matic) mode.
2
E101B 4/3/07 9:52 PM Page 7