Service – KROHNE OPTISWIRL 4070 ATEX II2G EN User Manual
Page 18
6
SERVICE
18
OPTISWIRL 4070
www.krohne.com
04/2013 - 4000077105 MA OPTISWIRL4070 II2G AD R05 en
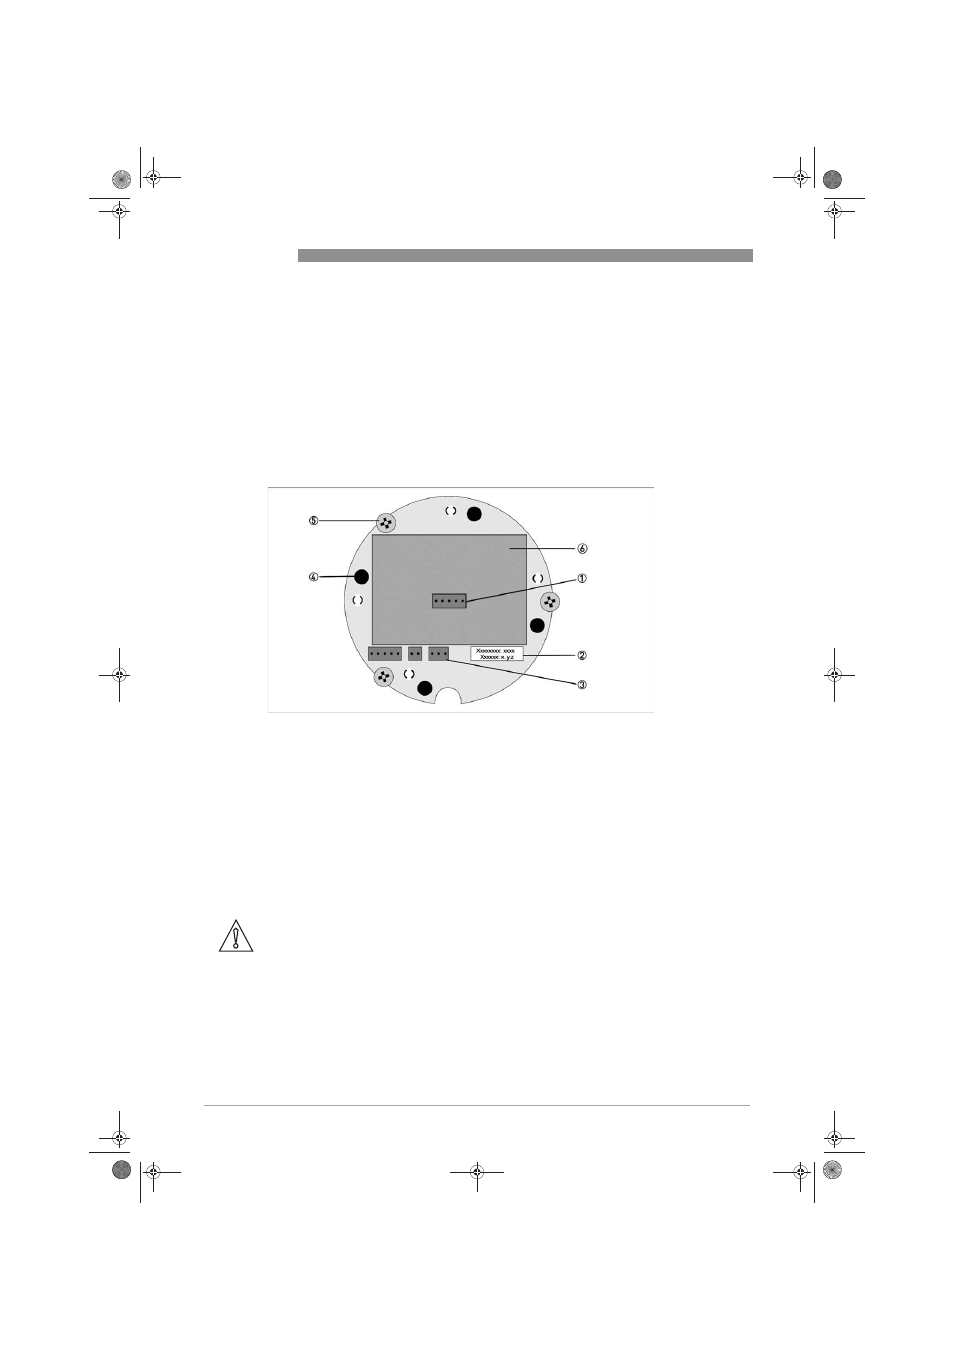
Take special note of the following figure and:
• ensure that the construction is the same by checking the nameplates.
• the connecting cable of the sensor circuits is to be laid in the cutout provided on the printed
circuit board. Avoid damage such as that caused by crushing.
• proper connection of the sensor 3 and the display connector 1
• tighten the mounting screws M4 5 evenly
The device shall be de-energised before opening the flameproof enclosure. Observe warning
without fail.
Exchanging the entire device
Removal and installation are the responsibility of the operator.
Before disconnecting the electric connecting cable of the device, it must be ensured that all of
the cables leading to the indicator part are de-energised relative to each other and to the
reference potential of the hazardous area. This also applies to functional earthing conductors
(FE) and equipotential bonding conductors (PA).
1 Display connection
2 Version number, software
3 Sensor connection
4 Mounting bolts, display
5 Mounting screw device insert
6 Nameplate device insert
CAUTION!
•
Pressurized pipes to be depressurized before removing the flowmeter.
•
In the case of environmentally critical or hazardous products, appropriate safety precautions
must be taken with regard to residual liquids in the measuring unit.
•
New seals must be used when re-installing the device in the piping.
AD_OPTISWIRL4070_II2G_R05_en_077105_PRT.book Page 18 Tuesday, April 23, 2013 2:17 PM