Step 8, Step 9 – Catskill Craftsmen 53017 User Manual
Page 9
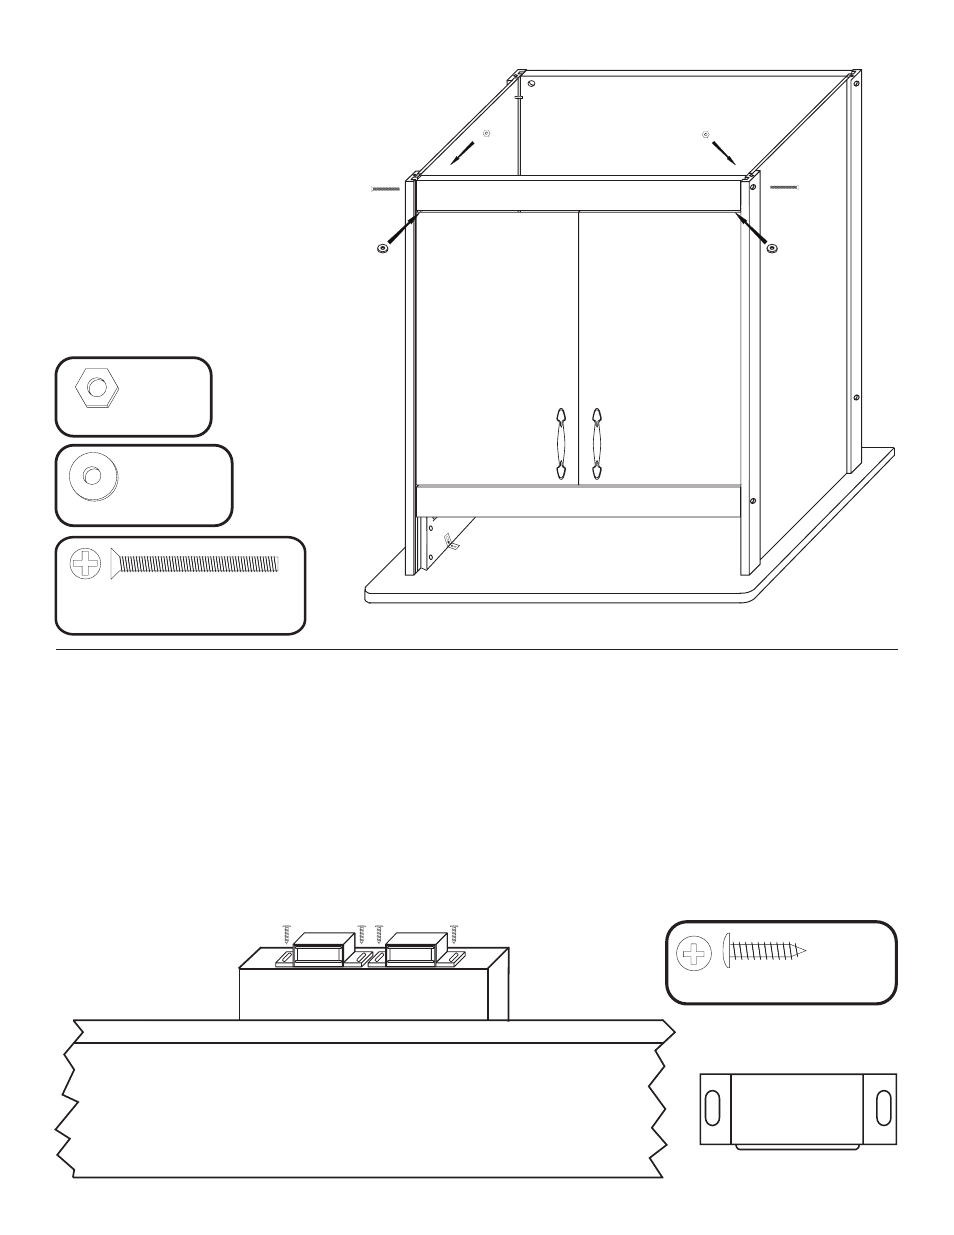
STEP 8
A. Install doors by inserting pins in
the door tops into the holes in the
long edge top front brace.
B. Place one washer on each of
the door pins in the door bottoms.
C. Take the bottom front brace,
align pins in door bottoms with
holes along top long edge of
brace (are washers on pins?) and
secure brace with 1 3/4” bolts/hex
nuts as before.
1 3/4” Phillips Flat Head Bolt
2 Used in this step
10-24 Hex Nut
2 Used
in this step
2 Used
in this step
3/16” Flat Washer
1 3/4” Phillips Flat Head Bolt
2 Used in this step
10-24 Hex Nut
2 Used
in this step
2 Used
in this step
3/16” Flat Washer
STEP 9
A. Stick magnet to magnet plate on right door.
B. With left door open, close the right door. The magnet should be positioned over the wooden block
on the bottom of the top front brace. Hold the magnet in place with your thumb, and open the right
door. The magnet will be in the correct position on the block.
C. Secure magnet with the two pan head screws in the magnet packet. Center screws in the slots in
the magnet. This will allow adjustment later, if needed.
D. Repeat with other magnet.
NOTE: No pilot holes in block as softwood!
Magnet (2)
5/8” Pan Head Screw
4 Used
in this step