Step 1 – Catskill Craftsmen 53017 User Manual
Page 4
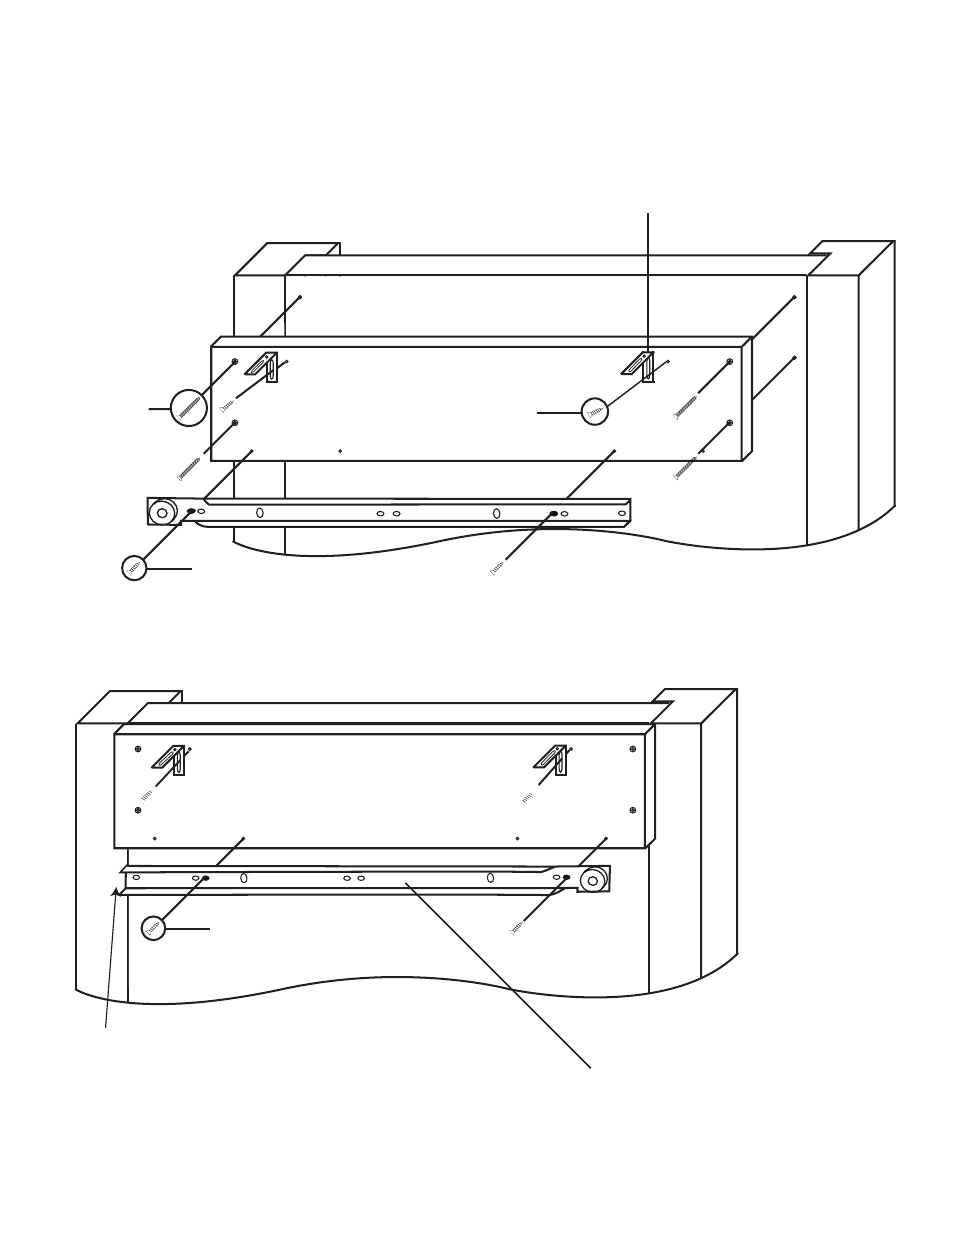
5/8” #7
1 1/4” #8
5/8” #7
5/8” #7
The glides look almost alike;
however, they are stamped
CR for cabinet right and CL
for cabinet left.
Left Side
Front
Right Side
Front
The “L” brackets are attached to the Glide Support using the large slot in the “L” bracket.
The Hole will be used to attach the table top.
Flush with back
Flush with back
Top of “L” Bracket should be even with the top of the glide support
STEP 1
Glide Support Assembly
Note: Make sure glide is flush
with back of glide support
Note: Glide holes sometimes change, just make
sure the cabinet glides are flush with the back
of the glide supports & pilot holes will line up -
only 2 holes are used!
See also other documents in the category Catskill Craftsmen Furniture:
- 1426 (13 pages)
- 1447 (5 pages)
- 1429 (14 pages)
- 1481 (16 pages)
- 1533 (12 pages)
- 1521 (16 pages)
- 1448 (14 pages)
- 1536 (12 pages)
- 1537 (13 pages)
- 1538 (14 pages)
- 1544 (14 pages)
- 1563 (12 pages)
- 1569 (12 pages)
- 1575 (13 pages)
- 1576 (14 pages)
- 1580 (14 pages)
- 1582 (17 pages)
- 1622 (7 pages)
- 1842 (18 pages)
- 1925 (6 pages)
- 2005 (11 pages)
- 2007 (11 pages)
- 2008 (11 pages)
- 1531 (13 pages)
- 1529 (14 pages)
- 1527 (12 pages)
- 1526 (13 pages)
- 1480DOR (17 pages)
- 1476 (13 pages)
- 1470 (12 pages)
- 1461 (8 pages)
- 1428 (15 pages)
- 3314 (6 pages)
- 3310 (6 pages)
- 7237 (12 pages)
- 14485 (14 pages)
- 15445 (14 pages)
- 43017 (13 pages)
- 51524 (12 pages)
- 51526 (13 pages)
- 51527 (11 pages)
- 51531 (12 pages)
- 51533 (11 pages)
- 51536 (11 pages)
- 51537 (12 pages)