Step 13, Step 14 – Catskill Craftsmen 54238 User Manual
Page 12
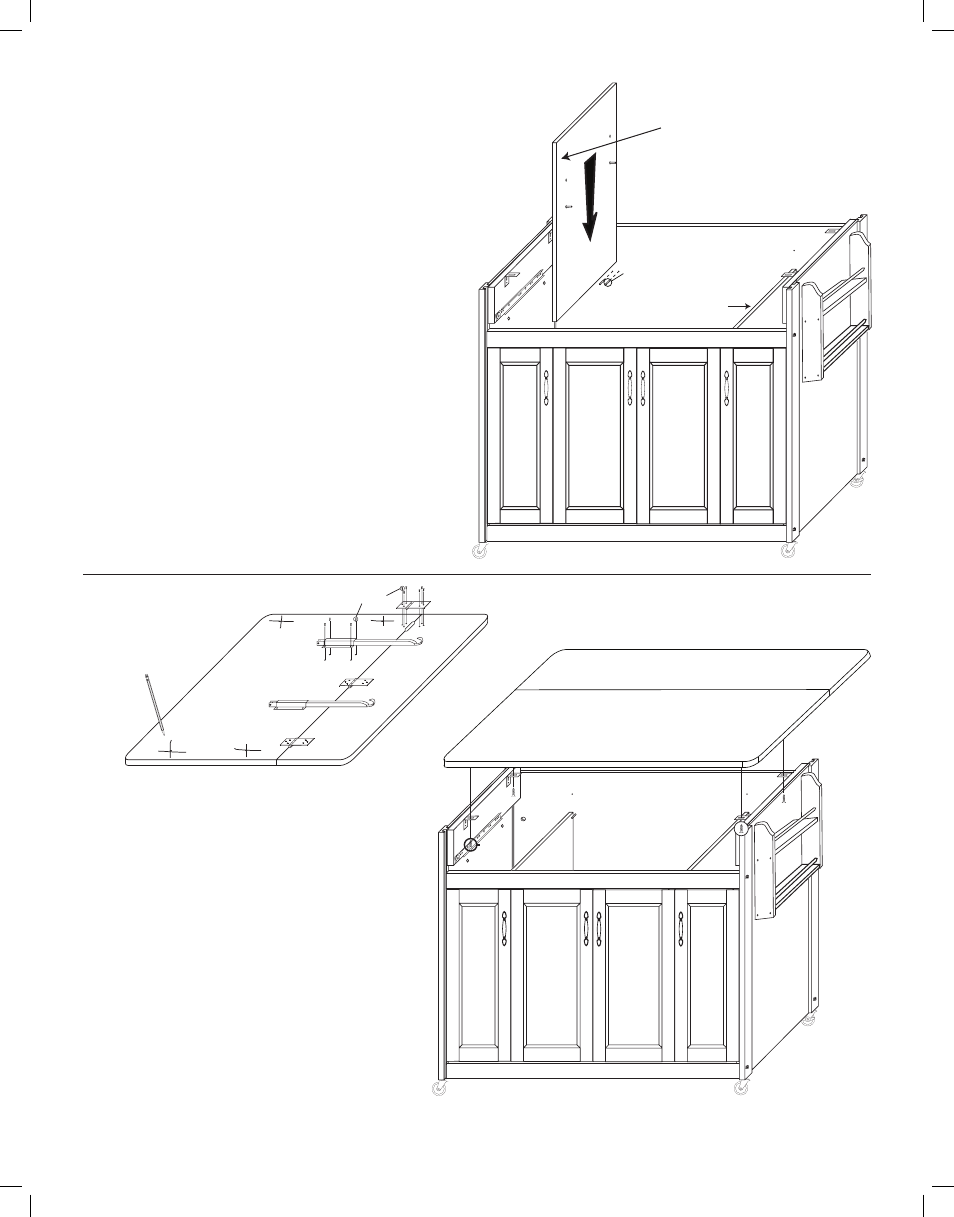
STEP 13
A. Tap 1” pins into the 4 sets of holes in the Back
Panel. B. Just above the Bottom shelf on the inside
of the Bottom Front Brace there are two sets of holes.
Tap 1” pins into these holes.
C. On the Inside face of the Top Front Brace there is
a hole adjacent to each of the magnet blocks for the
outside doors. Tap one 1” pin into each hole.
D. Choose the height you want your middle
shelves, then tap the 2” pins in accordingly
on the Cabinet Dividers. For Side Panels,
use the metal shelf pins.
E. Slide the Cabinet Dividers between the
sets of pins in the Back Panel and the pins
in the Front Braces until dividers rest on
the Bottom Shelf. Make sure the edge
banding faces out.
NOTE: Eight 2” pins are provided in case
you want the center middle shelf & the
side middle shelves at different heights.
STEP 14
A. Invert Table Top on a smooth flat
surface and make a large (X) mark over
each of the 4 pilot holes in the bottom.
Make marks about 1 1/2” long. These
marks will help you align the cabinet with
the pilot holes in the bottom of the Top.
B. Attach hinges/drop leaf supports with
5/8” #8 screws. Place the Cart Top on the
cabinet.
C. Open the outside doors. Maneuver the
Cart Top so that the ( X ) marks/pilot holes
in the bottom of the Top align with the
holes in the “L” brackets. Secure top to
“L” brackets with 5/8” #7 screws.
1” Pins
2” Pins
Divider
in place
Edge banding toward front of unit.
5/8” #7
ILLUSTRATION 14A
ILLUSTRATION 14B
5/8” #8