Side panel assembly, Illustration 3a – Catskill Craftsmen 1428 User Manual
Page 7
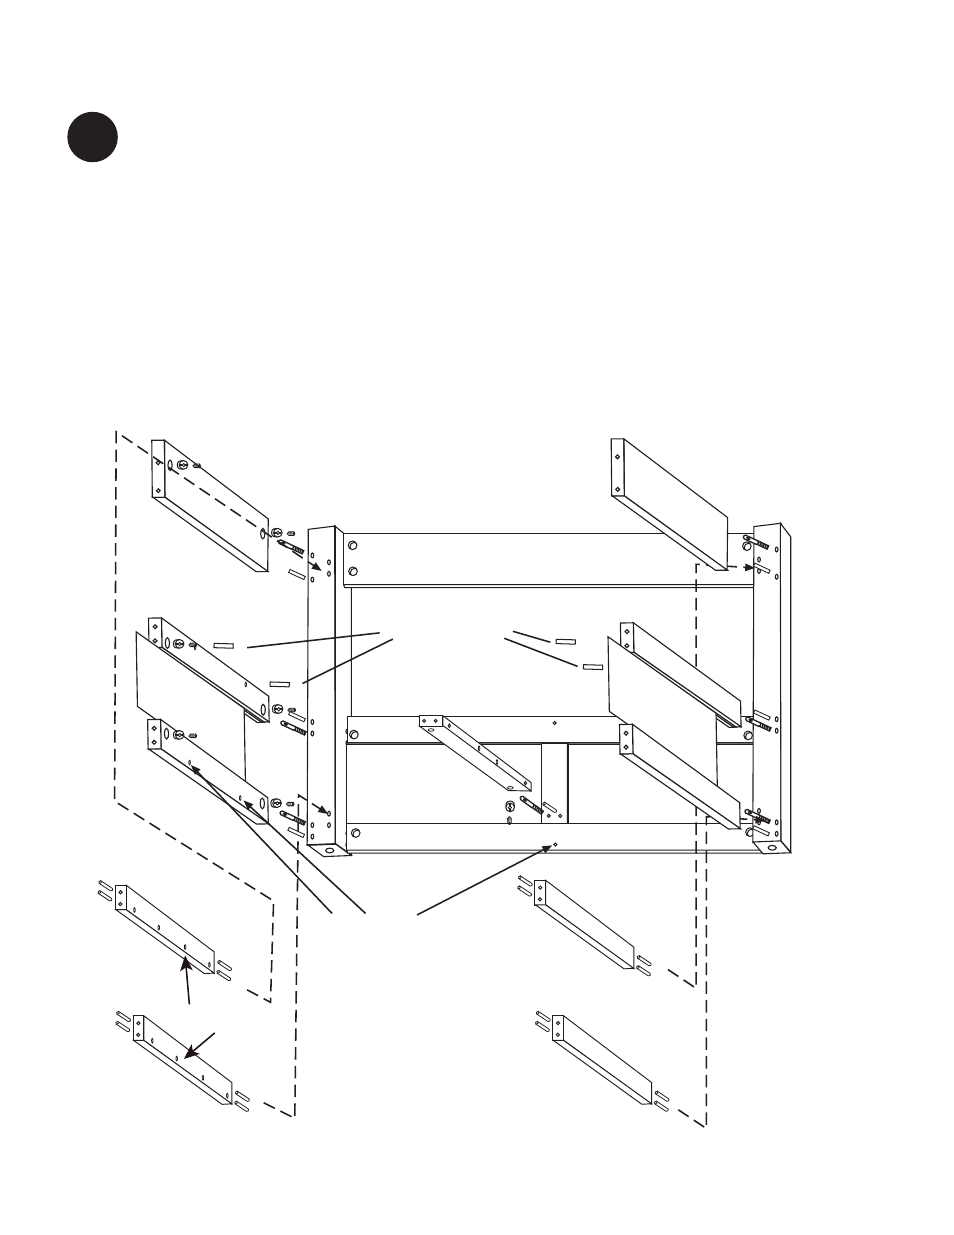
Back Assembly
Top Side Brace
Center
Side
Brace
Bottom
Side
Brace
Top Side Brace
Center
Side
Brace
Bottom
Side
Brace
3
Lay the Back Assembly on a smooth flat surface as in Illustration 3A. Screw the Bastion
Posts into the legs and Back Vertical Brace as shown in the Bastion Fastening Instructions
on Page 3. When properly seated, the screwdriver slot in the post ends will be
perpendicular to the length of the legs. Tap the 3/4” Steel Pins into the legs and Back
Vertical Brace. Tap 1” Steel Pins into the Center Side Braces to be used later to support the
center shelf. Slide the Side Braces and Center Drawer Glide Support Stick into place,
tightening the set screws.
Next, tap two 3/4” Steel Pins into each end of the four Drawer Glide Support Sticks as
shown in llustration 3A. insert one end of these sticks into the legs as illustrated while
making sure that the small pilot holes for the drawer glides are toward the bottom edge and
face toward the inside of the cart.
Finally slide the Bottom Side Panels into place, best side out.
SIDE PANEL ASSEMBLY
Drawer
Glide
Support
Stick
Drawer
Glide
Support
Stick
Drawer
Glide
Support
Stick
Drawer
Glide
Support
Stick
Center
Drawer
Glide
Support
Stick
Bottom
Side
Panel
Bottom
Side
Panel
These holes not
used in assembly
Illustration 3A
1” Pins taps into holes
on Center Side
Braces
holes toward
bottom edge