Aposonic A-S3216T3 User Manual
Page 45
DVR User Manual
39
Advance settings are as follows:
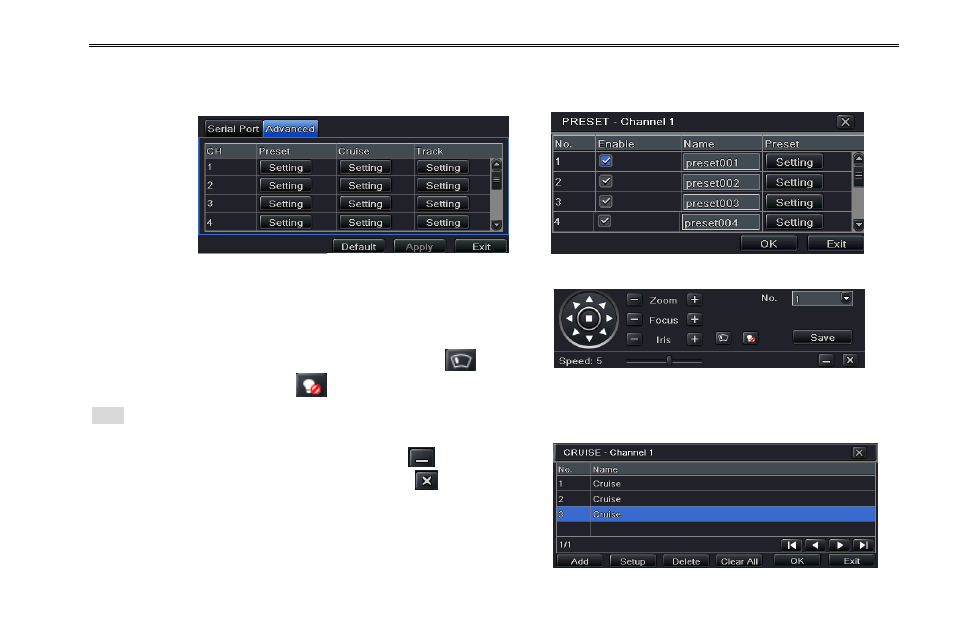
Step 1: Enter into MenuSetup P.T.Z Advanced tab. Refer to Fig 4-38:
Step 2: In the Advanced tab
, click preset “Setting” button to see a dialog box as Fig 4-39:
Fig 4-38 P.T.Z Configuration-Advanced Fig 4-39 Advanced-Preset
Step 3: In the preset setting tab, while clicking Setting button, a dialog
will pop-up as Fig 4-40:
User can control the dome by rotating up, down, left, right and
adjust the rotating speed zoom, focus and iris of the dome;
Select the serial number of the preset point. Click
button to
enable the PTZ wiper and click
button to enable the PTZ light. Fig 4-40 Preset Setting
Note: PTZ must support wiper and light, these two functional buttons can take effect. At the same time these two buttons are
just available when selecting PELCOP or PELCOD.
Click Save button to save the settings, click
icon to hide the
tool bar, right click to view the toolbar again; click
icon to exit the
current interface.
In the preset interface, click OK button to save the setting; click
Exit button to exit current interface.
Step4: In the Advanced tab
, while clicking cruise “Setting” button, a
dialog box will pop-up as Fig 4-41: Fig 4-41 Cruise Setting