Assembly and adjustments, Continued), Base to column – WEN 4210 10 Variable Speed Drill Press User Manual
Page 10: Table to column
4212
WENPRODUCTS.COM
10
Assembly and adjustments
(continued)
WARNING: If any part is missing or damaged, do not plug the drill press in until the missing or
damaged part is repaired or replaced, and assembly is complete.
The column assembly (column, column support, rack, rack collar, and table support bracket) must be attached to
the base. The table and table support handles must be attached to the table support bracket. The motor housing
must be attached to the column.
Tools needed for assembly
• Adjustable wrench
• Screwdriver
• Hammer and block of wood
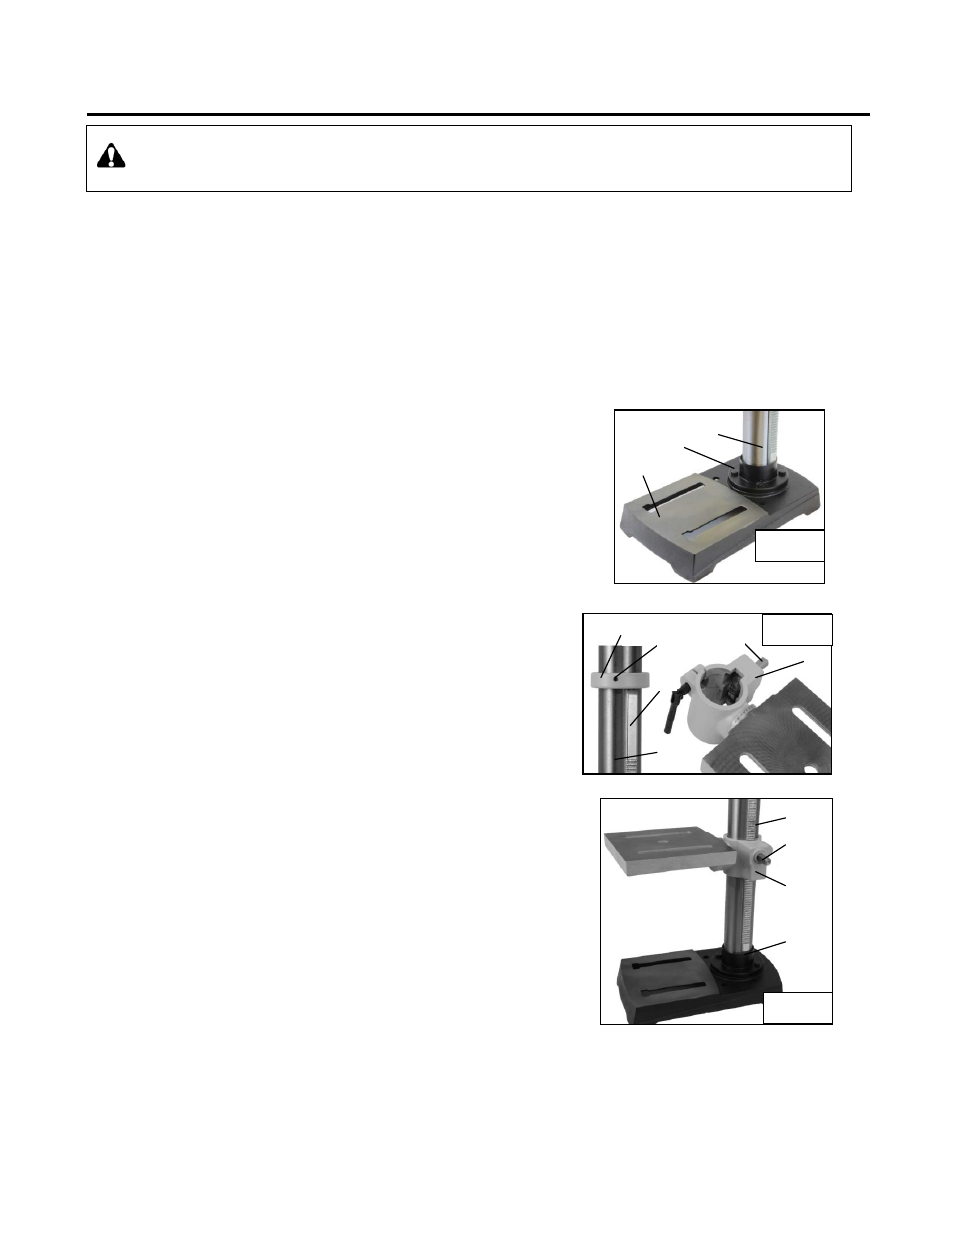
Base to column
(Fig. 2)
1. Set the base (1) on the floor.
2. Place the column tube (2) on the base (1), align the column
support holes with the base holes.
3. Install a bolt (3) in each column support hole and tighten with the
wrench.
Table to column
(Fig. 3–5)
1. Loosen set screw (2) in rack collar (1) and remove the collar.
2. Remove the rack (3) from the column (4).
3. Insert worm shaft (5) into the hole of the table support crank
handle (6) from inside the table support. The worm shaft (5)
should extend outside the housing about 1” (25 mm).
4. Insert the rack (3) into the geared groove of the table support
(6). Make sure the worm shaft (5) on the inside of the table
support is engaged with the teeth of the rack. The table support
should sit at the center of the rack.
5. Slide the table support and rack assembly (3, 5, and 6) down
together onto the column. Insert the bottom edge of the rack
into the lip (7) of the column support. Hold in this position until
step 6 is completed.
6. Place the collar (1) bevel side down over the rack. Tighten the
set screw (2) with the 3 mm Allen wrench to hold the rack in position. (Fig. 3)
1
3
2
Fig. 2
Fig. 3
1
2
3
4
5
6
3
5
6
7
Fig. 4