Enjoy your mount – Video Mount Products PDS-LCHB User Manual
Page 4
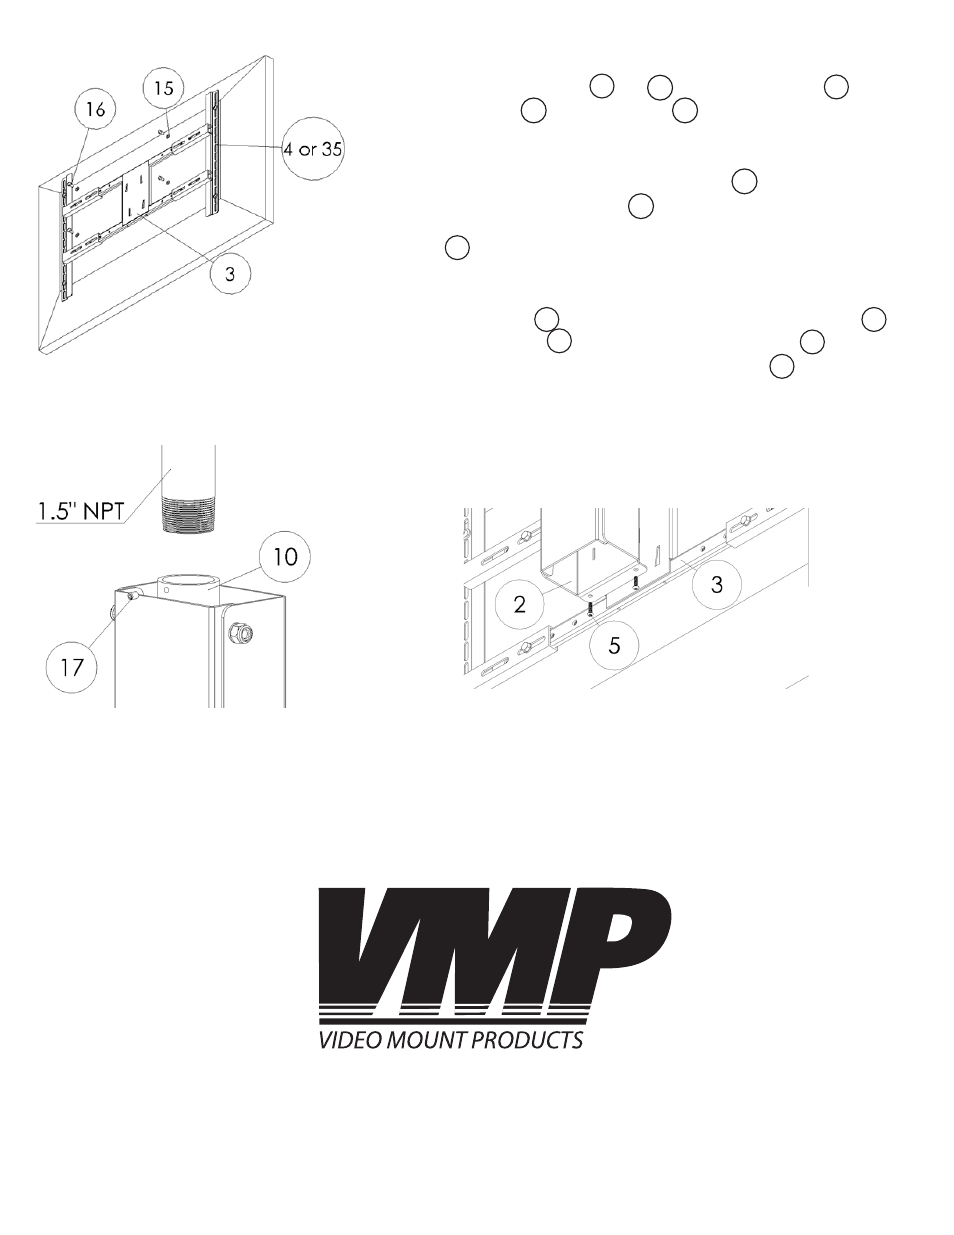
Step 5
Secure the Mounting Rails
(#4
or
#35)
to the H Bracket
(#3)
using
the 5/16” Screws
(#16)
and Washers
(#15)
.
Step 6
Screw the 1.5” NPT into the Pipe Couple
(#10)
as tight as pos-
sible. Once the Pipe Couple
(#10)
is securely tighten screw the
¼”-20UNC brake screw in the threaded hole in the side of the Pipe
Couple
(#4)
as tight as possible.
Step 7
Lift the H Bracket
(#3)
onto the tabs of the Tilt Bracket
(#2)
.
Once the H Bracket
(#3)
is set onto the Tilt Bracket
(#2)
, secure
the two together using the M5 Security Screws
(#5)
in the holes
at the bottom of the H Bracket and Tilt Bracket.
Please verify that all nuts and screws are securely tightened.
Step 5: Securing the mounting
rails to the H bracket
Step 6: Attaching the pipe
couple to the 1.5” NPT mast
(mast not provided)
Step 7: Attaching the H bracket
onto the tilt bracket
15
16
WARNING: The installer of these products must verify that the mount surface, ceiling or wall, will safely
support the combined weight of all attached equipment and hardware. Video Mount Products will not
be held liable for the improper use or installation of its products.
Enjoy Your Mount!
35
3
4
10
10
4
2
3
2
3
5