Step by step installation instructions – Tennsco L-6000 User Manual
Page 2
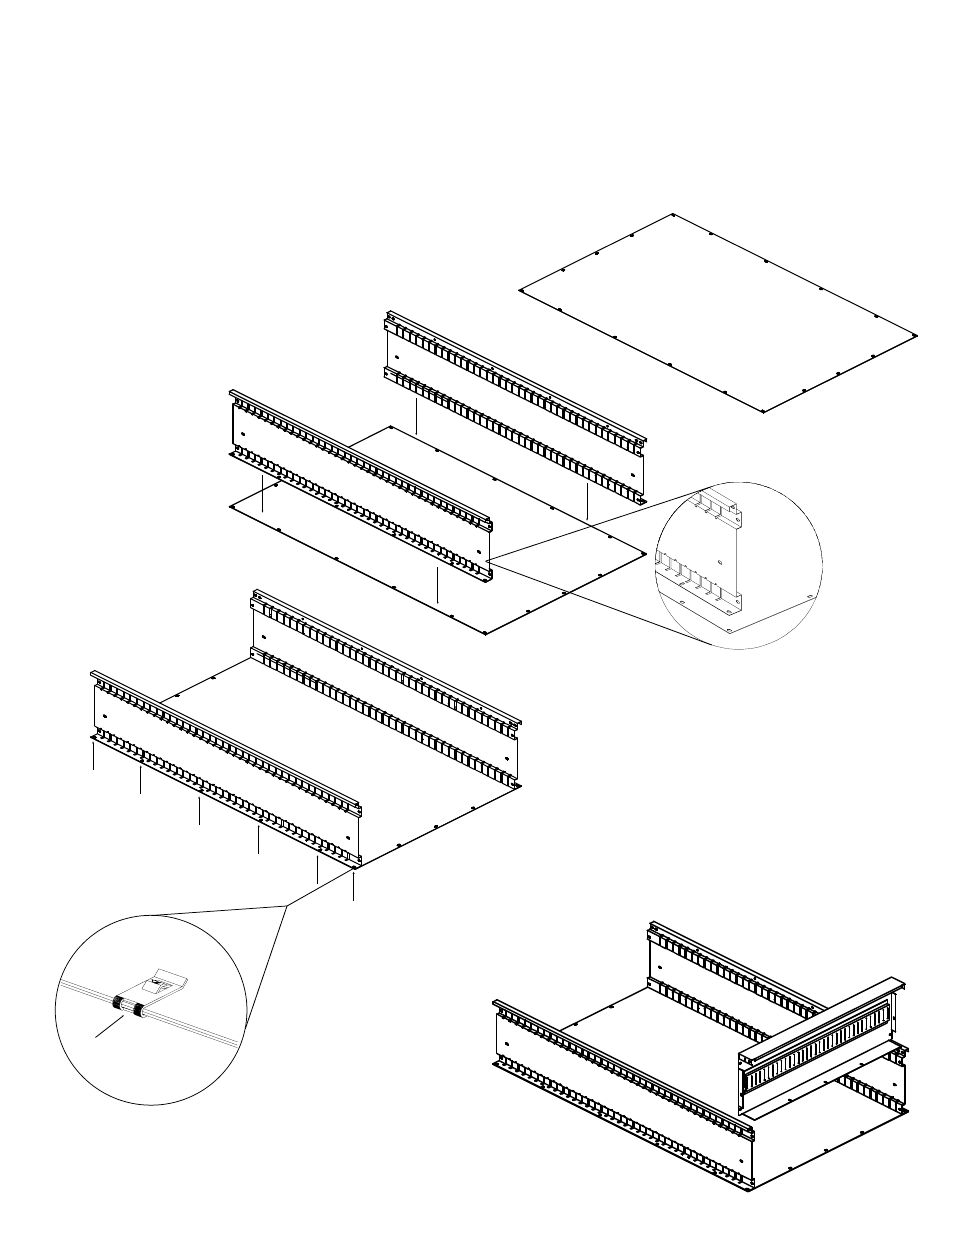
Step By Step Installation Instructions
Tools required: One phillips screwdriver and a 3/8" wrench or nutdriver.
Unit should be assembled on any convenient, non-marring flat surface.
1. Remove all parts from carton and
check against the parts list on back
cover for any missing parts.
3. Place uprights (Ref. No. 2)
on either side of the back.
Be sure that the flat edge of
the upright is facing outward
as shown in exploded
view at right.
NOTE:
There is no
"right" or "left" upright;
both uprights are the
same.
2
2
2. Place back (Ref. No. 1)
on a flat surface.
4. Fasten each upright to
the back using tinnerman
clips (Ref. No. 7). Place one tinnerman
clip over each of the slotted holes
(see exploded view at left for example).
NOTE:
Do not place the screws into the
tinnerman clips yet. The back will be
screwed into place in step 8.
1
5. Place bottom shelf (Ref.
No. 4) into position by
slipping into slots on
uprights. It may be
necessary to pry
uprights apart slightly to
move bottom shelf into
position.
7
4
PK-2420907