Handle/locking system installation instruction – Tennsco J2478A User Manual
Page 3
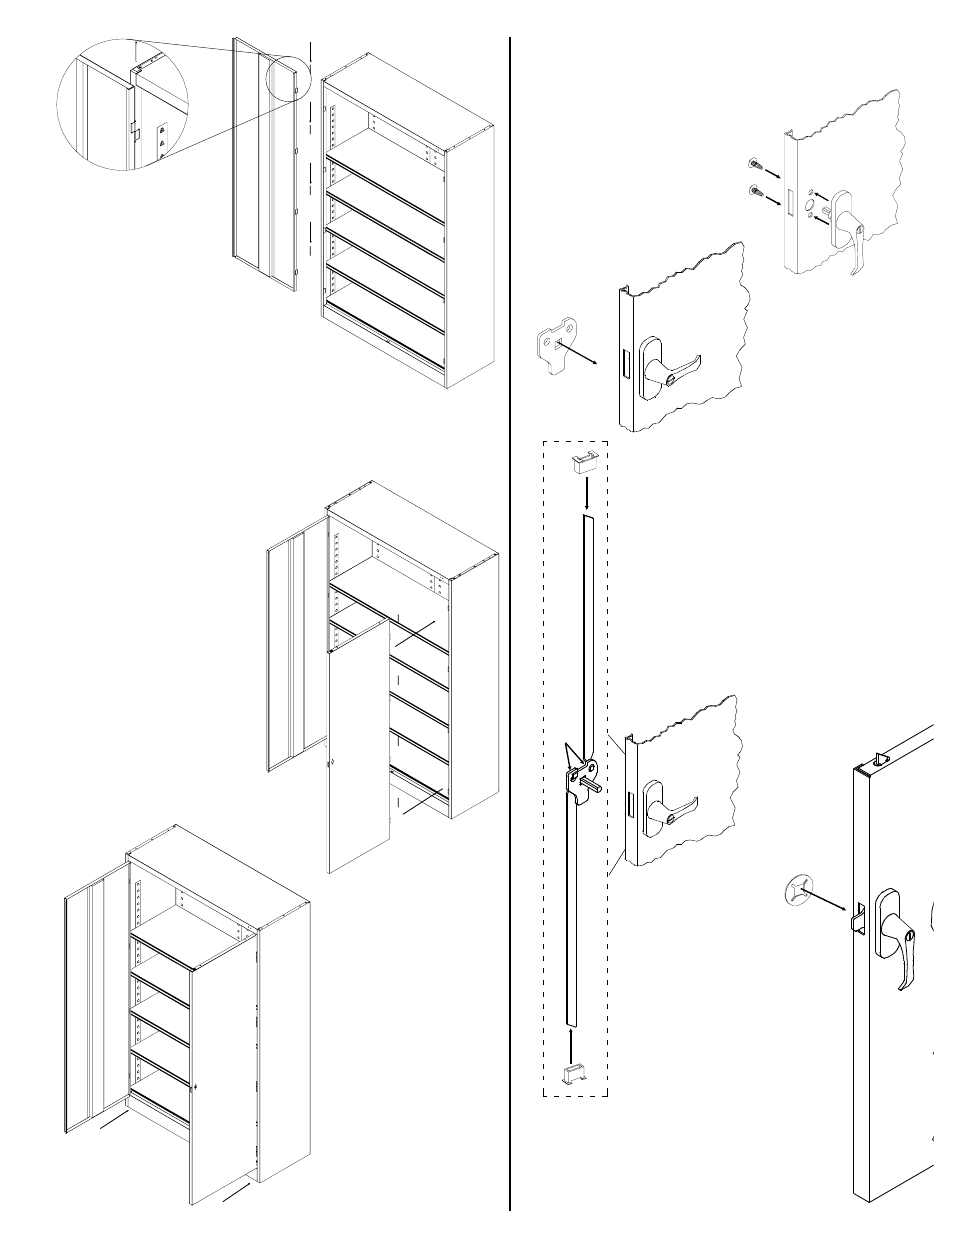
10. Attach the left door to the
unit by placing the door
on the hinges, aligning the
holes, and driving four
hinge pins into place. If the
head of your hammer is too wide
to hit the pins without scraping
the cabinet, it may be helpful to
place the flat edge of a
screwdriver on the pins and tap
the screwdriver with the hammer.
11. Attach the right door in the same
manner as the left door,
placing the door on the
hinges and connecting
by driving the remaining
four hinge pins
through the holes.
Handle/Locking System Installation Instruction
1. Place locking handle on right
hand door and fasten with
two slotted bolts with
lockwashers.
2. Turn handle to open
position and place
locking cam over
square shank of door
handle with latch
facing downward.
3. With handle still in open position, hook
locking bars to locking cam (A). Then, hold
lock bars in position while sliding nylon lock
bar guide inserts over lock bar ends and
through door slots (B).
A
B
B
4. Place locking cam
retainer over square
shank of right door
handle and tap on
edges with hammer
until retainer sits
firmly against the
locking cam.
12. Adjust the levelers
underneath the front of
the unit to ensure that
the cabinet is level. If the
cabinet is not level, the
doors will not align
properly.
13. Your cabinet assembly
is now complete except
for handle and locking
mechanism installation.
See next column for
handle and lock-bar
attachment.
5. Attach dummy
handle to left
door using the
two included
screws.